Create Cargo
Steps:
Open the Cargoes module from the menu on the left.
In the top right corner, click Create
.
Select Create New Cargo.
In the modal, you can fill in the required fields and add any additional information about the new cargo.
Click Create.
Required fields:
Load Port
Discharge Port
Charterer
Commodity
New design:
The new Create Cargo modal has a new design to increase the productivity while creating a cargo, is more user-friendly and has more useful features altogether. Click on the picture below to get a better view of the details:

New Create Cargo Port modal:
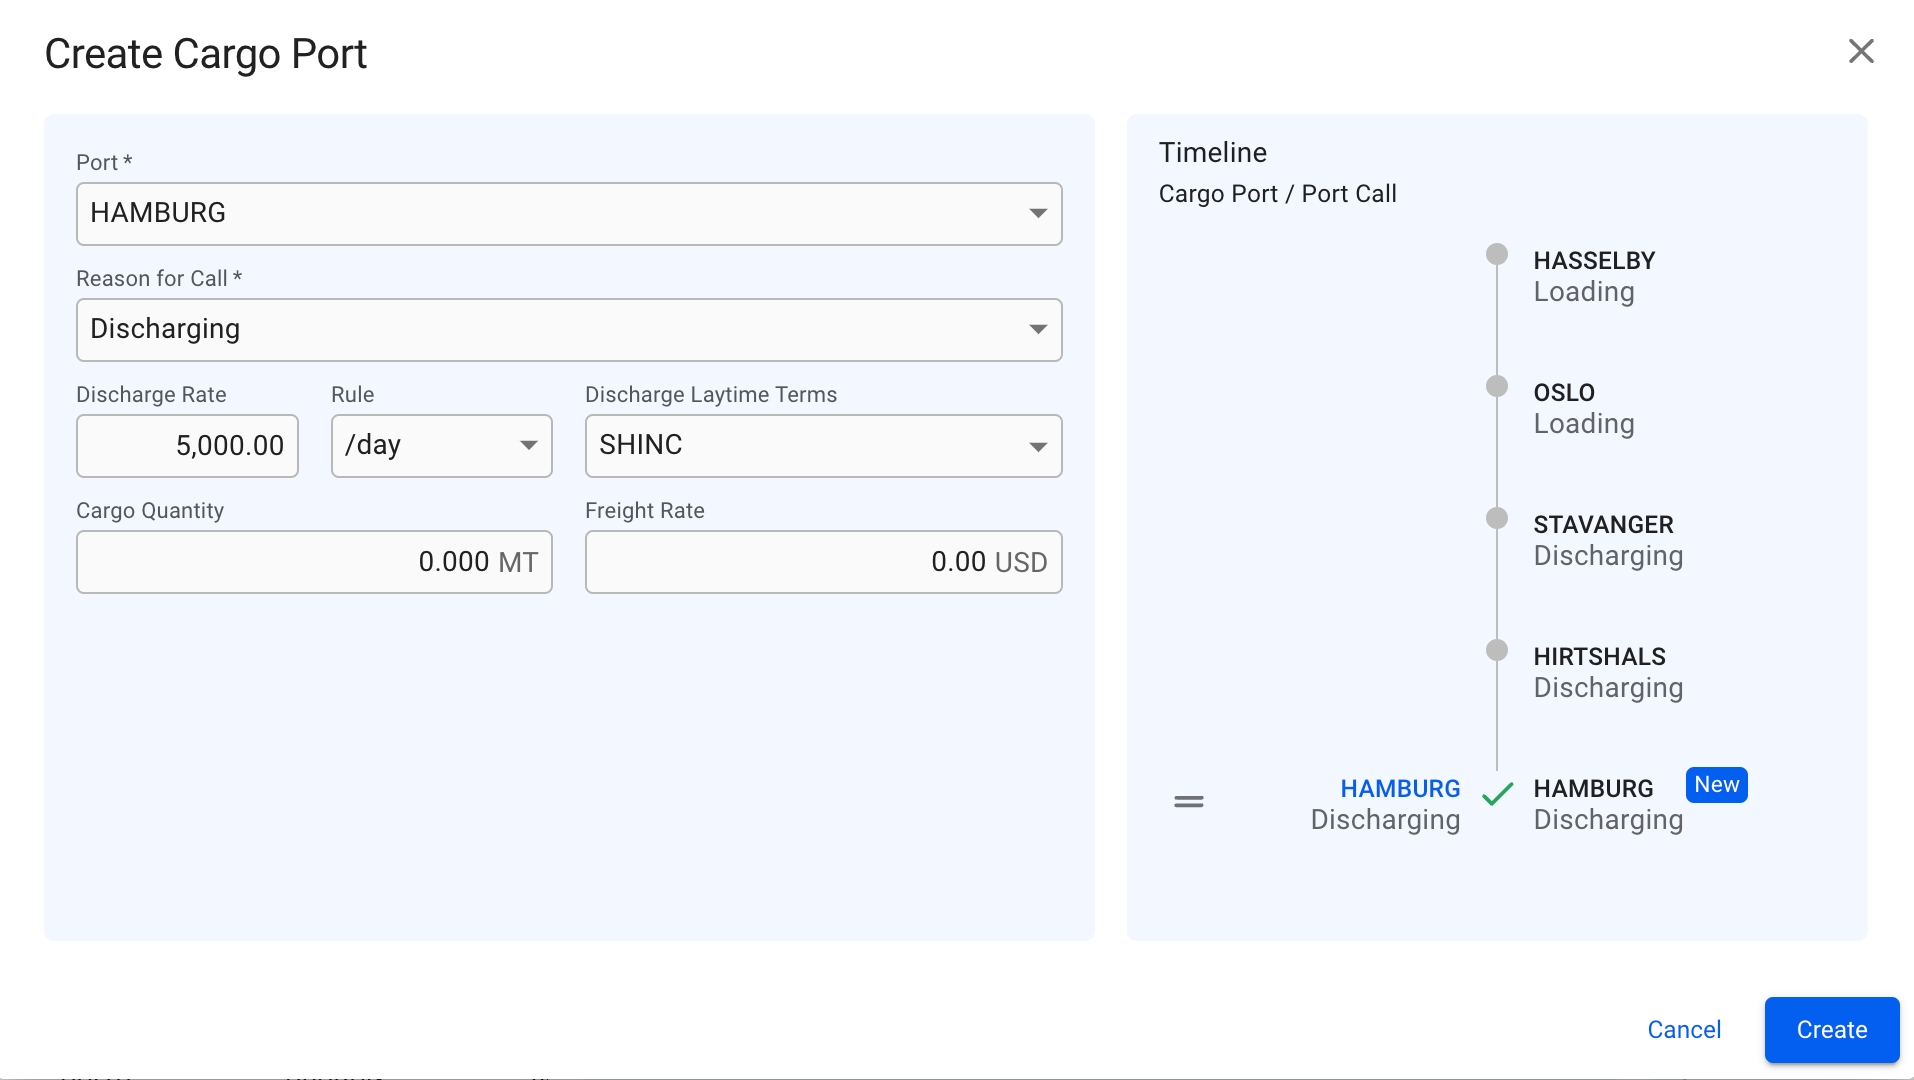
Similar to the design above, we now have a new Create Cargo Port modal:

This modal has the same features as the Create Cargo modal, listed below. To create a new cargo port on a cargo, there is now a simple icon at the top of the Cargo Port Timeline section of the cargo drawer. However unlike the Create Cargo modal, Reason for Call is set to 'Loading' by default and is limited to only 'Loading' and 'Discharging' for cargo ports.To change the order of ports, you can use the drag and drop features inside the modal. To edit or delete an existing cargo port you can, in the Cargo Port Timeline section, look for the grey icons on each of the cargo port rows, to specifically focus on a cargo port of choice to make the changes. Read more about the features below.
Features:
With the new multiple value component in the Create Cargo modal, you are now able to add multiple Load- and Discharge- cargo ports to the new cargo.
The fields are divided into 2 sections, while the 3rd section displays the Timeline component of the cargo ports that are added. In the Create Cargo Port modal, there are 2 sections, in which the 2nd one contains the Timeline.
It is possible to drag and drop the ports in the Timeline component to change the order of the cargo port rows, in both of the modals.
Was this helpful?