Scenarios
This is a list of all scenarios, including budgets, in the system. The MASTER scenario is marked in capital letters and cannot be edited.
Actions
By clicking on a scenario, a drawer will open where you can create a copy or change the scenario name (in the Secondary Actions dropdown), as well as view information about its voyages, cargos, and vessels.
To create a new scenario follow the step-by-step guide: Create Scenario.
Find Scenario
Scenarios List
Navigate to the 'Scenarios' menu group to the left under the "Planning" module to find the list of scenarios. Here we have a list of all existing scenario, except for the MASTER scenario (which you cannot edit). The list contains these columns:

Here, you can easily navigate through the scenario named, number of vessels and voyages in the scenario and the type of scenario, and click on the desired scenario to open the drawer.
Scenario Types
This list of scenarios includes both the types budget and non-budget scenarios. To effectively list the desired type of scenarios, you can filter the list based on the type you want to see, with the quick filter 'Type' found above the list:
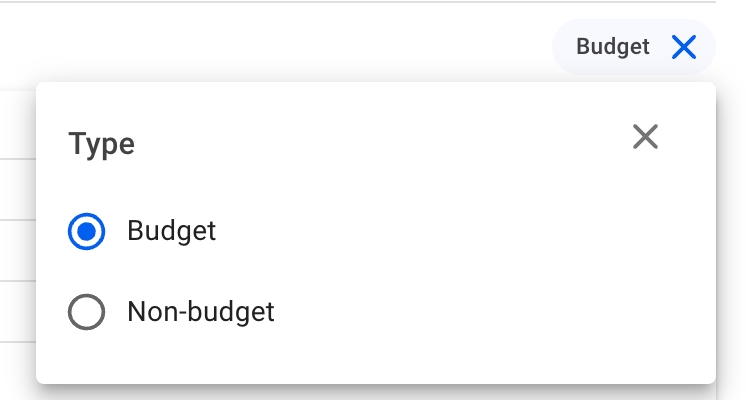
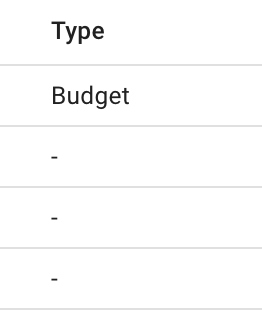
In the Type column, you will immediately be able to detect whether a scenario is of type budget or a non-budget (' - '):
Create Scenario
There are four possibilities to create a scenario:
create from scratch
create from MASTER fleetplan
copy existing scenario
create a budget scenario
In the scenario list you have a  icon on the top left to create a new scenario. You can create a scenario from scratch, from the MASTER fleetplan or create a budget scenario. You can also copy an existing scenario.

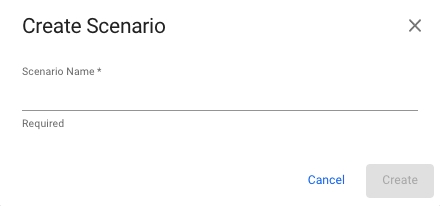
Create from Scratch
When creating a scenario from scratch you enter a scenario name and click create.
Create from Master Fleetplan
When using the MASTER fleetplan to create a scenario, all voyages in the master fleetplan and their allocation are copied. Thus, unallocated voyages will be unallocated in the scenario and allocated voyages will be allocated to the same vessel. The first position of each vessel in the scenario schedule is defined by the start of the first voyage on the vessel.
The new scenario is called Master Fleetplan Scenario with a date and time stamp of the creation.
Copy existing scenario
To copy a scenario open its drawer in the scenario list. Select the action copy in the drawer to create a copy of the scenario.
Create budget scenario
Create Budget ScenarioMaintain Scenarios
Scenario Drawer
To change an existing scenario, navigate to the 'Scenarios' menu group to the left, and open the Scenario drawer by clicking on the list row of choosing. Learn more about finding a scenario!
Actions
You have the following actions in the drawer:
View in Open Positions Board
Delete
Copy
Edit Scenario Name
View Audit Log
To access and upload attachments
Main Details tab
Here you have an overview of Average TCE, Average Days and Days Total of the whole scenario. The overview sections also contains information about whether the scenario is a budget, the number of voyages, template voyages and cargoes of the selected scenario:

Vessels tab
Vessels in the selected scenario can be managed from the list in the Vessels tab. Clicking on a vessel will lead to the vessels' drawer.
Add / Remove Vessel
Open the Scenario module in the Planning section.
Select a scenario and navigate to the Vessels tab.
Click Add
in the top right corner of the vessels list.Select/Deselect vessels in the Select Vessels dialog.
Click Confirm.
Copy Scenarios
Inside a scenario drawer, you have a primary action for copying a scenario:

Then, a 3-stepper modal will show up and give you access to define what vessels, voyages and cargoes of that specific scenario you want to copy over to the "new" scenario. Firstly, you will be given the option to choose a name for the copied scenario:
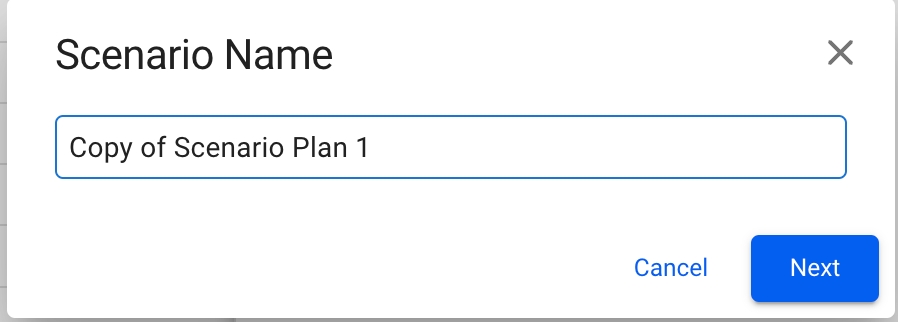
By default, the "Copy of original scenario name" will be added at the input, until you decide for another name. Each of the scenario names should be unique to avoid duplicates in the system (there is a validation check for this when typing). Moreover, you can step through the modal to specify further:
Step 1 - Select Vessels

A list of pre-selected vessels of the original scenario that you want to copy from will show. You will have the option to un-check unwanted vessels for the "new" scenario as well. The list contains of vessels, which includes their allocated voyages and cargoes, from the selected scenario, and is sectioned by the vessel itself and its vessel type.
Features:
You can filter by:
My Vessels
Vessel
Vessel Type
When copying the MASTER scenario, only the future allocated voyages with their cargoes for the specified vessels are copied
The checked vessels are persisted throughout the modal
You are able to click the "Next" button even if you have selected zero vessels
Step 2 - Select Voyage Commitments

A list of pre-selected voyage commitments of the original scenario that you want to copy from will show. You will have the option to un-check unwanted voyages for the "new" scenario here too. The list contains of all the unallocated voyages, which includes their cargoes (both non-template), from the selected scenario. It's sectioned by reference number, voyage status, trade, start- and end dates, ballast-, load- and discharge ports.
Features:
You can filter by:
Voyage
Reference Number
Voyage Status
Vessel
Name
Type
Area
Loading
Discharging
More
Commodity
Charterer
Trade
Commodity Class
Cargo Type
The checked voyages are persisted throughout the modal
You are able to click both the "Back" and "Next" buttons even if you have selected zero voyages
Step 3 - Select Cargo Commitments

A list of pre-selected cargo commitments of the original scenario that you want to copy from will show. You will have the option to un-check unwanted cargoes for the "new" scenario here as well. The list contains of all the unallocated cargoes (non-template) from the selected scenario, and is sectioned by cargo reference, cargo status, cargo type, load- and discharge ports, charterer, cargo quantity, commodity and trade.
Features:
You can filter by:
Charterer
Cargo
Commodity
Commodity Class
Cargo Type
Trade
Area
Loading
Discharging
The checked cargoes are persisted throughout the modal
You are able to click both the "Back" at any time
You are able to click the "Copy" button if you have selected at least one item, whether it's a vessel, voyage or a cargo
Common Features
Customise Columns:
All of the table lists in the Copy Scenario modal also have the customise columns feature, that have now been added to most of the lists in VMS.
Read about Copy Budget Scenario here.