Fleet Plans
Was this helpful?
Was this helpful?
The Fleet Plans module allows you to allocate voyages and cargoes in MASTER and different scenarios without making any changes to your master Fleet Plan.
At the top center of the screen, the selected scenario is displayed:
Below the scenario selector, there are three tabs to access different views of the scenario schedule:
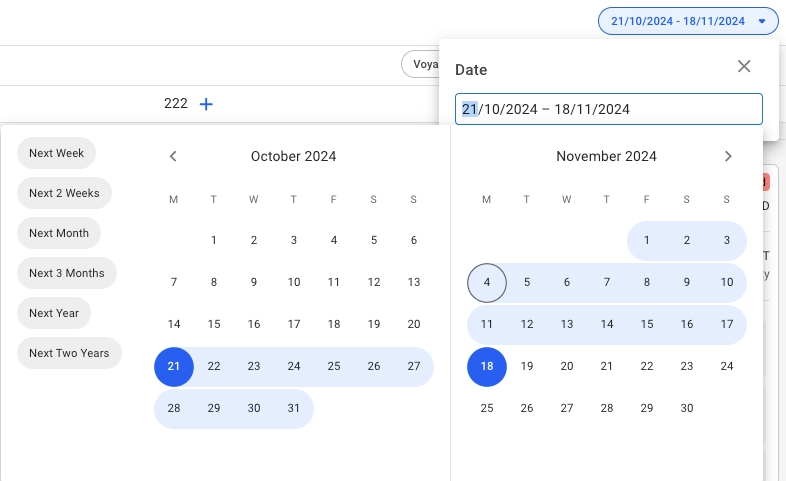
In FAS the date filter will filter voyages and cargoes in all of the boards more efficiently. There are filtering shortcuts for Next Week, Next 2 Weeks, Next Month, Next 3 Months, Next Year and Next Two Years (meaning the past 2 weeks plus selected). The default is set at 'Next 3 Months'. It is also possible to manually select the date range.
All voyages and allocated cargoes are filtered with respect to the voyage's end date date. The unallocated cargoes in their respective Cargo Commitments column, are filtered with respect to the cargo's laycan from- and to- dates.
For a scenario != MASTER, the date filter is also clearable. Meaning, you can clear the filtering of the selected date range, resulting in the list showing for all results instead, regardless of cargo's laycan dates and the voyage's end date.
On the Open Positions and Cargo Management boards, specifically, you will be able to use the toggle functionality:
By turning the toggle off, you will be able to hide the Voyage Commitments, or Cargo Commitments, making the allocated sections for voyages and cargoes the full view.
Meanwhile, in the Scheduler board, you have two hide functionalities:
By clicking on, for instance, the "Hide Commitments" toggle, you will hide the whole Commitments section, making the Schedule section the full view. And opposite action for "Hide Schedule" (you are also able to hide both sections, then you will get an "empty" full view).
To select a different scenario, click the expand buttonnext to the name to open a list of all scenarios, except . The MASTER scenario is pinned to the top of the selector for easy accessibility.
To create a new scenario follow the step-by-step guide: .
Specifically for cargoes, see .
Specifically for voyages, see .


