Loading...
Loading...
Loading...
Loading...
Loading...
Loading...
Loading...
Loading...
Loading...
Loading...
Loading...
Loading...
Loading...
Loading...
Loading...
Loading...
Loading...
Loading...
Loading...
Loading...
Loading...
Loading...
Loading...
Loading...
In Fleet Allocation and Scheduling (FAS) you can work on voyages in the planning phase and allocate them to vessels. Available voyages and vessels are:
Scheduled (Unallocated)
Scheduled (Allocated)
Nominated
Furthermore, the voyages need to be on-going or lie in the future.
"Schedulable" in the vessel master data
FleetExitDate empty or in the future
The master scenario shows the current plan for the fleet and commitments. It is directly linked to the rest of the VMS.
Other scenarios can be to help the scheduler evaluate different options when scheduling. These scenarios are independent from other VMS modules.
Under the menu item Scenarios you can find all scenarios, edit them and create new ones.
Under the menu item you can view the schedule for any scenario in three different views: the , the and the .
The capacity plan gives you a monthly overview if your fleet is over- or underbooked with cargoes. For each months and each trade, we compare the available cargoes to the capacity in your fleet which is serving that trade.
You can navigate between the current month and future months at the top of the dashboard. You can also filter to restrict the view to a particular set of trades.
The are three summary cards at the top displaying information on all trades selected in the filter:
Free capacity: Total deadweight - total weight
Deadweight: Total deadweight of vessels loading in the selected month
Weight: Total weight of cargoes with laydays commencement in the selected month.
For free capacity and weight, we distinguish between total values and fixed values. The latter takes only cargoes into account which have status "Clean Fix".
An expandable panel is shown for each trade, with totals for that trade. There are two lists inside the panel, one for cargoes by charterer and one for vessels.
In each trade panel there is a list of total cargo weight and volume grouped by charterer. Only cargoes where laydays commencement lies in the selected month are counted.
All "fixed" charterer cargo totals are listed first, while "not fixed" entries come second and are indicated in grey.
In each trade panel there is a list of vessels. For each voyage in the master fleetplan, the vessel that voyage is allocated to is listed if the following two criteria are met:
The voyage is marked with this trade or its performance cargo belongs to the trade.
The voyage has arrival date in the first load port within the selected month.
Category
Status
Not Fixed
Indication
Firm Offer
Working
On Subject
Fixed
Clean Fix
Summary
Description
Values
Free Capacity
Remaining deadweight tonnage summing all vessels and cargoes
Total: Deadweight - total weight
Fixed: Deadweight - fixed weight
Deadweight
Deadweight of vessels
Total: Sum of deadweight of vessels
Weight
Weight of cargoes
Total: Sum of weight of cargoes of any status
Fixed: Sum of weight of cargoes of fixed status
Column
Description
Charterer
Name of the charterer
Weight (MT)
Total cargo weight in metric tons
Volume (M³)
Total cargo volume in cubic meters
Column
Description
Vessel
Name of vessel
DWT
Deadweight of the vessel
Open Date
Arrival date in the first load port
Open Port
First load port
Previous Trade
Trade of the previous voyage on the vessel
The Cargoes tab can be found in the Fleet Plans module. It contains a list of all unallocated cargoes and cargoes allocated voyages who's vessels are scheduled. Each cargo can be found within a scenario, including the MASTER scenario.
With the below mentioned features combined, in FAS Cargoes, a Scheduler can now create an Annual Load Plan in the MASTER scenario, and then copy it into a new scenario, to save the plan. This plan can then be tailored within this specific scenario, consistent of various columns and rows of cargoes, that are filtered and/or sorted, within a chosen time period.
Clicking on a cargo opens the and gives access to additional information and actions.
Cargo List's filters, sorting and header sorting can be read here: .
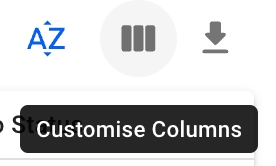
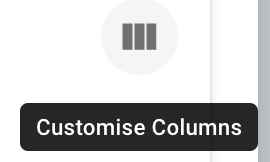
In this Cargoes List, specifically in FAS, you have the option to select and customise your columns of choosing. Keep in mind that the standard ones cannot be removed, but can be be "hidden". This option gives you the possibility to, amongst many, add in additional columns of your desire and re-order the columns, as you go.
It is highlighted in blue if it's activated.
You can read the full description about this action here: .
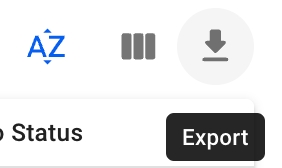
Also in this lit, specifically, you can export the viewed list into an Excel sheet. By clicking on the export icon, you will be given a modal with various options, before exporting. You can read more about it here: .
You can read all about the Cargo actions here: .
Open the Budgets module in the Planning section
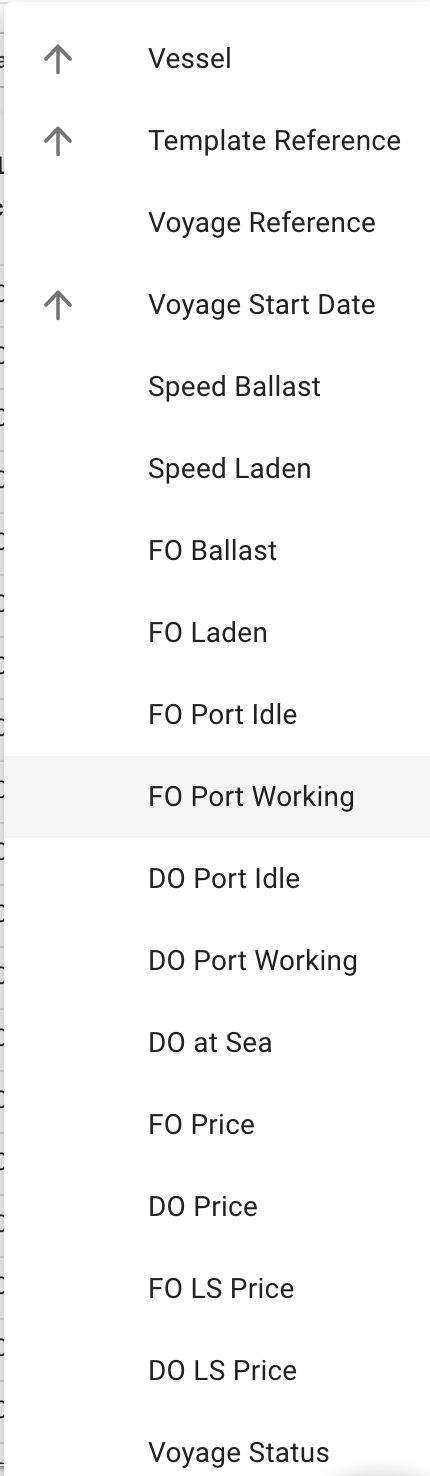
Find under the Template Voyages tab
Click the Template Voyages tab
Find in the list of voyages
Open the Voyages module
Choose Template Voyage quick filter
Find in the Voyages list
You can use the quick to find the template voyage you are looking for.
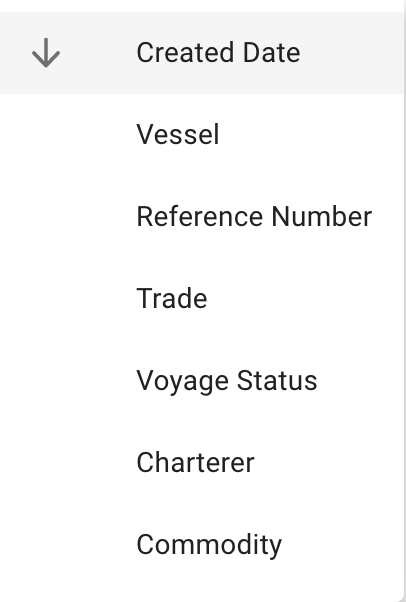
You can also sort in ascending and/or in descending order based on these fields:
Budgeted Voyages can be located from the tab in the Budgets module.
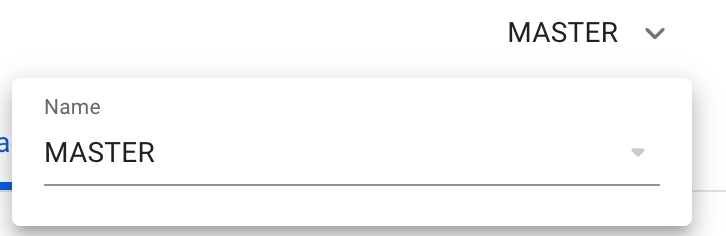
This is a list of all scenarios, including budgets, in the system. The MASTER scenario is marked in capital letters and cannot be edited.
By clicking on a scenario, a drawer will open where you can create a copy or change the scenario name (in the Secondary Actions dropdown), as well as view information about its voyages, cargos, and vessels.
To create a new scenario follow the step-by-step guide: .
Template Voyages Tab in Budgets Module
Template Voyages can be located from the tab in the Budgets module.
Create Template VoyagesFind Template VoyagesMaintain Template VoyagesThe Fleet Plans module allows you to allocate voyages and cargoes in MASTER and different scenarios without making any changes to your master Fleet Plan.
At the top center of the screen, the selected scenario is displayed:
To select a different scenario, click the expand buttonnext to the name to open a list of all scenarios, except Budgets. The MASTER scenario is pinned to the top of the selector for easy accessibility.
To create a new scenario follow the step-by-step guide: .
Below the scenario selector, there are three tabs to access different views of the scenario schedule:
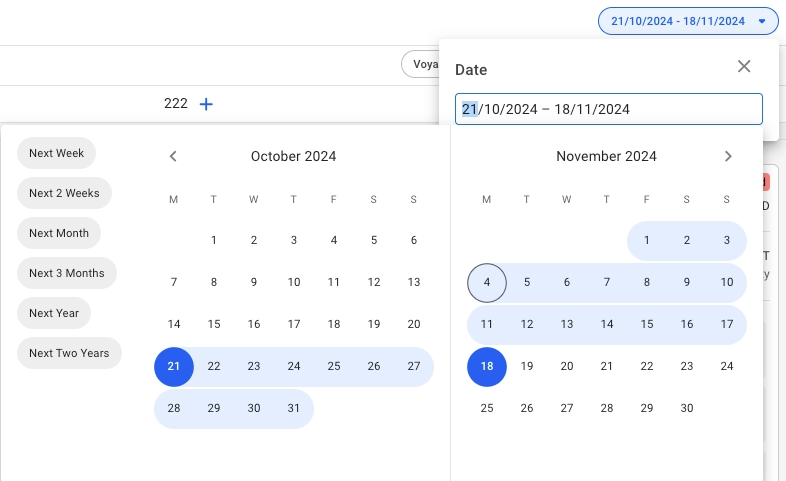
In FAS the date filter will filter voyages and cargoes in all of the boards more efficiently. There are filtering shortcuts for Next Week, Next 2 Weeks, Next Month, Next 3 Months, Next Year and Next Two Years (meaning the past 2 weeks plus selected). The default is set at 'Next 3 Months'. It is also possible to manually select the date range.
All voyages and allocated cargoes are filtered with respect to the voyage's end date date. The unallocated cargoes in their respective Cargo Commitments column, are filtered with respect to the cargo's laycan from- and to- dates.
For a scenario != MASTER, the date filter is also clearable. Meaning, you can clear the filtering of the selected date range, resulting in the list showing for all results instead, regardless of cargo's laycan dates and the voyage's end date.
On the Open Positions and Cargo Management boards, specifically, you will be able to use the toggle functionality:
By turning the toggle off, you will be able to hide the Voyage Commitments, or Cargo Commitments, making the allocated sections for voyages and cargoes the full view.
Meanwhile, in the Scheduler board, you have two hide functionalities:
By clicking on, for instance, the "Hide Commitments" toggle, you will hide the whole Commitments section, making the Schedule section the full view. And opposite action for "Hide Schedule" (you are also able to hide both sections, then you will get an "empty" full view).
Specifically for cargoes, see .
Specifically for voyages, see .
Open the Budgets module in the Planning section
Select a budget from the dropdown
Click Create in the top right corner
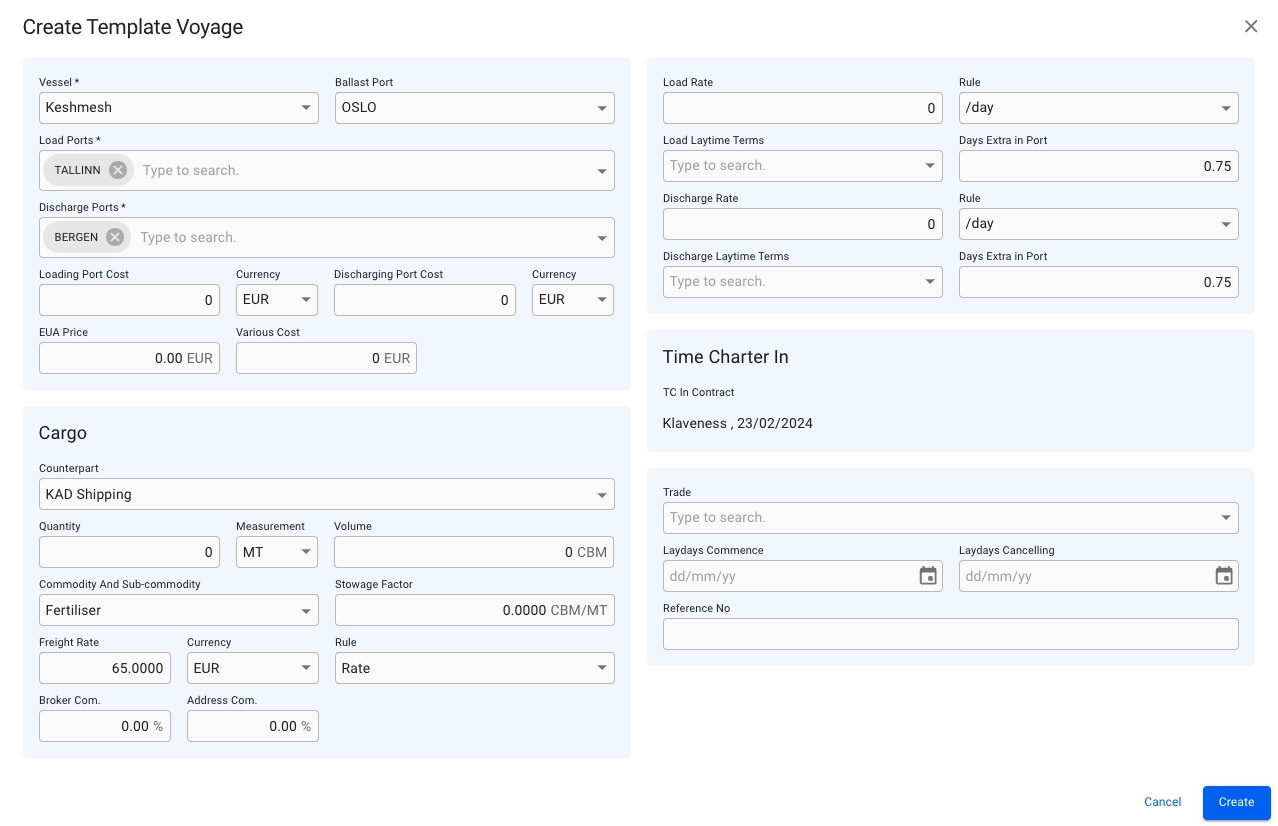
Fill in all required fields listed in the Create Template Voyage window
Click Create
Open the Contracts of Affreightment module in the Chartering section
Click on a CoA to open the drawer, and navigate to the Template Voyages tab
Click Create in the top right corner
Fill in all required fields listed in the Create Template Voyage window
Open the Voyages module
Choose Template Voyage quick filter
Click Create in the top right corner
Fill in all required fields listed in the Create Template Voyage window
Click Create
After the creation of the new template voyage the template Voyage drawer will open and the template voyages list will refresh.
Open the Budgets module in the Planning section.
By using the list of budget voyages that opens from the Budgeted Voyages tab in the Budgets module, you can use the quick to find the template voyage you are looking for:
By using one of these sorting options
After selecting a template voyage, navigate to the .
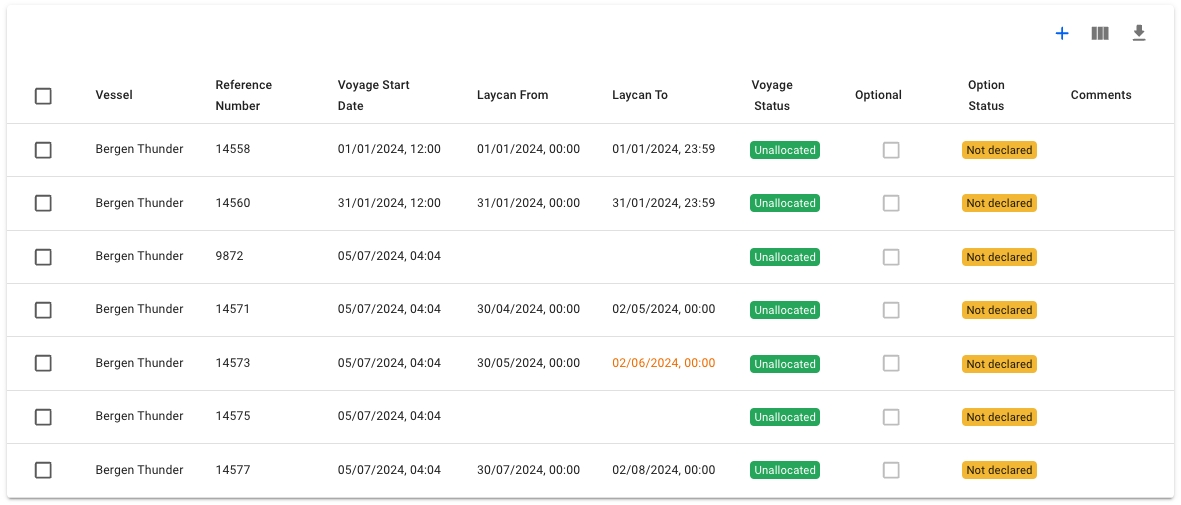
The Voyages tab can be found in the Fleet Plans module. It contains a list of all voyages that can be found within a scenario. This includes voyages of statuses: unallcoated, allocated, estimated and nominated.
The following voyage information can viewed from the list:
Clicking on a voyage opens the voyage drawer and gives access to additional information and actions.
You can read more about the actions here: .
There are several options available for you to narrow down what you include in the list view.
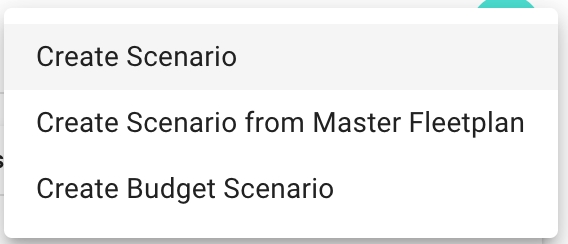
There are four possibilities to create a scenario:
create from scratch
create from MASTER fleetplan
copy existing scenario
create a budget scenario
In the scenario list you have a icon on the top left to create a new scenario. You can create a scenario from scratch, from the MASTER fleetplan or create a budget scenario. You can also copy an existing scenario.
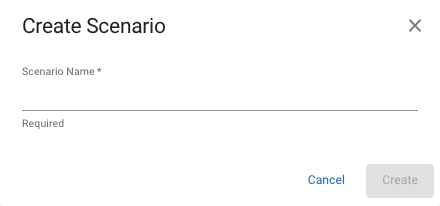
When creating a scenario from scratch you enter a scenario name and click create.
When using the MASTER fleetplan to create a scenario, all voyages in the master fleetplan and their allocation are copied. Thus, unallocated voyages will be unallocated in the scenario and allocated voyages will be allocated to the same vessel. The first position of each vessel in the scenario schedule is defined by the start of the first voyage on the vessel.
The new scenario is called Master Fleetplan Scenario with a date and time stamp of the creation.
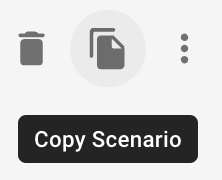
To copy a scenario open its drawer in the scenario list. Select the action copy in the drawer to create a copy of the scenario.
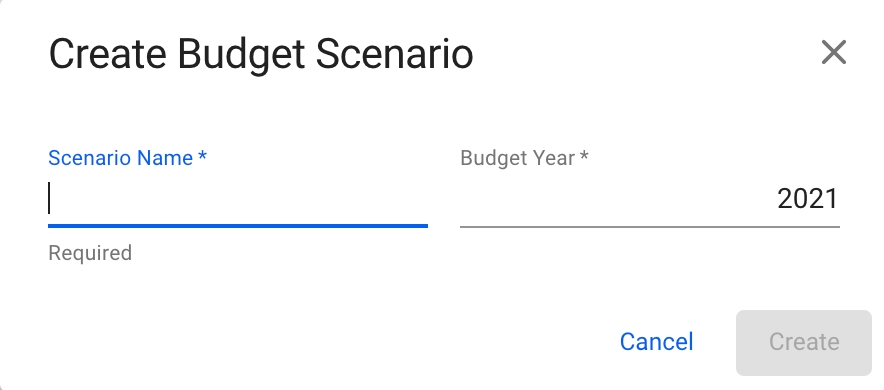
Create Budget Dialog
Open the Scenario module in the Planning section.
Click Create in the top right corner.
Select Create Budget Scenario from the dropdown menu.
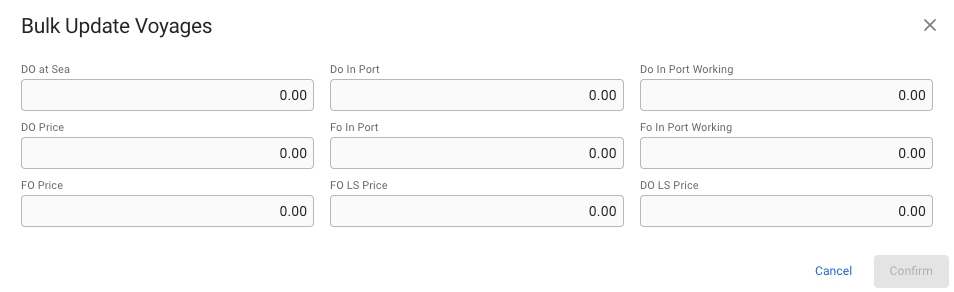
At the top of the list with budgeted voyages, if you have the required permission (Voyage Contributor Role), a "Bulk Update" button is available:
Clicking the button will change the list to be selectable, where the desired voyages can be selected for bulk updating. After selecting, press the update button below the filters to open a modal with available fields to bulk update:
Click Create
Click Create
Field
Description
Vessel
Vessel the voyage will be using
Load Port
First loading port
Discharge Port
Last discharge port
Fill in all required fields listed below in the Create Budget Scenario window.
Clicking Create will create a new, empty scenario.
Field
Description
Scenario Name
Unique Scenario Name
Budget Year
Defaults to current year

Inside a scenario drawer, you have a primary action for copying a scenario:
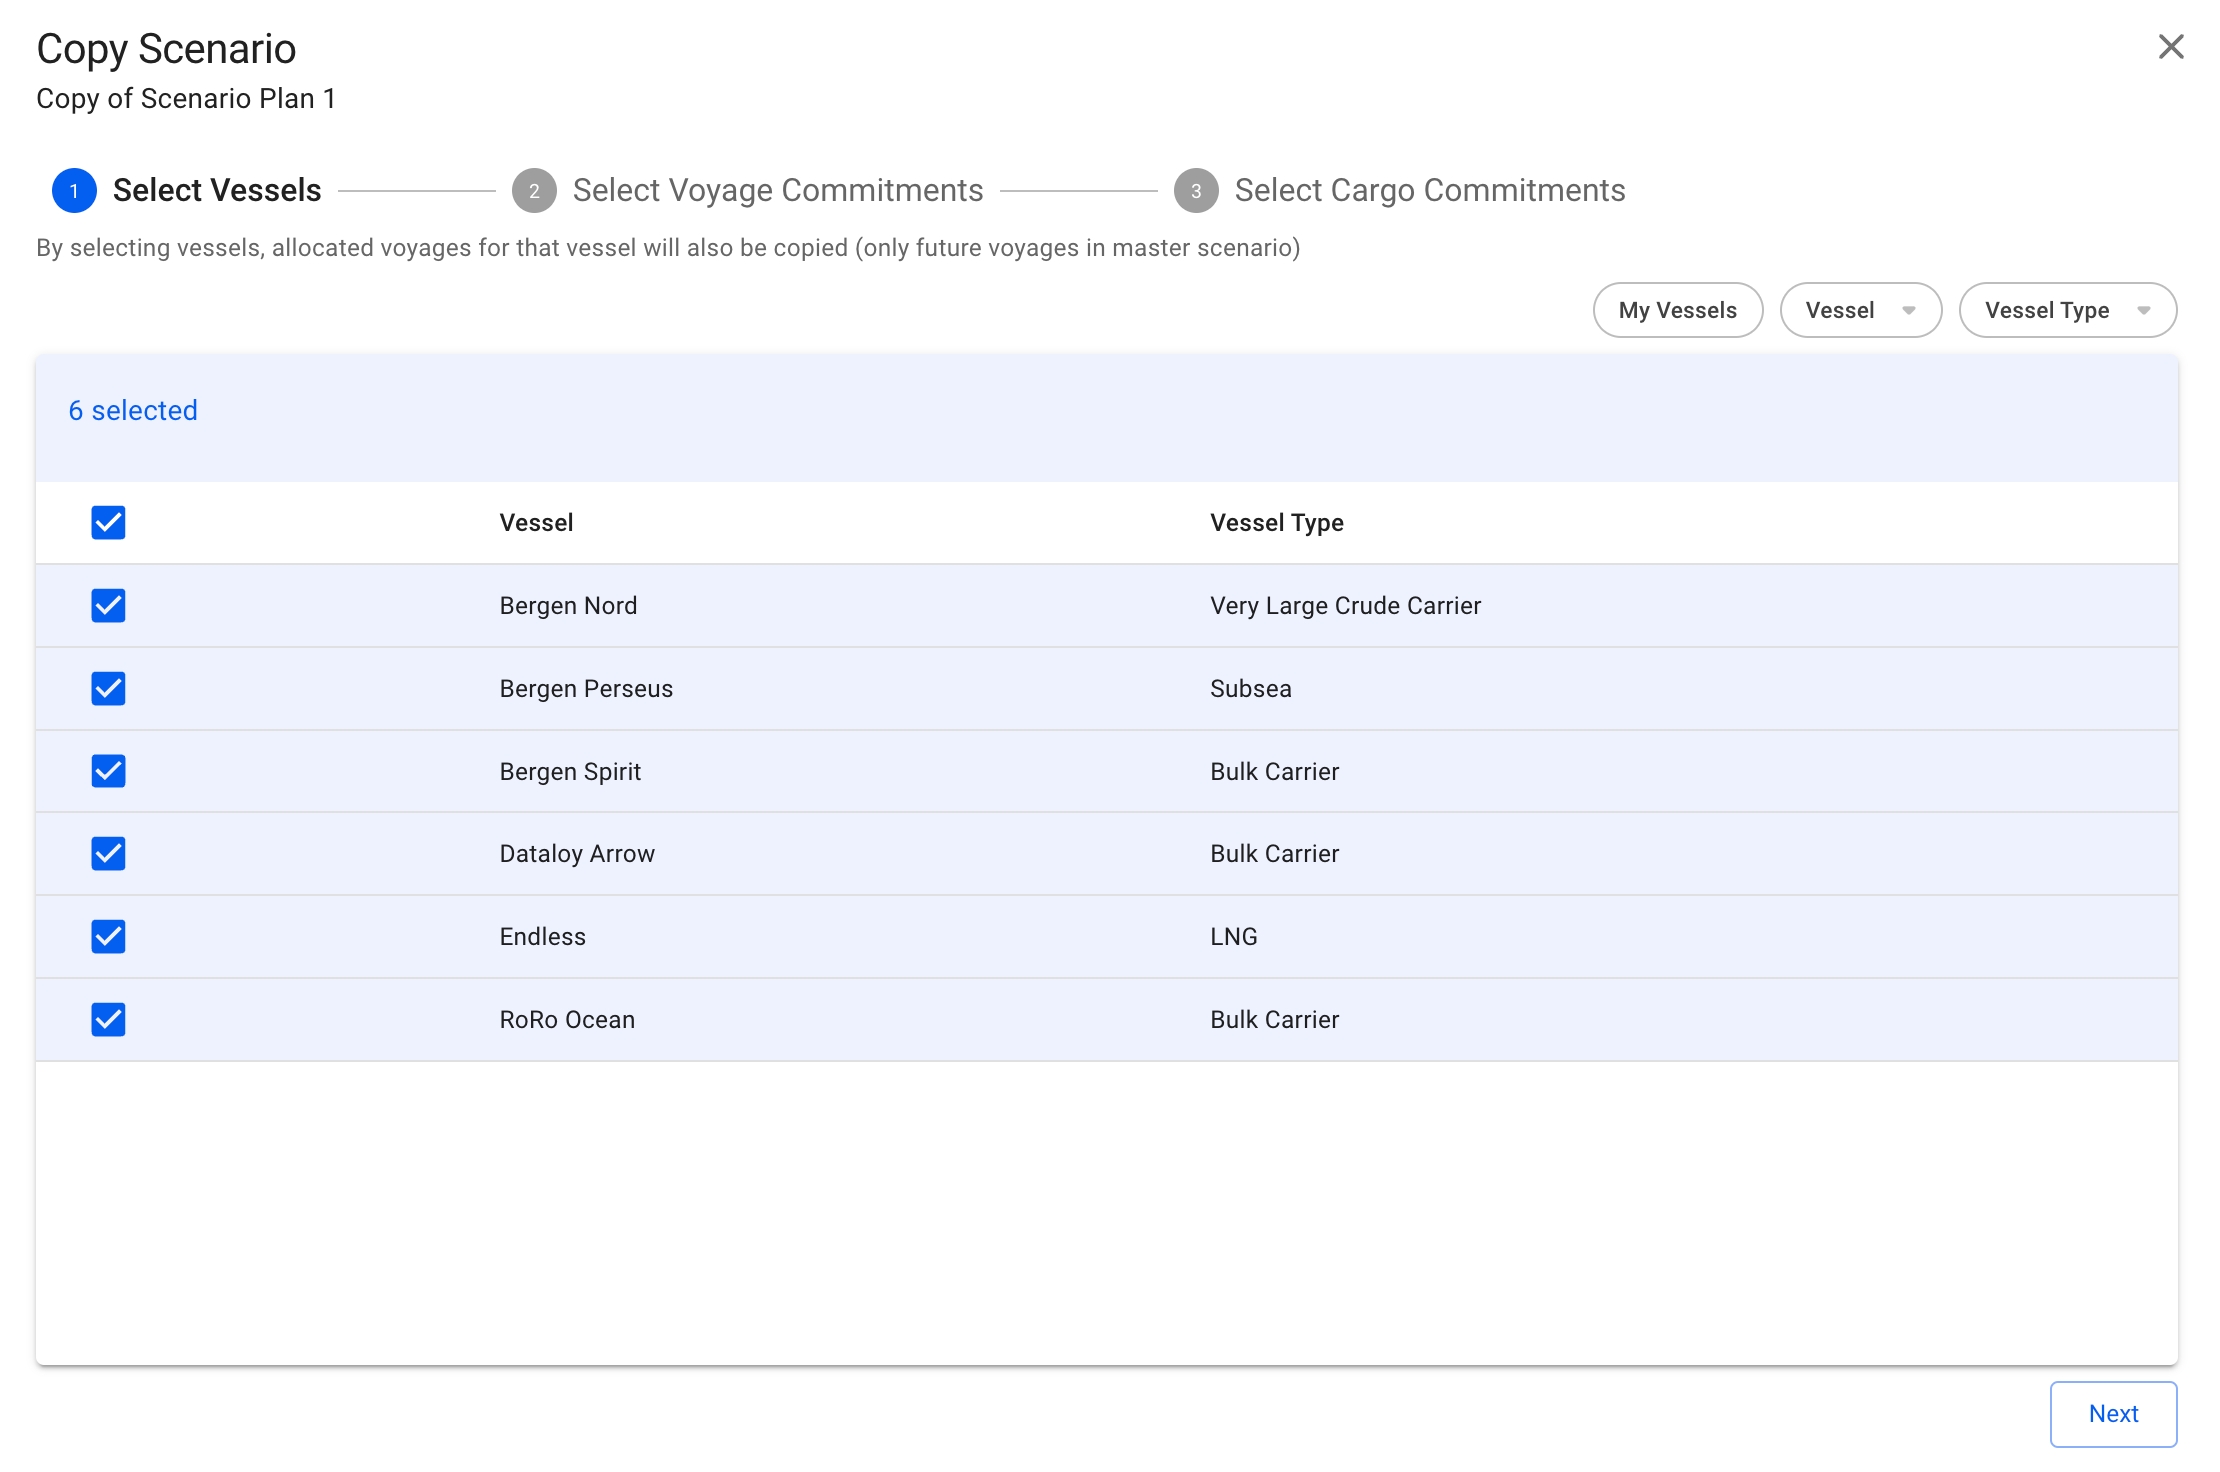
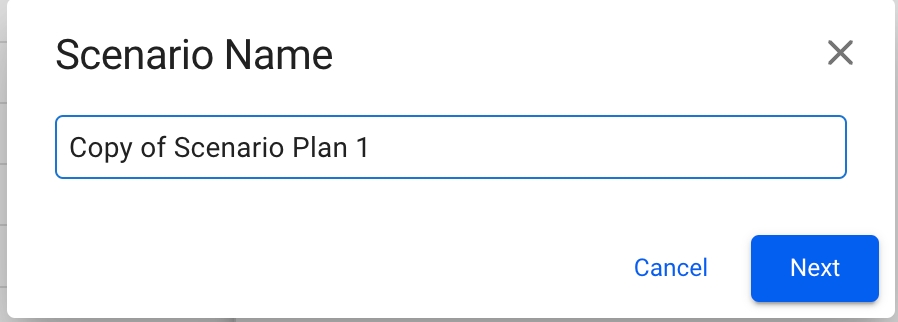
Then, a 3-stepper modal will show up and give you access to define what vessels, voyages and cargoes of that specific scenario you want to copy over to the "new" scenario. Firstly, you will be given the option to choose a name for the copied scenario:
By default, the "Copy of original scenario name" will be added at the input, until you decide for another name. Each of the scenario names should be unique to avoid duplicates in the system (there is a validation check for this when typing). Moreover, you can step through the modal to specify further:
A list of pre-selected vessels of the original scenario that you want to copy from will show. You will have the option to un-check unwanted vessels for the "new" scenario as well. The list contains of vessels, which includes their allocated voyages and cargoes, from the selected scenario, and is sectioned by the vessel itself and its vessel type.
You can filter by:
My Vessels
Vessel
Vessel Type
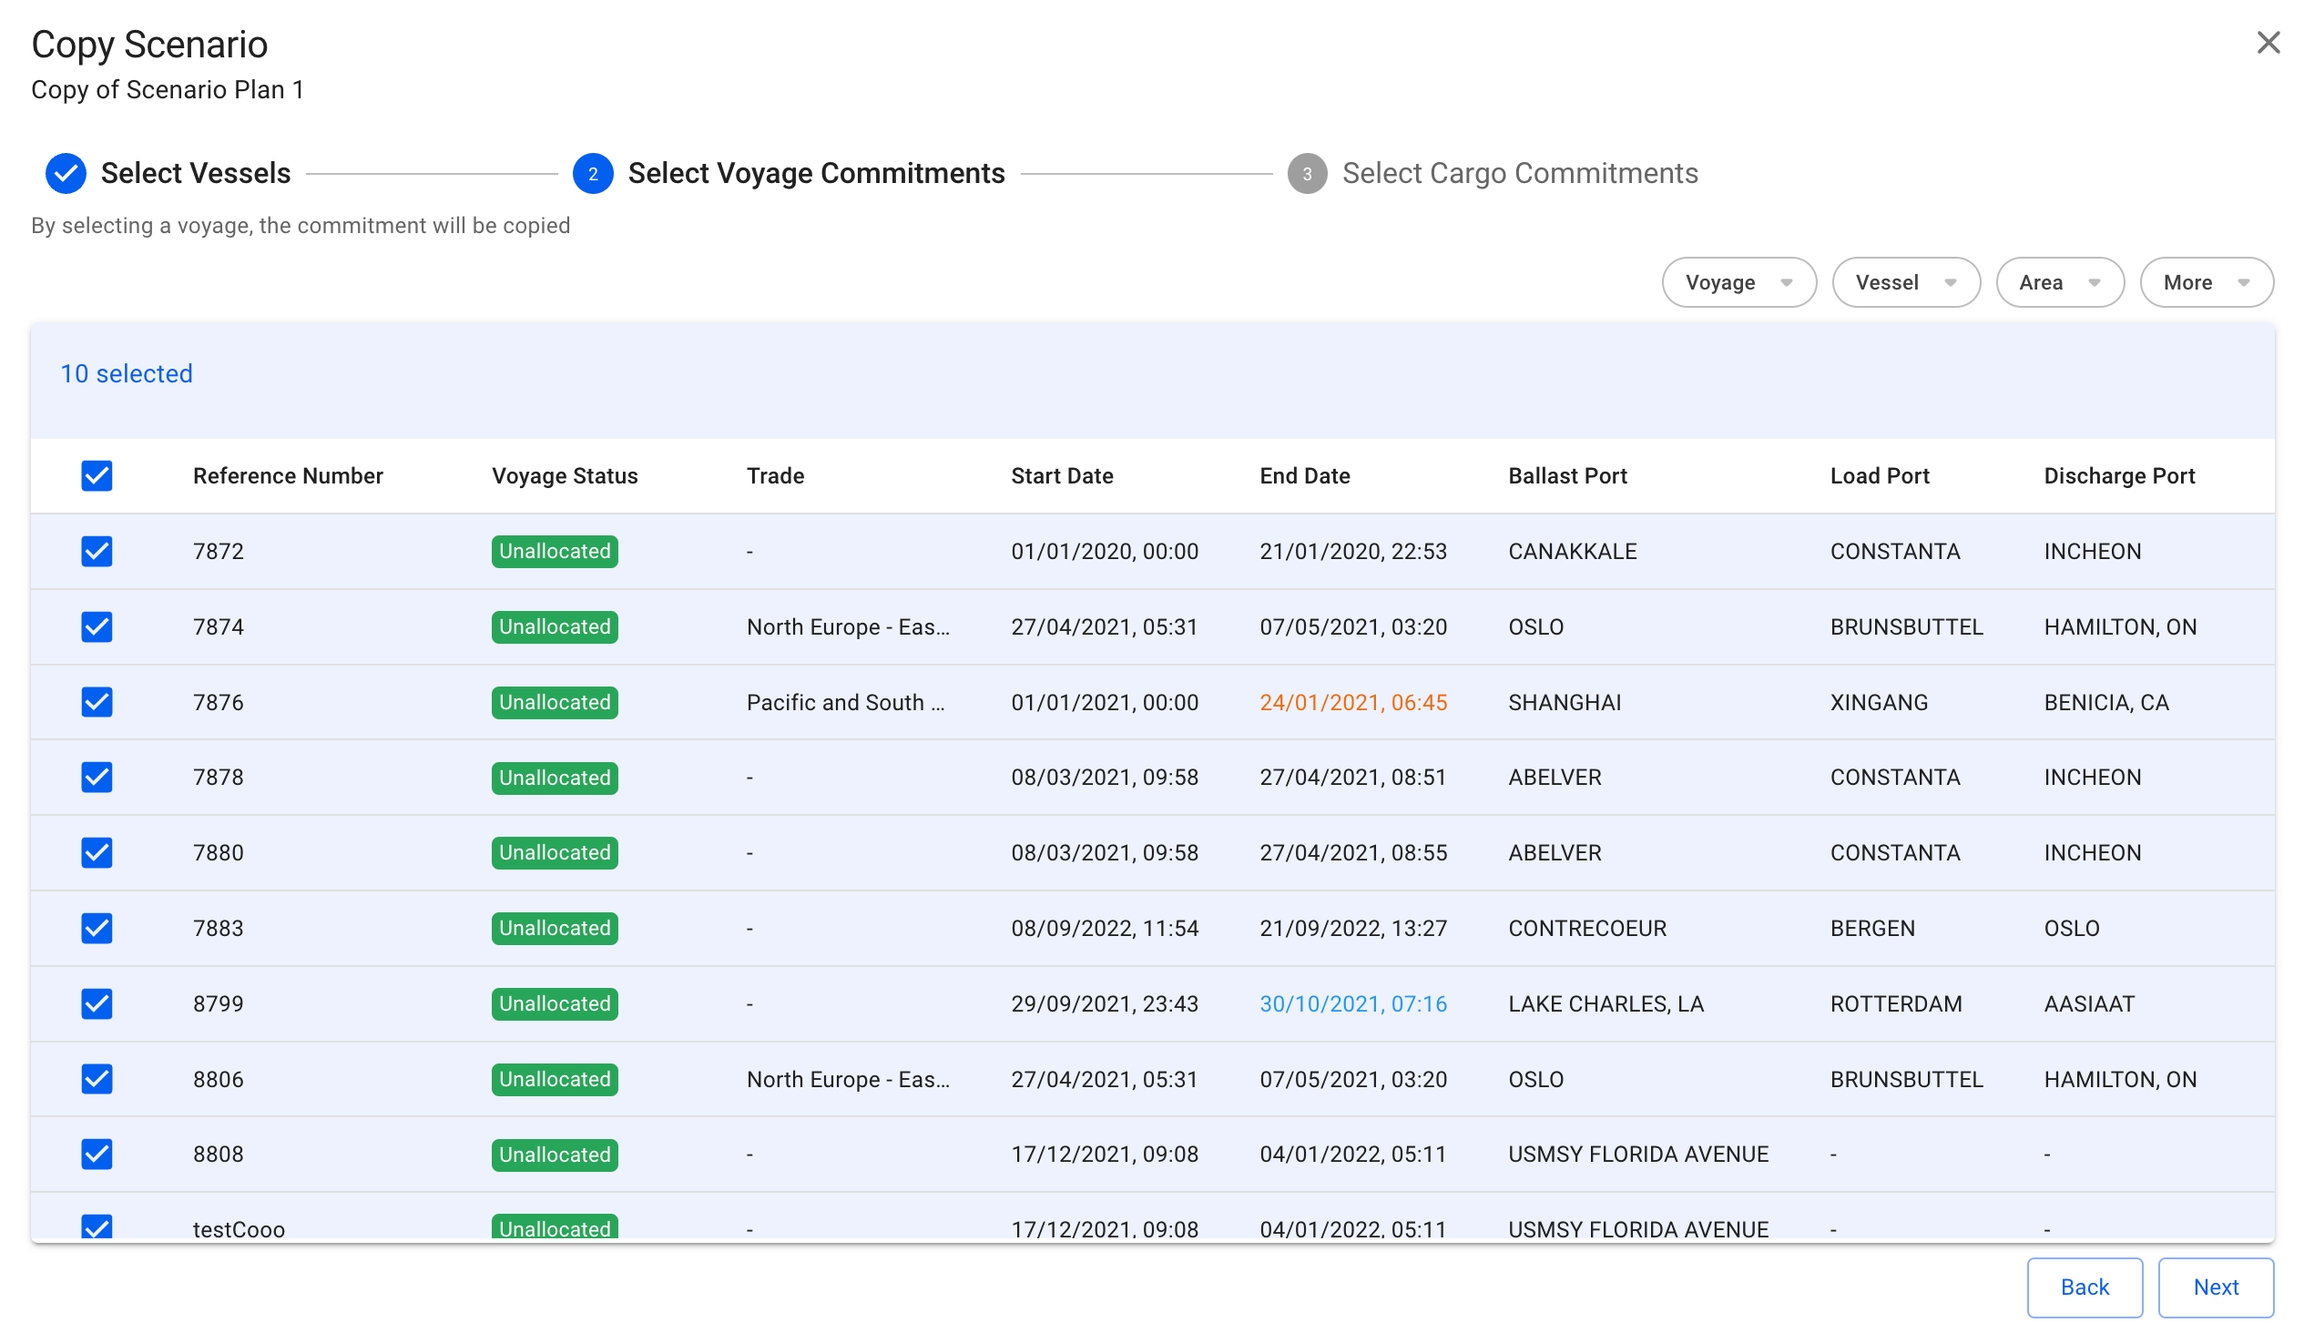
A list of pre-selected voyage commitments of the original scenario that you want to copy from will show. You will have the option to un-check unwanted voyages for the "new" scenario here too. The list contains of all the unallocated voyages, which includes their cargoes (both non-template), from the selected scenario. It's sectioned by reference number, voyage status, trade, start- and end dates, ballast-, load- and discharge ports.
You can filter by:
Voyage
Reference Number
A list of pre-selected cargo commitments of the original scenario that you want to copy from will show. You will have the option to un-check unwanted cargoes for the "new" scenario here as well. The list contains of all the unallocated cargoes (non-template) from the selected scenario, and is sectioned by cargo reference, cargo status, cargo type, load- and discharge ports, charterer, cargo quantity, commodity and trade.
You can filter by:
Charterer
Cargo
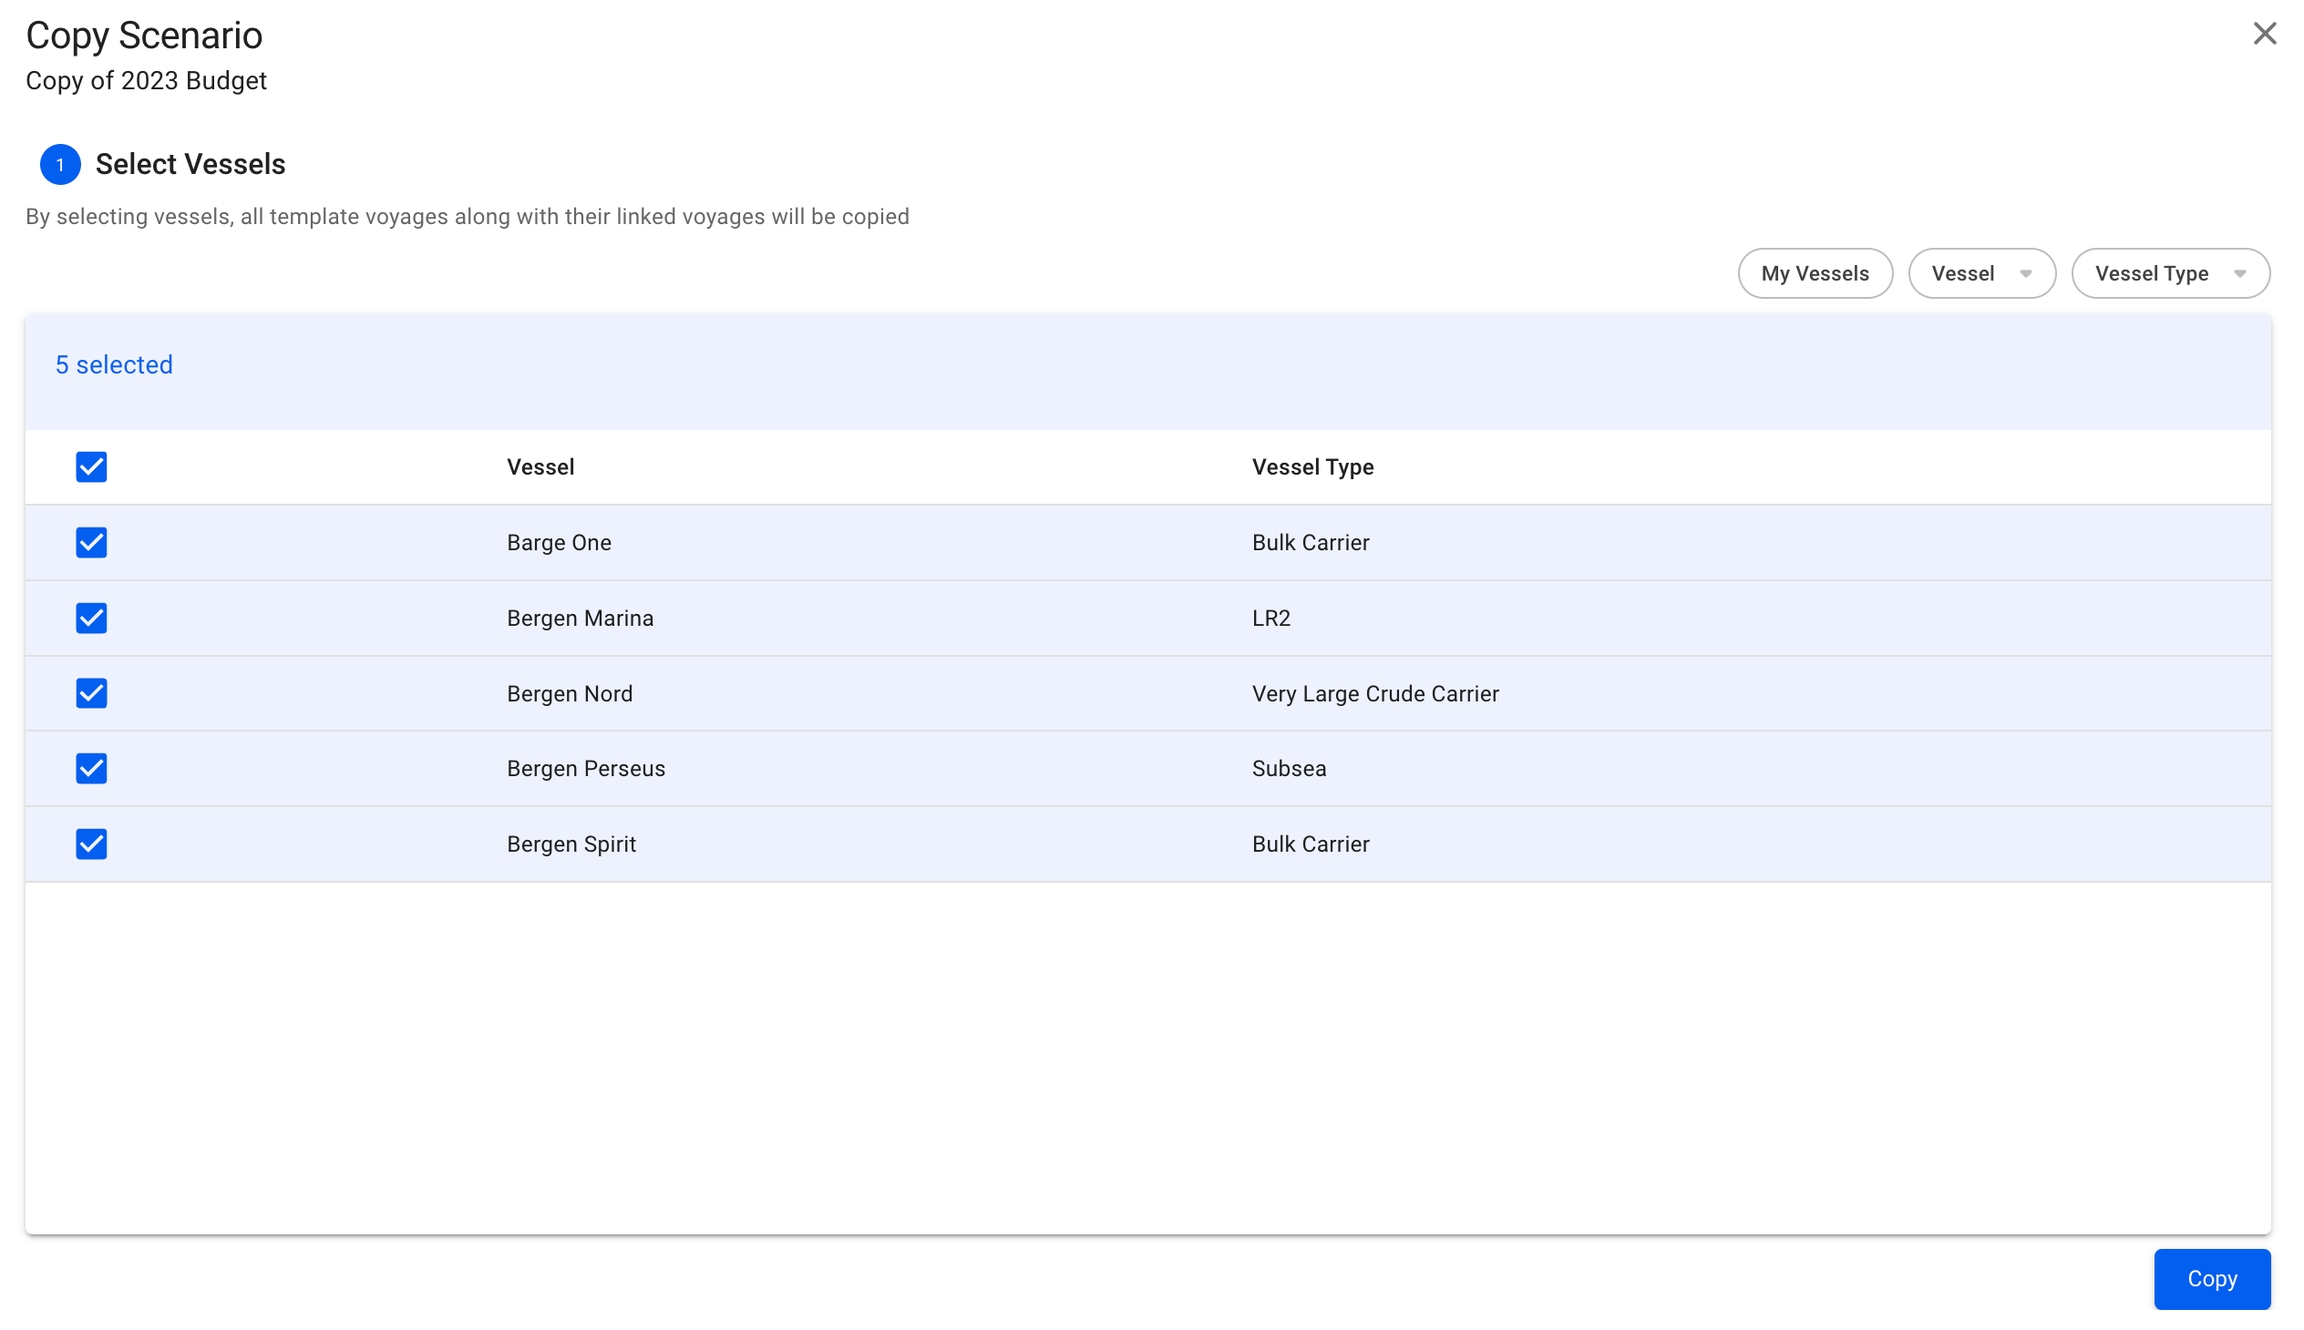
You also have the option to copy a budget scenario, by following the same instructions as for the non-budget scenarios. With this option, you will have the possibility to specify which vessels from the selected scenario you want to copy onto the "new" budget scenario:
A list of pre-selected vessels of the original budget scenario that you want to copy from will show. You will have the option to un-check unwanted vessels for the "new" budget scenario here too. The list contains of all the vessels, which includes their template voyages (with their linked voyages) and budgeted voyages, from the selected scenario. It's sectioned by the vessel itself and the vessel type.
You can filter by:
My Vessels
Vessel
Vessel Type
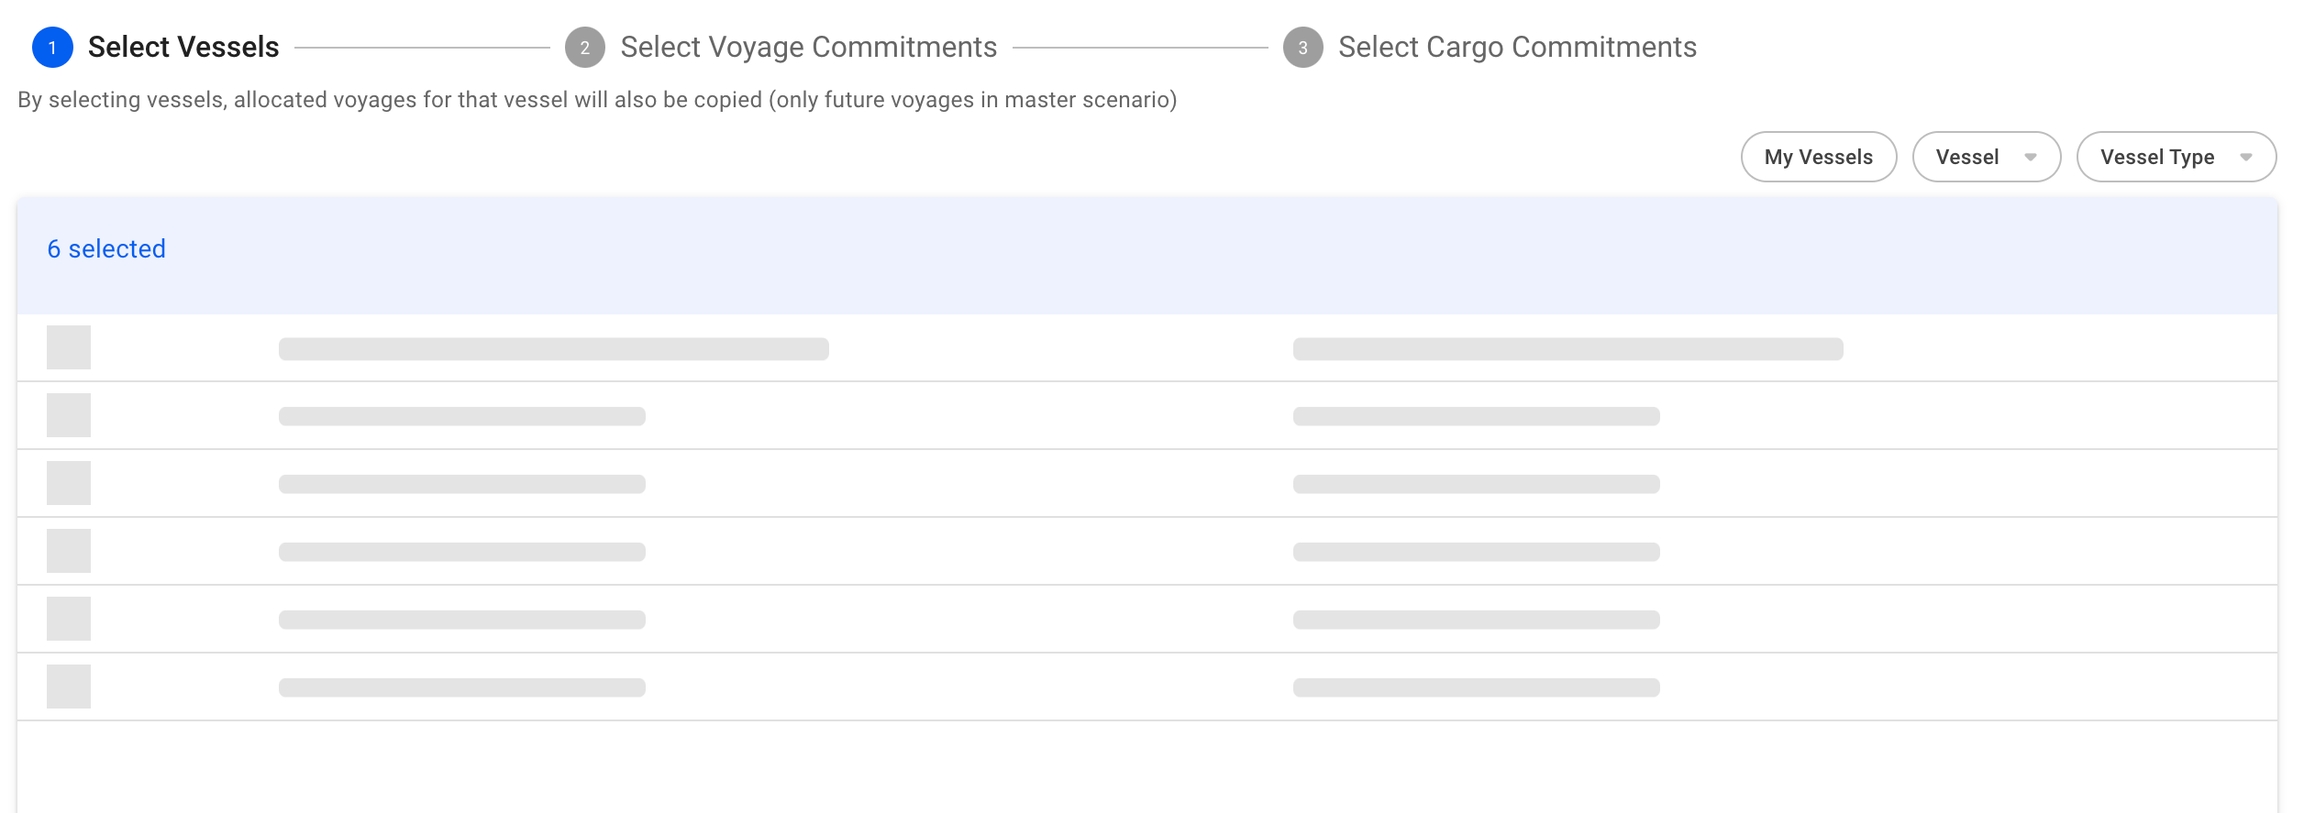
On each of the steps, we have what are called "skeletons", which are shadow-like figures that will appear on the screen while we load data for each of the steps. This is to indicate that we are in fact loading data, and not having some type of internal error causing a freeze of the system.
All of the table lists in the Copy Scenario modal also have the customise columns feature, that have now been added to most of the lists in VMS.
Scenario Drawer
To change an existing scenario, navigate to the 'Scenarios' menu group to the left, and open the Scenario drawer by clicking on the list row of choosing. Learn more about finding a scenario!
You have the following actions in the drawer:
View in Open Positions Board
Delete
Copy
Edit Scenario Name
View Audit Log
To access and upload attachments
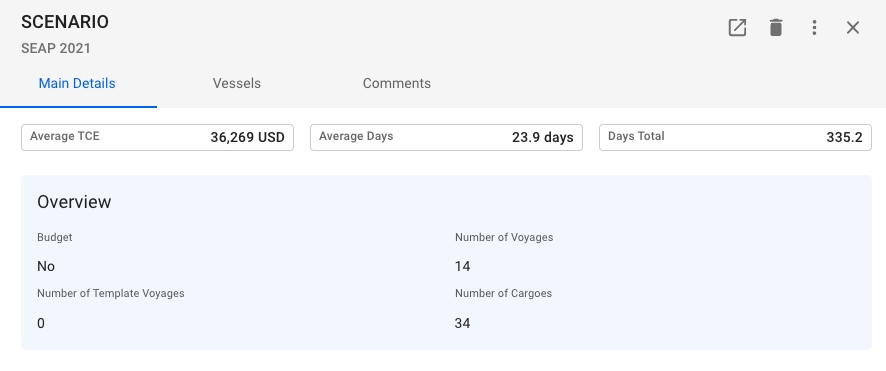
Here you have an overview of Average TCE, Average Days and Days Total of the whole scenario. The overview sections also contains information about whether the scenario is a budget, the number of voyages, template voyages and cargoes of the selected scenario:
Vessels in the selected scenario can be managed from the list in the Vessels tab. Clicking on a vessel will lead to the vessels' drawer.
Open the Scenario module in the Planning section.
Select a scenario and navigate to the Vessels tab.
Click Add in the top right corner of the vessels list.
Navigate to the 'Scenarios' menu group to the left under the "Planning" module to find the list of scenarios. Here we have a list of all existing scenario, except for the MASTER scenario (which you cannot edit). The list contains these columns:
Here, you can easily navigate through the scenario named, number of vessels and voyages in the scenario and the type of scenario, and click on the desired scenario to open the drawer.
When copying the MASTER scenario, only the future allocated voyages with their cargoes for the specified vessels are copied
The checked vessels are persisted throughout the modal
You are able to click the "Next" button even if you have selected zero vessels
Vessel
Name
Type
Area
Loading
Discharging
More
Commodity
Charterer
Trade
Commodity Class
Cargo Type
The checked voyages are persisted throughout the modal
You are able to click both the "Back" and "Next" buttons even if you have selected zero voyages
Commodity Class
Cargo Type
Trade
Area
Loading
Discharging
The checked cargoes are persisted throughout the modal
You are able to click both the "Back" at any time
You are able to click the "Copy" button if you have selected at least one item, whether it's a vessel, voyage or a cargo
The template voyages includes
A link to the original voyage it was created from
Template cargoes
The budgeted voyages, which are non-template voyage, includes
Non-template cargoes
Both template- and budgeted voyages are budgets
The checked vessels are persisted throughout the modal
You are able to click the "Copy" button if you have selected at least one vessel item
Click Confirm.
Budget scenarios are listed in the dropdown in the top center of the Budgets page.
The Budgets page contains two tabs for viewing template voyages and budgeted voyages from the selected budget scenario.
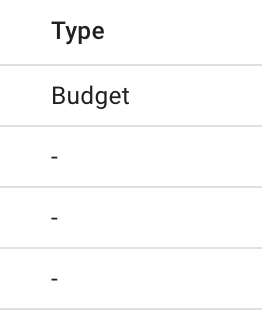
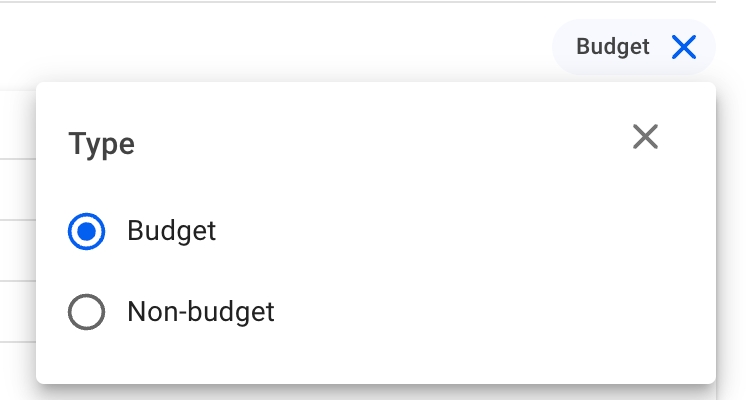
This list of scenarios includes both the types budget and non-budget scenarios. To effectively list the desired type of scenarios, you can filter the list based on the type you want to see, with the quick filter 'Type' found above the list:
In the Type column, you will immediately be able to detect whether a scenario is of type budget or a non-budget (' - '):
When you have located a template voyage, click on it and the details will show in a drawer on the right hand side. The drawer will also open after creating a new template voyage.
Template voyages have the template label next to the status selector to indicate that it is a template voyage.
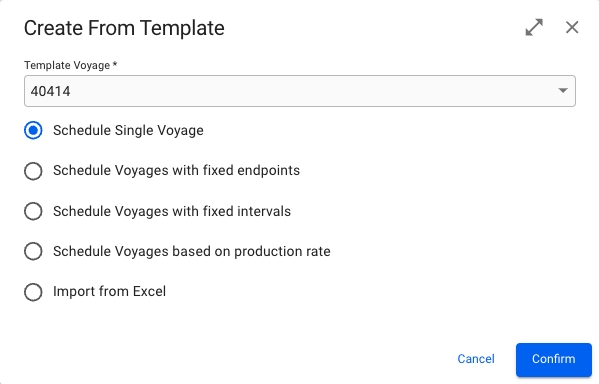
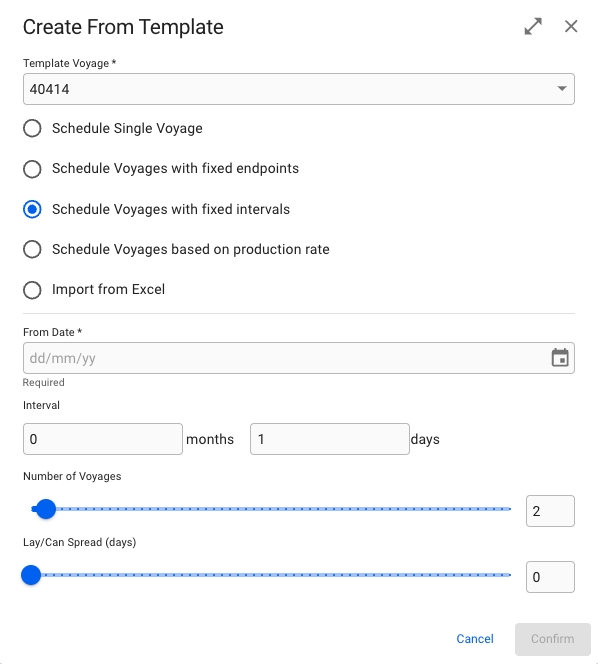
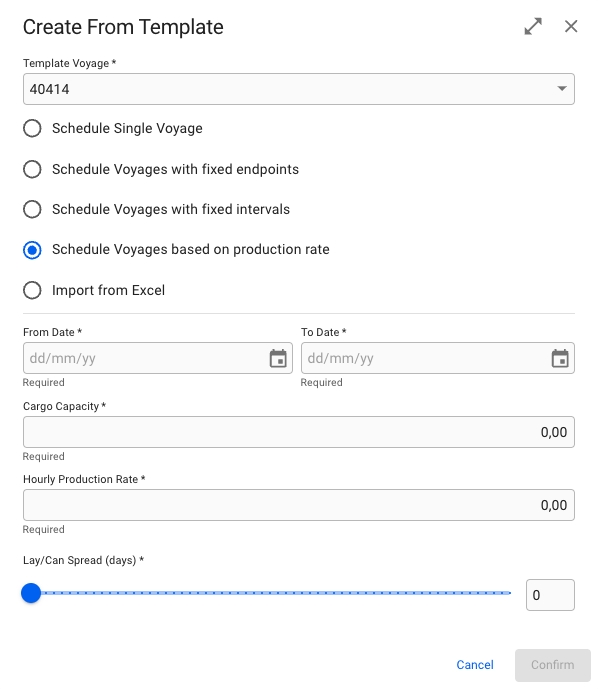
Template voyages have an additonal "Scheduled Voyages" tab. Voyages that are created from the selected template voyage are listed in this Scheduled Voyages tab. To create a new scheduled voyage click Add in the top right corner of the list. This will bring up a modal allowing you to choose between creating a single scheduled voyage, or multiple based on user input or import.
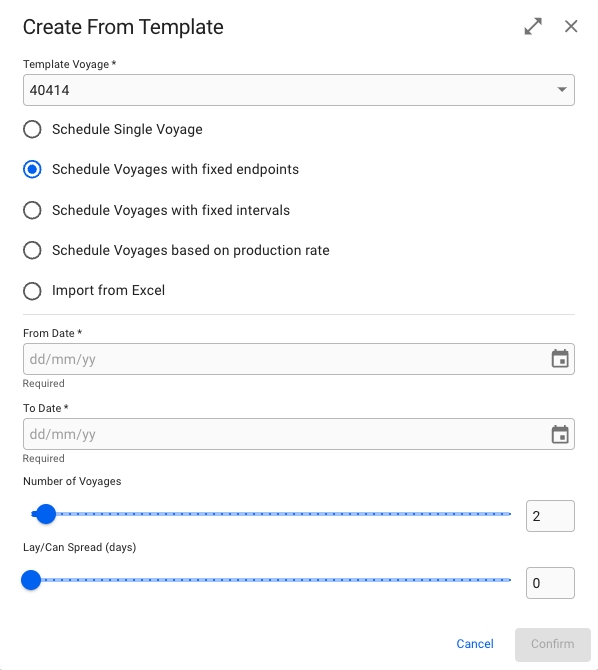
The "Schedule Voyages with fixed endpoints" option lets you define the number of voyages and an interval in which they will be evenly scheduled in.
When choosing "Schedule Voyages with fixed intervals", you instead define a start date, the number of voyages required, and then the number of days or months in between each voyage.
Lets you plan ahead voyages based on a storage capacity and hourly production rate by the cargo owner, such that the vessel will arrive in time to pick up the cargo before the storage overflows. Assumes the stores are empty at the start date. Laycan will start when the amount of cargo in the owner's storage has reached the specified Cargo Capacity.
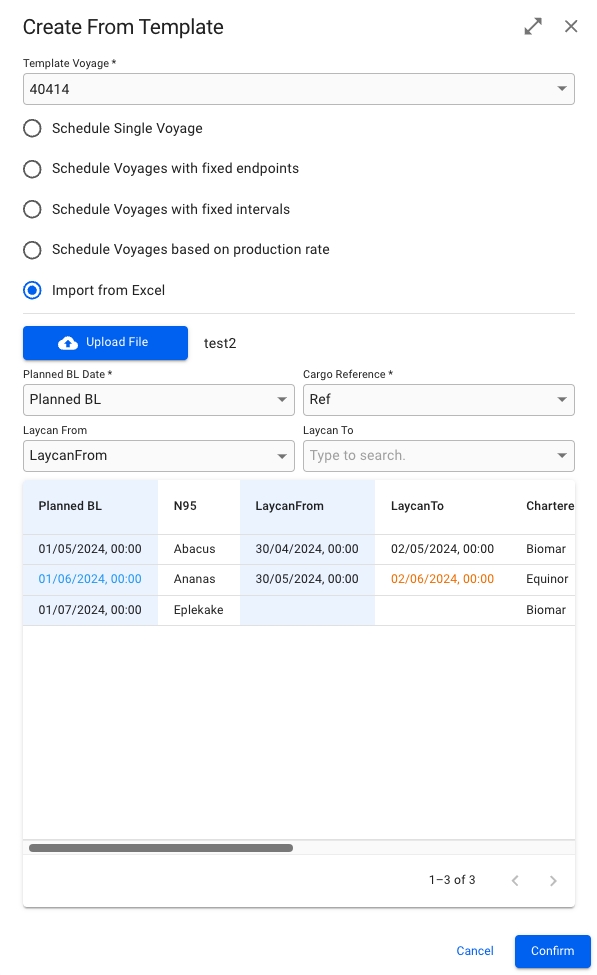
If using the "Import from Excel" option, the voyages are created in a slightly different manner. After uploading an .xlsx or .csv file, you choose which column to use for the planned B/L date and cargo reference. The laycan fields are optional, but if one is selected, both must be. The system will then create a number of voyages equal to the number of rows in the file, and set the planned B/L date and cargo reference on the performance cargo of the voyage. If laycan fields have been selected, those will also be set. Note however, that unlike the two other options for creating multiple voyages, the voyage start date is not set.
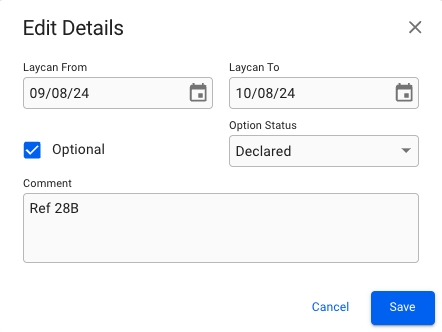
Clicking on one of the scheduled voyages will bring up the edit modal for that voyage. Here you can set laycan, option status, and make comments on the voyage.
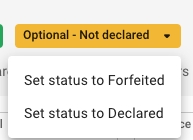
When opening one of the scheduled voyages from the list that has been marked as Optional, an additional option status chip is visible. Clicking it will allow you to set the option status from the voyage drawer.
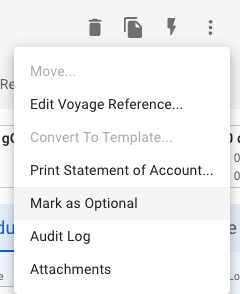
If the voyage has not been marked as Optional, you can set it in the secondary actions menu by clicking "Mark as Optional". To remove the Optional mark, open the menu again and click on the option.
The option status is also available in the tooltip of the Commitment voyages in the in FAS.
Option Status field is mandatory on a cargo
Status chip dropdown is only visible when the optional field is checked on the performance cargo (or the voyage is marked as optional)
Mark as Optional/Remove Optional mark is not available and/or is disabled for Template voyages and for voyages with statuses: 'Nominated', 'Operational', 'Operationally Closed', 'Invoiced' and 'Closed'
Follow the link below for further information on the Voyage drawer:
The scheduler board gives users an overview of the voyages that need to be scheduled. It shows unallocated, allocated and nominated voyages. The allocated and nominated voyages can be viewed on the bottom half of the board (Schedule), while the unallocated voyages can be viewed on the top half (Commitments).
The board is based on a Gantt schema, with the column headers being dates and the row headers being COA and SPOT for the Commitments section and vessel names for the Schedule section. The red vertical line indicates today's date.

Not possible to change the voyage status of an optional voyage with option status that is not 'Declared' to a status beyond 'Allocated' (i.e. 'Nominated', 'Operational', etc...)
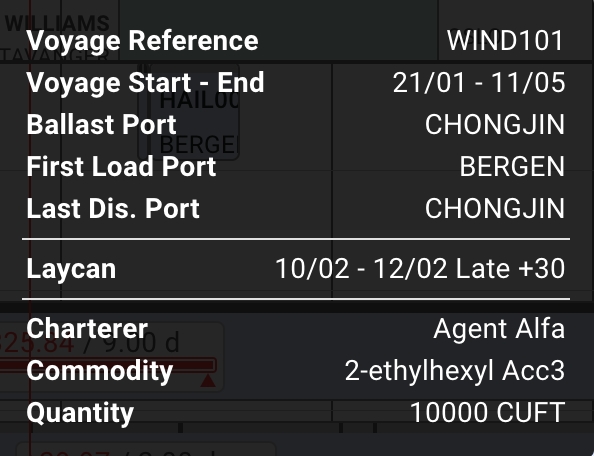
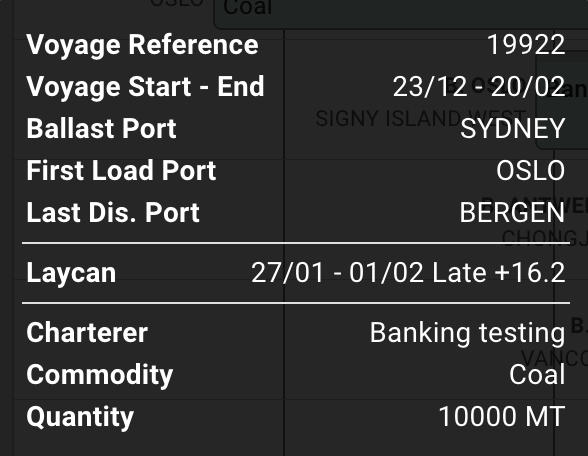
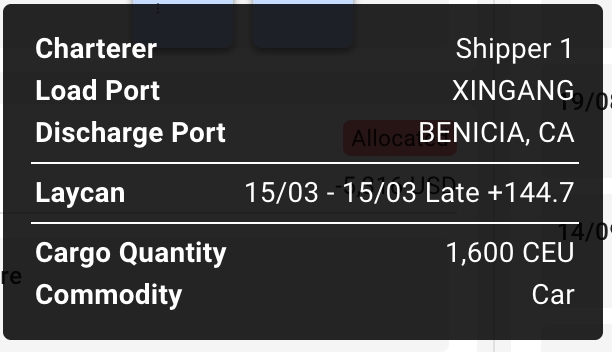
When hovering over a commitment bar, a tooltip will pop up with additional information about the voyage:
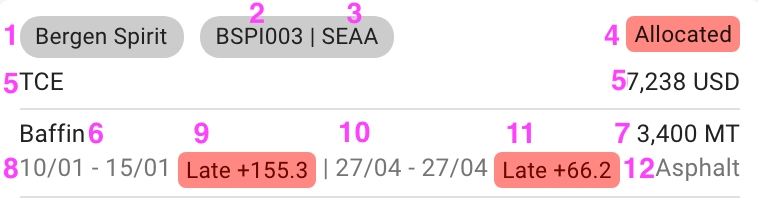
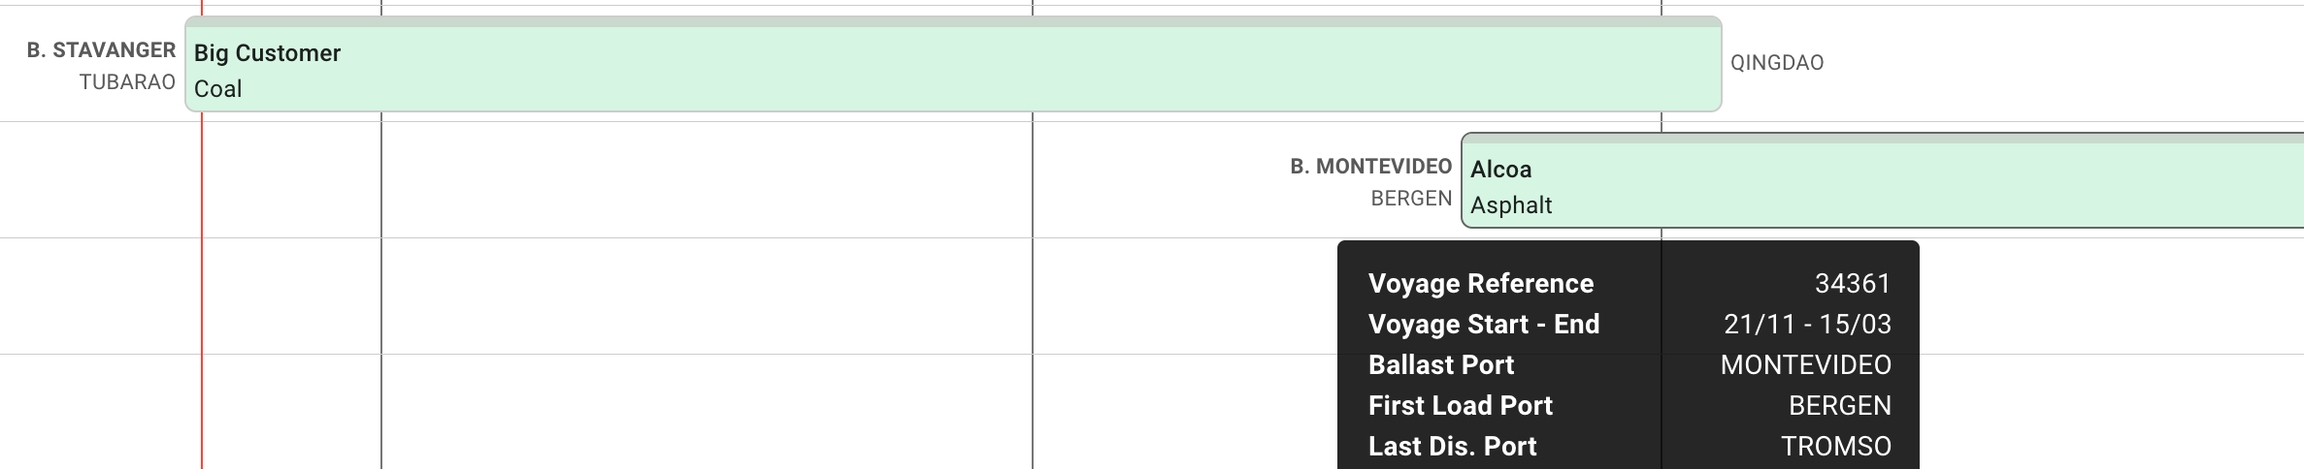
Scheduler bars can be found in the Schedule section and contain information about either allocated or nominated voyages, containing Reference No, Voyage Status, first Load Port and last discharge port. If the Laycan dates have been set, a Laycan indicator can also be viewed on a schedule bar. A timeline of the ballast and port calls can be viewed on top of each bar.
When hovering over a scheduler bar, a tooltip will pop up with additional information about the voyage:
You can choose between the quick filters specified for 'Commitments' or the 'Schedule'. They will be filtered separately in each of their respective sections of the board:
The period selector allows you to choose the time period of your liking, to easily display the voyages of that timeframe:
The quick filters decides the filtering of the voyages, while the period selectors allows selecting the period that the board will display.
It is possible to drag and drop the bars to unallocate or allocate a voyage. A scheduled voyage can be unallocated by dropping it into the commitments area. A commitment voyages can be allocated by dropping it onto an empty vessel row, or behind another allocated voyage.
Each of the voyage bars now have a new light grey border, and when you hover, it will be marked with a darker one to clearly indicate which one you are hovering over. The picture above illustrates the Commitment Bars, but the same applies to the Schedule Bars as well.
When selecting one of these bars, a blue and thicker border will display along with opening the Voyage drawer:
The blue border will stay active on the board until you do another action. The picture above illustrates the Commitment Bars, but the same applies to the Schedule Bars as well.
This border also displays and stays active when creating a new voyage and with the use of drag & drop of the bars.
The Cargo Management Board displays all allocated voyages and the cargos allocated to them. It also shows the unallocated cargos in Cargo Commitments column. For details on the Vessel Open Positions, voyage cards and board settings, see Open Positions Board.
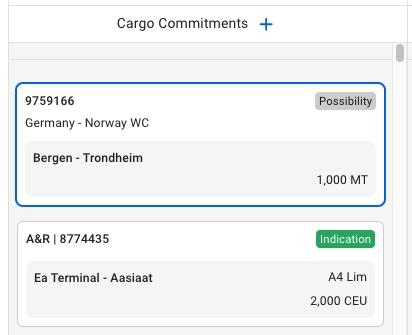
The Cargo Management Board displays all cargos belonging to the selected scenario. In the left-most column, we display the unallocated cargos (Cargo Commitments column), which are cargos that have not yet been allocated to a voyage. The other columns display voyage cards with the cargoes allocated to them.
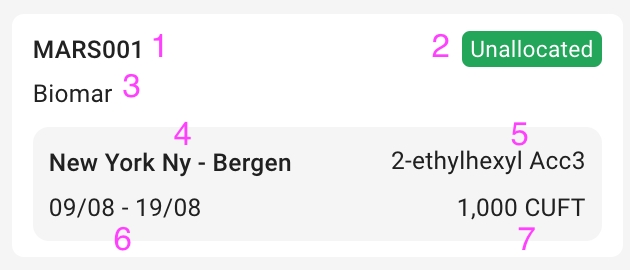
Each cargo contains the fields:
The right side of the Cargo Management Board contains all the allocated voyages and their cargos. On the right side of a voyage card, the cargo cards allocated (or dragged) to the voyage are displayed. Each cargo displays the Charterer, Gross Weight and Cargo Status, while illustrating graphically the Load Ports and Discharge Ports. These cargos can be moved by dragging and dropping between the voyages of the same Trade:
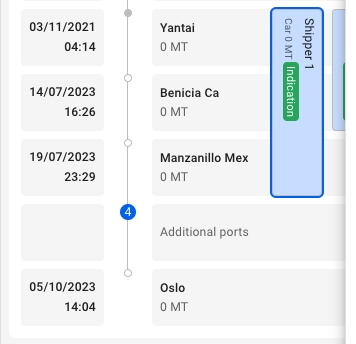
The Additional ports icon indicates how many more ports are "hidden" on the voyage. You can use the tool to adjust them accordingly.
The Cargo Cards also has indication lines to help you interpret the Laydays and Arrival Windows for each cargo, graphically.
Laydays: indication line at the top of the cargo. Arrival Window: indication line at the bottom of the cargo.
Color indicator:
if early: blue
if late: red
if on time: normal / no color
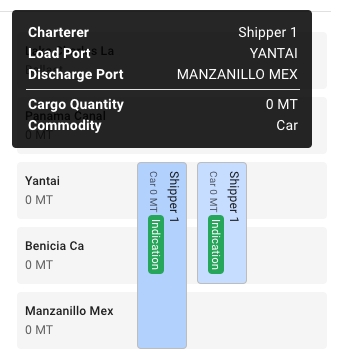
By hovering over a cargo card or on a port call row, a tooltip can be viewed. Fields in the tooltip that contain no data are hidden:
The following fields are available within the cargo card- and port call tooltips:
Each of the unallocated cargo cards now have a new light grey border, and when you hover, it will be marked with a darker one to clearly indicate which one you are hovering over.
When selecting one of these cards, a blue border and thicker border will display along with opening the Cargo drawer:
Along with displaying the cargo tooltips, we now get a darker shadow on the cargo when hovering over it:
When selecting one of the allocated cargoes, a blue border will display here as well, along with opening the Cargo drawer:
It is possible to access the cargo drawer by clicking on any allocated voyage in any of the boards/lists in FAS (or outside), and then opening the 'Cargo' tab. Also, in the Cargo Management Board, you can access the cargo drawer by clicking on a cargo commitments to the left, or directly on an allocated cargo on the right (on the allocated voyages).
Inside a chosen , you will be able to create new cargoes in based on allocated or unallocated voyages.
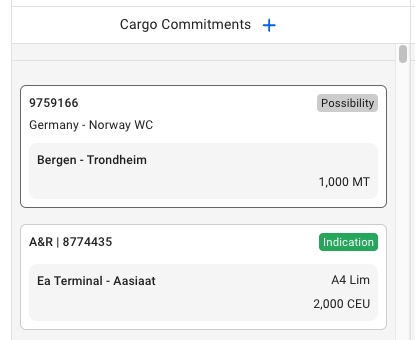
In the , next to the Cargo Commitment title, there is a icon. Here, you can find all the different types of cargoes to create, and their modals. Follow the same steps as to create a new cargo. The new cargo will be placed in this Cargo Commitments column based on the given Laydays. If not given, then they will be placed at the bottom of the list.
On any allocated voyage in FAS (or ), you can find the 'Cargo' tab at the top of the voyage drawer. Above the cargo list, there is a icon there. Also here, you can of cargoes, and display their modals. But- there is a new design here as well:
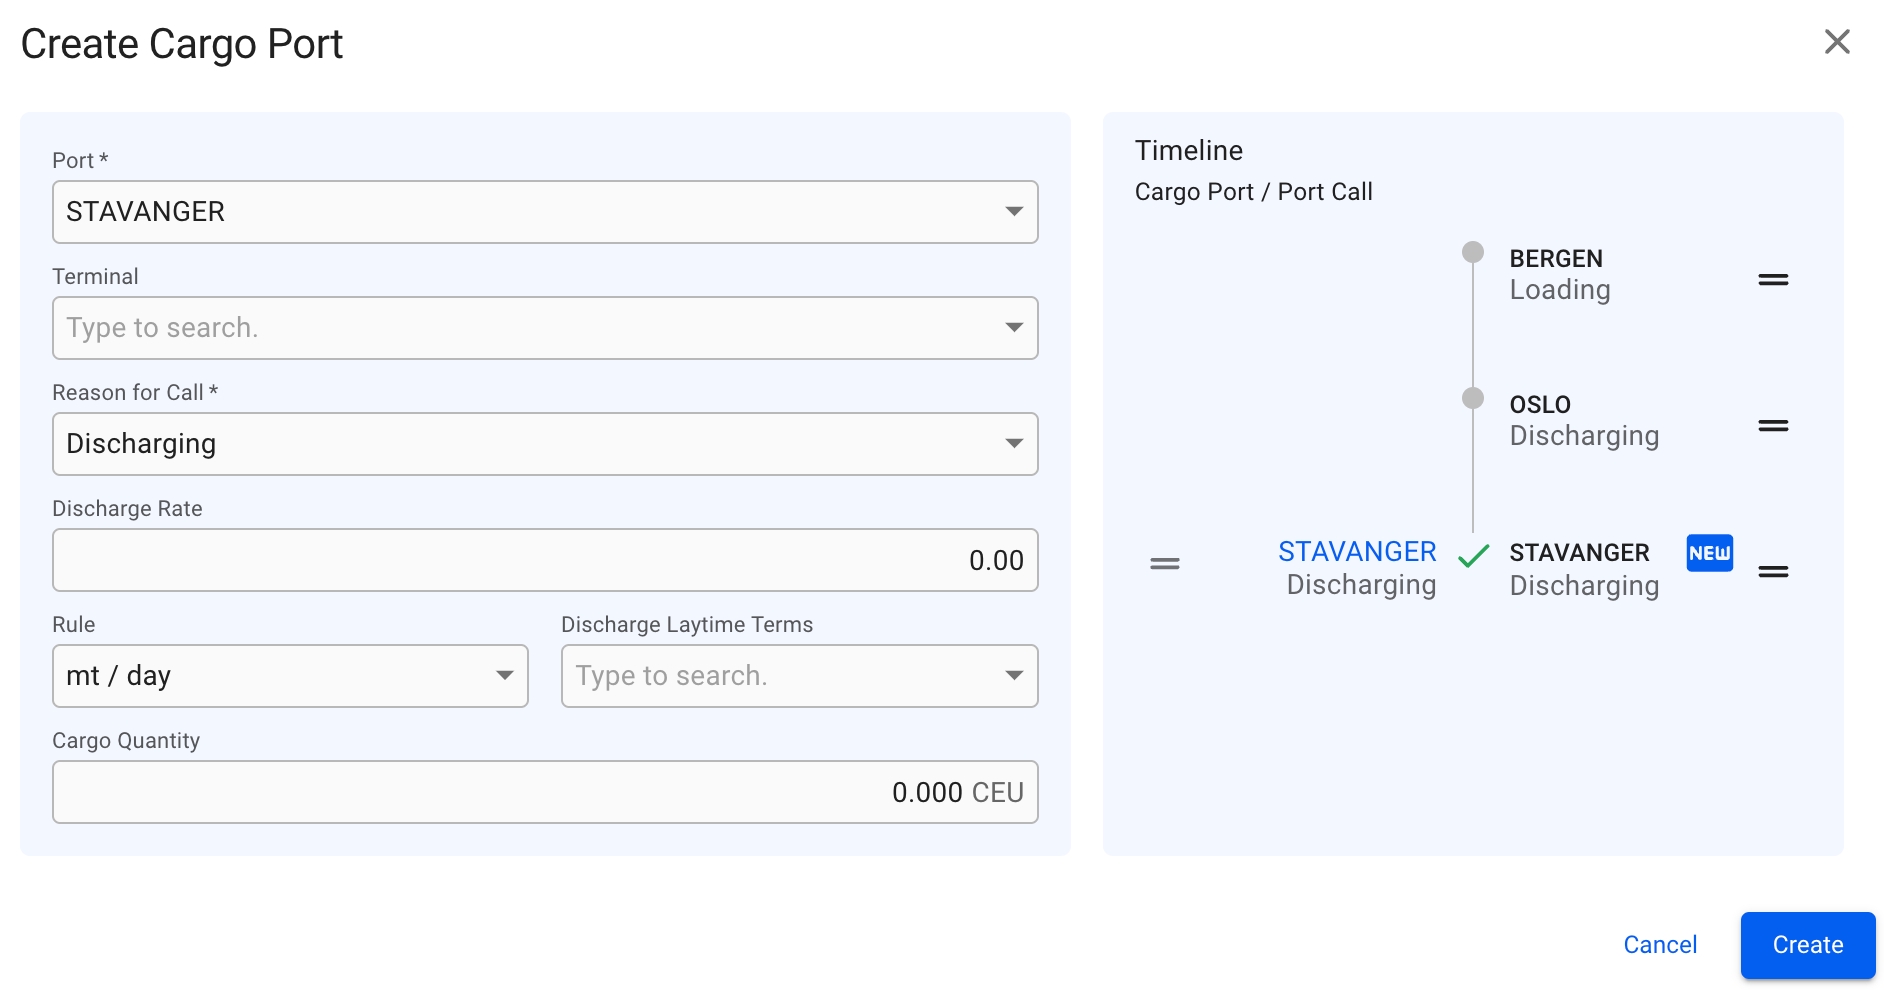
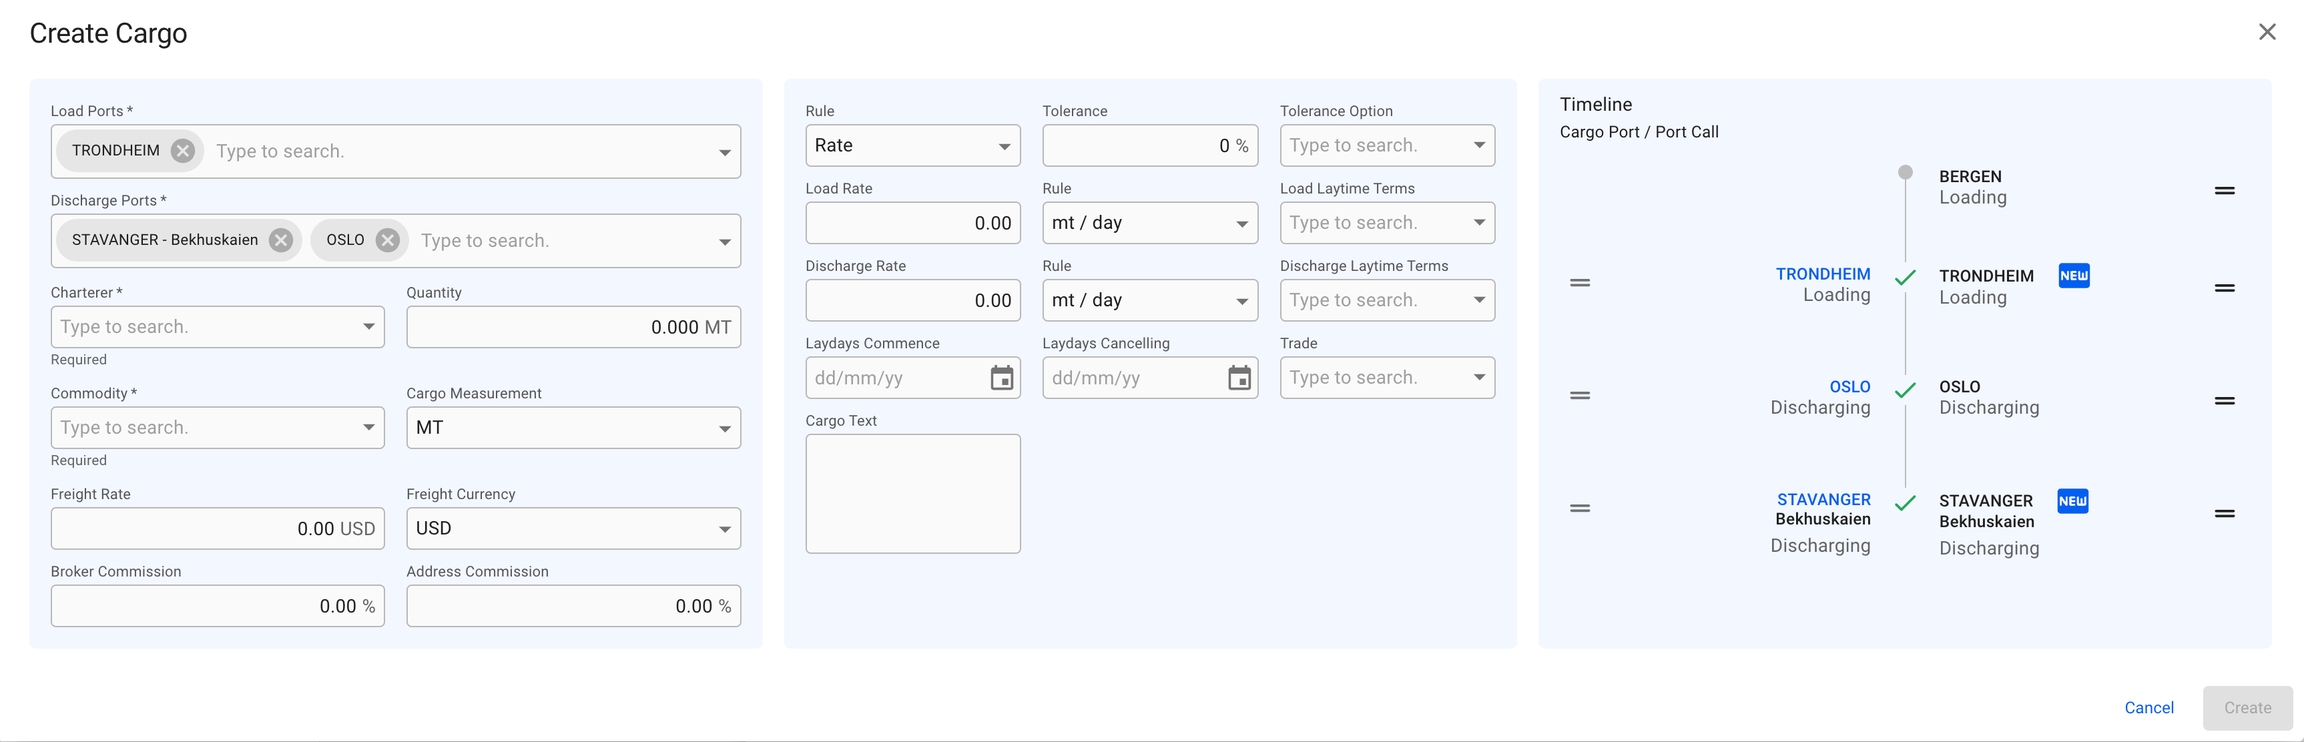
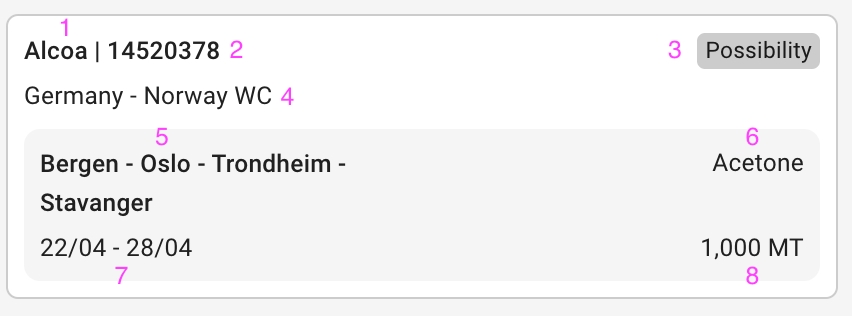
Please click on the picture to get better view of the details. The key details are the same as earlier described , but as you can see- there is some difference in the Timeline component this time. On a voyage, we have port calls. These will be matched with the new cargo ports of the cargo you want to create. The CP/PC row marked with 'NEW' contains the new cargo ports that are added from the fields on the left-most section, meaning port calls 'Trondheim' and 'Stavanger' didn't exist before, but are now added. At the same time, we know that 'Bergen' and 'Oslo' port calls existed from before, so if you want to add a cargo port 'Oslo', it will now be directly linked to the port call (and the 'NEW' icon is not displayed). Read more about the drag and drop features and the new Create Cargo Port modal down below.
On the allocated cargoes mentioned above, you will have drag and drop options on both sides of time timeline. On the left side, you will be able to drag a cargo port to match with a corresponding port call, but they both have to have the same reason for call. On the right side, you will be able to drag the whole CP/PC row to change the order in these ports on the voyage. The same features are implemented in the new Create Cargo Port modal:
Read about the new Create Cargo Port modal for unallocated cargoes .
In Open Positions Board: to allocate or unallocate a voyage, you can drag and drop the different voyage cards between the Voyage Commitments column (the unallocated voyages) and the different vessels displayed.
In Scheduler Board: to allocate or unallocate a voyage, you can drag and drop the different voyage bars between the COA and SPOT rows (the unallocated voyages) and the different rows of vessels displayed.
In the secondary actions menu (3 dots), it's possible:
To unallocate a cargo (unless it's already unallocated)
To allocate a cargo
To delete a cargo
To relet a cargo
You can filter unallocated cargoes based on Charterer, Cargo, Trade and Area.
You can filter the allocated voyages based on Voyage, Vessel, Area and More.
More containing Commodity, Charterer, Trade, Commodity Class and Cargo Type.
You can filter the cargoes based on Cargo Reference, Counterpart, Commodity, Vessel, Voyage Reference and Cargo Status. This are placed above the list.
You can sort the cargoes based on Created Date, Cargo Reference, Counterpart, Commodity and Cargo Status, by click on this icon: .
You can also header sort on the cargoes based on all the headers of the list, by click on the arrows: .

Inside a chosen , you will be able to create new voyages based on the vessels available. Next to each of the vessel names, there is a icon. In each of these, you can create a new voyage based on that vessel.
You can read more here to learn about the different types of voyages to create: .

Commodity
Laydays Start to End Dates
Quantity and Measurement Unit
Commodity
Quantity Option Terms (%)
Quantity Option
Comment (Field Comment in the Cargo Drawer)
Charterer
Cargo Reference
Cargo Booking Status
Trade
Cargo Ports (both L and D)
Charterer
Quantity Loaded
Load and Discharge Ports
Quantity in Transit
Laycan From and To dates and Missed By Label
Quantity Discharged
Arrival Window From and To dates and Missed By Label
Quantity and Measurement Unit
In Cargo Management board: to allocate or unallocate a cargo, you can drag and drop the different cargo cards between Cargo Commitments column (the unallocated cargoes) and the different allocated voyages displayed.
To tranship a cargo
To preship a cargo
To transfer a cargo
To edit Cargo Reference
To connect to CoA
To view the Audit Log
To access or upload voyage Attachments
You can use the settings button to adjust your view of the voyages.
Actions that are only available for MASTER, and not in a specific scenario, are marked with "(only MASTER)" below.
In Open Positions Board: to allocate or unallocate a voyage, you can drag and drop the different voyage cards between the Voyage Commitments column (the unallocated voyages) and the different vessels displayed.
In Scheduler Board: to allocate or unallocate a voyage, you can drag and drop the different voyage bars between the COA and SPOT row (the unallocated voyages) and the different rows of vessels displayed. s
In Cargo Management board: to allocate or unallocate a voyage, you can drag and drop the different voyage cards between the different vessels displayed.
In the secondary actions menu (3 dots), it's possible:
To edit a Voyage Reference
To nominate a voyage, or cancel its nomination (only MASTER)
To allocate or unallocate a voyage (only MASTER)
To move a voyage (only MASTER)
To view the Audit Log
To access or upload voyage Attachments
You can filter unallocated voyages based on Voyage, Vessel, Trade and More.
More containing Commodity, Charterer, Trade, Commodity Class and Cargo Type.
You can filter the allocated voyages based on Voyage, Vessel, Area and More.
More containing Commodity, Charterer, Trade, Commodity Class and Cargo Type.
You can use the master to filter through larger date periods.
You can use the button to adjust your view of the voyages.
You can filter unallocated voyages based on Charterer, Cargo, Trade and Area.
More containing Vessel name, Vessel Type, Trade and Business Unit.
You can filter Schedule voyages based on Vessel, Voyage and Area.
You can select a specific period to display the vessels.
You can use the arrows to move horizontally to view the voyage details.
You can use the master date filter to filter through larger date periods.
You can filter the voyages based on My Voyages, Vessel, Reference Number, Voyage Status, Ballast, Load Port, Discharge Port and Trade.
You can sort the voyages based on Ballast Port, Charterer, Commodity, Reference Number, Trade, Vessel, Voyage Status and Created Date.
You can use the master date filter to filter through larger date periods.


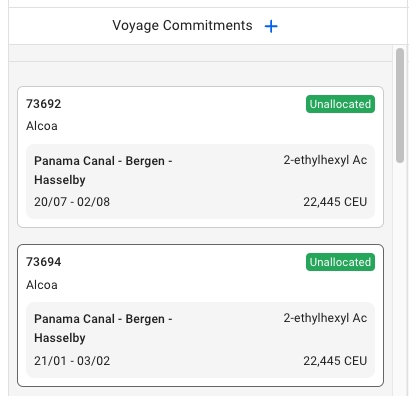
The board has two main areas- unallocated voyages (Voyage Commitments) on the left, and allocated voyages on the right.
Each element in the board represents either a voyage (unallocated), a voyage with cargo(s) (allocated), a vessel, a vessel open position card or a last port call card.
We call the yellow card on the vessel columns the vessel open position card. It displays the start of the schedule of each ship that is displayed on the board. You can click on the card to open the vessel open position drawer. For any scenario that is not the MASTER, you can edit the port and date of the vessel open position. This changes where your ship starts in the scenario and reschedules the consecutive voyages.
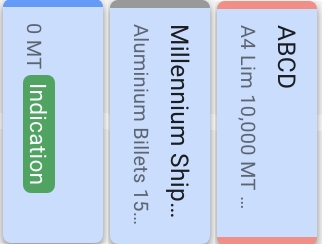
In the Voyage Commitments column, the left-most column of the board, we have a list of Unallocated Voyages with a new design:
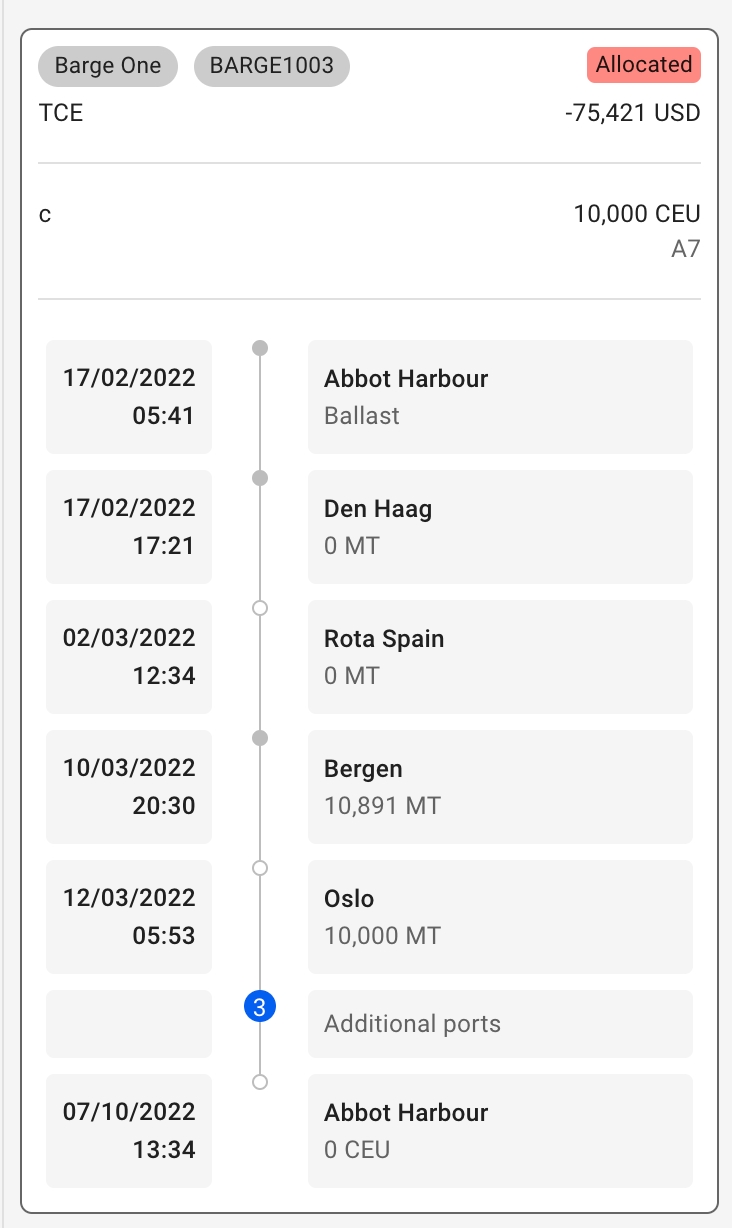
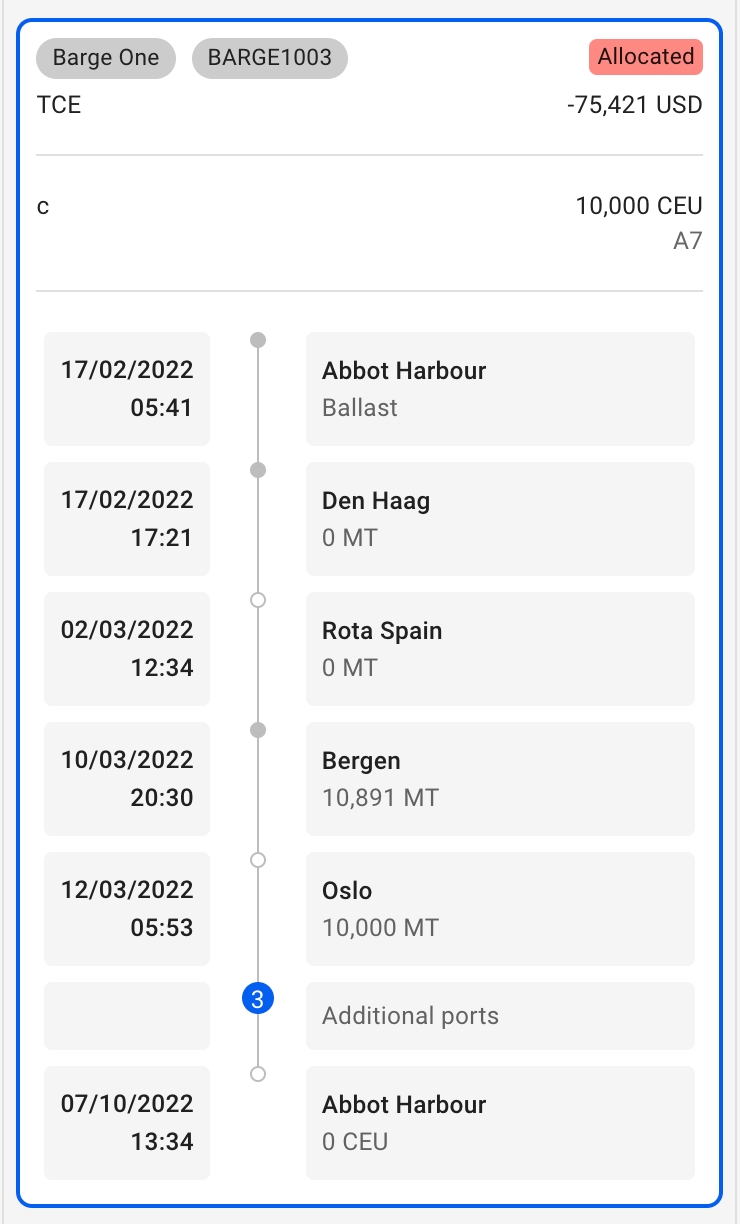
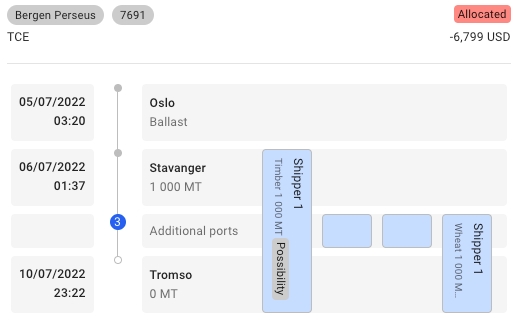
The Allocated Voyages Card also contains a detailed timeline:
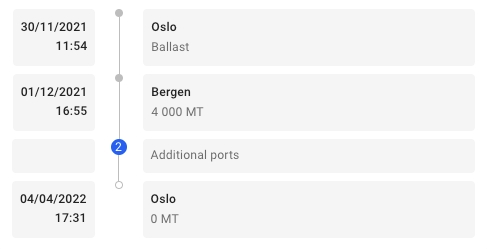
On the left side of the Voyage Card, all the arrival times are listed. The date and time listed for the Ballast Port is the voyage start date. On the right side of the timeline, the port names are listed, including the Ballast Port. The total cargo gross weight on board after the port call is listed under the port name.
Number of Displayed Ports
It is possible to change how many ports are listed at a time by using the settings. The minimum amount of ports that can be displayed is 3, the Ballast Port, the first load port and the last discharge port of a voyage. The number in the blue circle indicates how many ports are hidden.
For each vessel we have a card with information about when it is next available. This can be found after the last voyage in a vessel's schedule.
In the Open Positions Board you can drag and drop voyages to allocate or unallocate them, move them between vessels and change their order on a vessel.
Click any voyage card to open the and access additional information and actions.
You have a large variety of filters available on the board. Filtering for Voyage Commitments (left-most column) and Allocated Voyages (rest of the columns) is separate. Filtering is persisted when navigating between the boards as well as when navigating to different menu items.
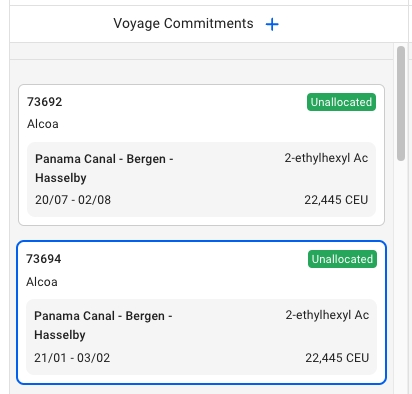
Each of the unallocated voyage cards now have a new light grey border, and when you hover, it will be marked with a darker one to clearly indicate which one you are hovering over.
When selecting one of these cards, a blue border and thicker border will display along with opening the Voyage drawer:
We have here as well now added a new light grey border, and when you hover over it, here too it will be marked with a darker one to clearly indicate:
When selecting one of the allocated voyages here too, the same type of blue border will display: along with opening the Voyage drawer as well:
Now when you hover over a Vessel Open Position card, it displays a darker grey tone on its border:
When you select the card, the border becomes the same blue active border as previously mentioned, along with opening the Vessel Open Position drawer:
This border will stay active until you do another action on the board.
At the top right of the board, click on Settingsto open the settings window.
You can select the number of columns to show in the board either by moving the slider or by typing in a number.
You can select the number of ports to show in the port call timeline either by moving the slider or by typing in a number. The ballast, first loading and last discharging ports are always visible.
The column grouping decides which column a card should go into. The default setting is to group by vessel, but you can also select load area or discharge area. The area groupings depends on the selected area report under account preferences.
The row grouping setting decides how the cards are grouped vertically. By default there is no row grouping. You can also select to group by month or week.


Laydays Start to End Dates
Quantity and Measurement Unit
TCE and Currency
Performance Cargo:
Charterer
Quantity and Measurement Unit
Laydays Start to End Dates
Days out of Laycan (Early/Late Indicator)
Arrival Window Start to End Dates
Days out of Arrival Window (Early/Late Indicator)
Commodity
Voyage Reference
Voyage Status
Charterer
Port calls
Commodity
Voyage:
Vessel
Voyage Reference
Trade Code
Voyage Status
1
Vessel
2
Last port call's ETD
3
Port