Layout:
The Voyages module contains of a large list of different types of voyages; unallocated, estimate, allocated, nominated, etc. In this list, you can filter the voyages based on several key endpoints to effectively view the required information on your screen. There is a sort icon to the far right, with different options for sorting the list as well. You can read more here: Sorting and Filtering Lists.
Below you can click to read how to create different types of voyages:
By default, the new voyages have Voyage Progress set to "Estimate" and Voyage Status set to "T".
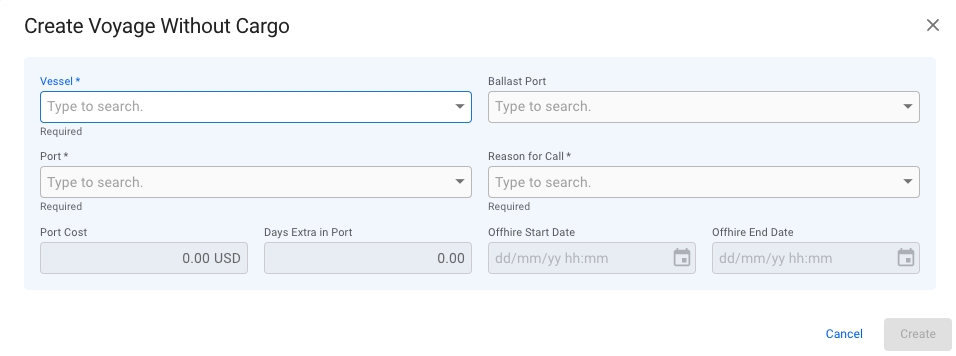
There may be several reason for having a voyage without any cargo onboard the vessel. By using the Create Voyage Without Cargo option, you can for instance plan out repositioning of your vessels, or schedule dry docking.
Open the Voyages module from the menu on the left.
On the top right corner, click the icon.
Select Create Voyage Without Cargo.
After you have filled in the required information, you can click Create.
Vessel
Yes
Ballast Port
No
If none is selected the selected Port will be used.
Port
Yes
Reason For Call
Yes
If Dry Dock is selected, an Offhire record will be created.
Port Cost
No
Only available if Reason For Call is set to Bunkering or Extra Port.
Days Extra In Port
No
Only available if Reason For Call is set to Bunkering or Extra Port.
Offhire Start Date
Yes (If enabled)
Only available if Reason For Call is set to Dry Dock.
Voyage Start Date will automatically be locked and set to the selected Offhire Start date.
Offhire End Date
Yes (If enabled)
Only available if Reason For Call is set to Dry Dock.
Must be after Offhire Start Date.
Open the Voyages module from the menu on the left.
On the top right corner, click the icon.
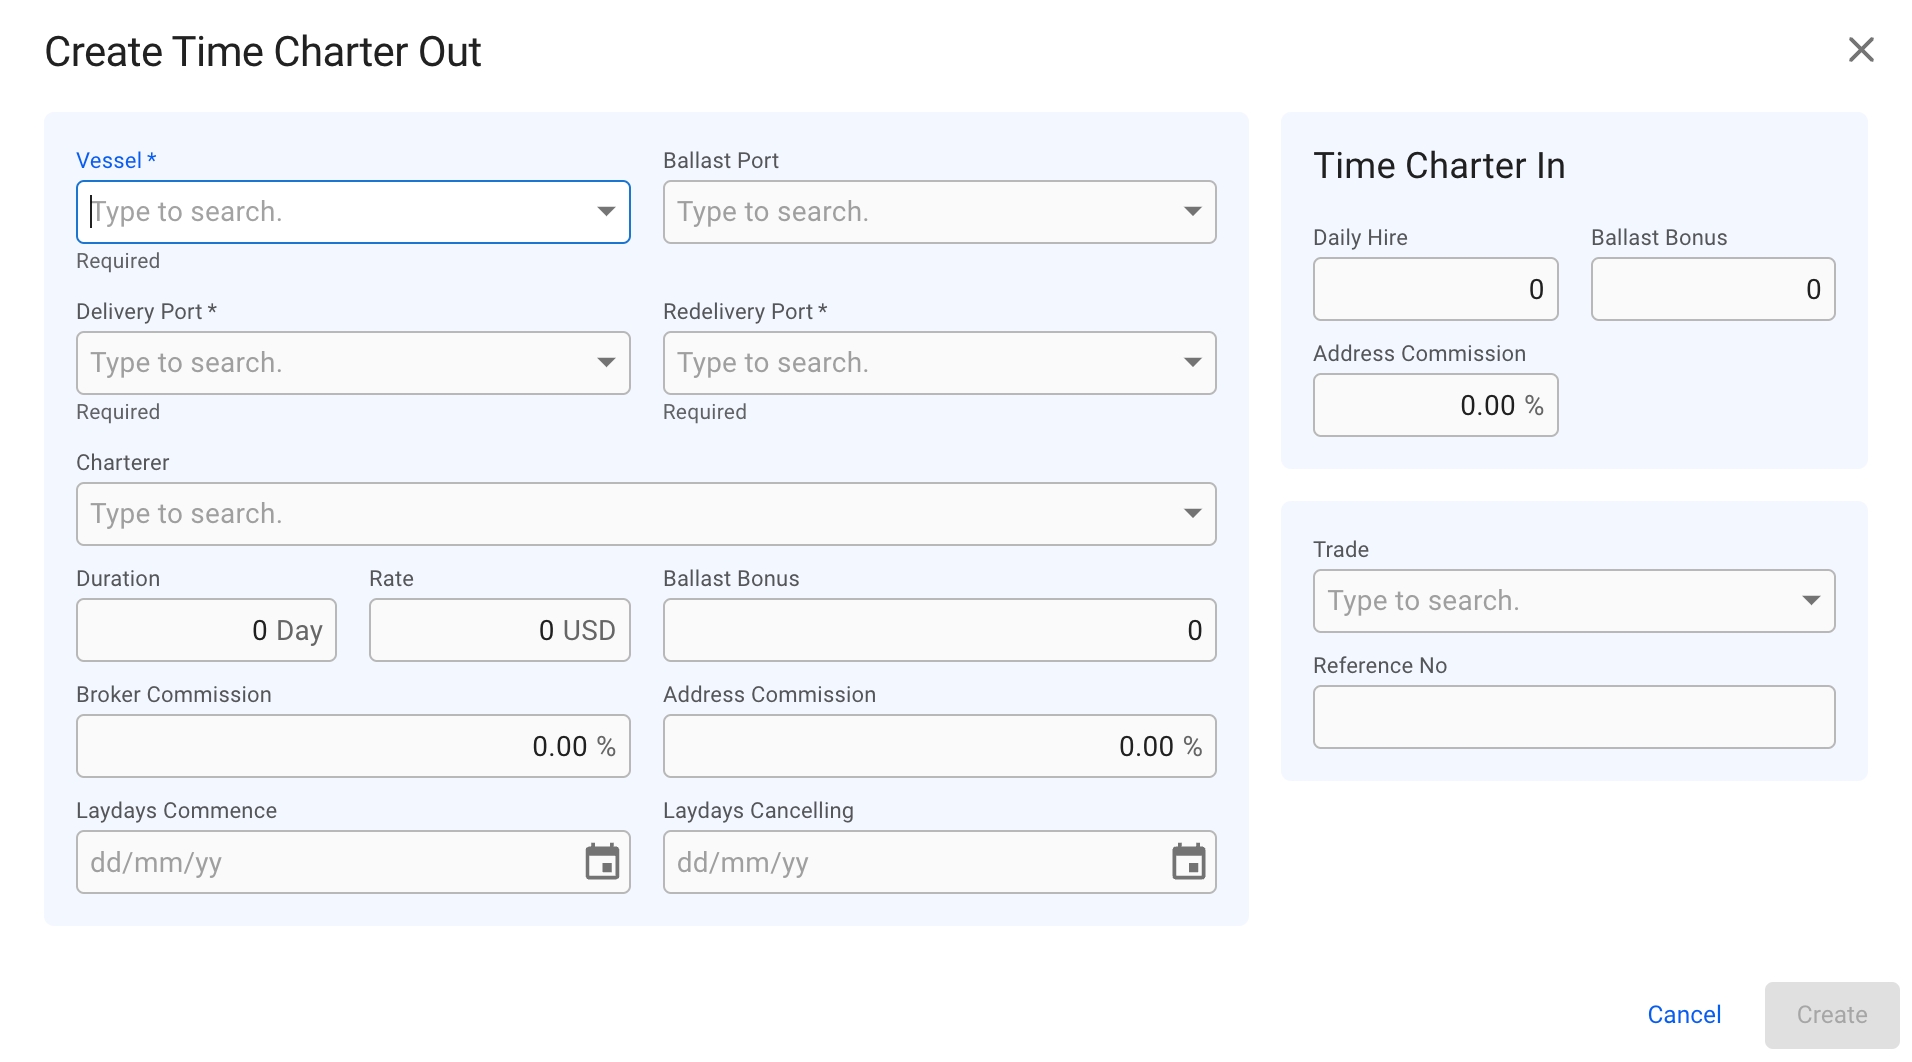
Select Create Time Charter Out.
In the modal, you can fill in the required fields and add any additional information about the new TC voyage.
After you have filled in, you can click Create.
Vessel
Delivery Port
Redelivery Port
After choosing a vessel, you will now be able to choose a Ballast Port.
The modal is now draggable, making it easier to see the information "behind" the modal. Hover over the title or the top of the modal to activate it.
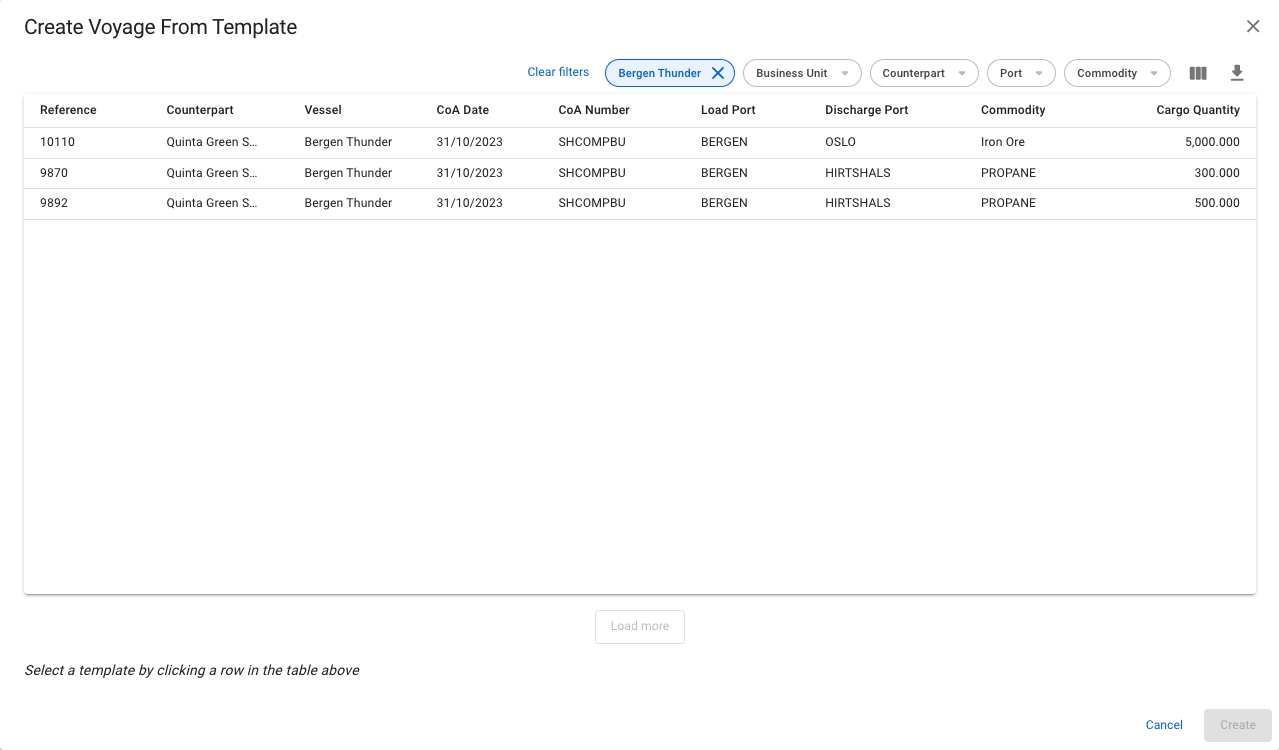
To efficiently create a voyage, and link them with CoAs, you can create voyage based on a . The CoA Templates Voyage are the template voyages that are maintained in the Budgets module.
Open the Voyages module from the menu on the left.
In the top right corner, click Create .
Select Create Voyage From Template.
In the modal, you can apply various filters to narrow down the selection. Clicking a CoA template voyage selects it. The new voyage will inherit the values from the template displayed in the modal, as well as the Company and Business Unit of the template.
Click Create.
Creating a voyage charter is fast and easy. The minimum amount of details required is a vessel and a port for loading and discharging.
Open the Voyages module from the menu on the left.
On the top right corner, click the icon.
Select Create Voyage Charterer.
Fill in the details manually, or choose between using a CoA Template Cargo or an existing unallocated cargo as basis for the voyage.
Click the Create-button.
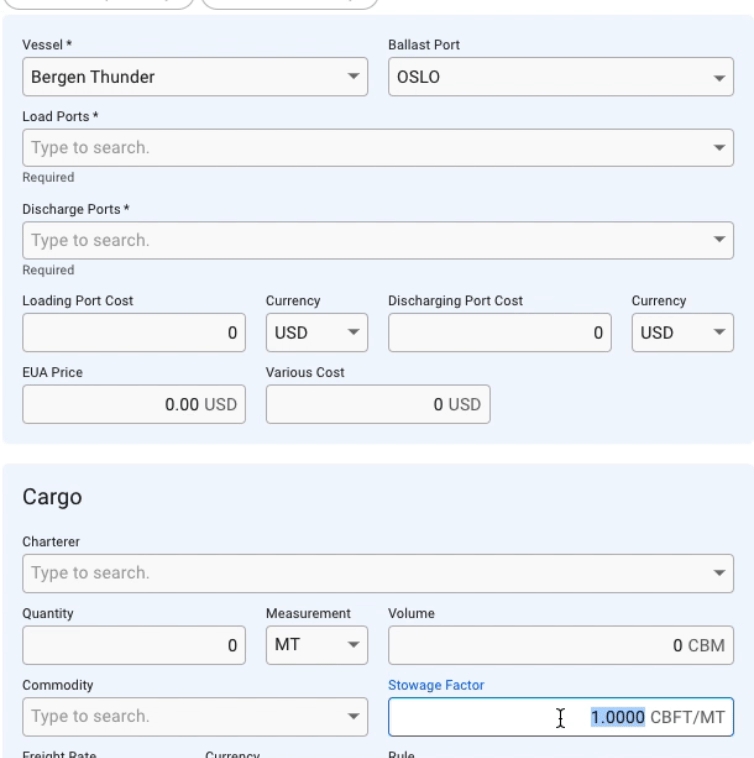
After choosing a vessel, the previous Port on the Vessel will be set as Ballast Port. This can be overridden by entering another Port, if no Ballast Port is set then the first Load Port will be used.
To create the voyage using a CoA template as a basis, click the Use CoA Template Cargo button in the top of the modal. This will bring up another window, allowing you to select a template from a list of CoA templates. More details can be found here: Create Cargo From CoA Template.
Using a CoA template will give the voyage and cargo the same Company and Business Unit as the CoA.
It is possible to create a new voyage and allocate an unallocated cargo by using the Use Unallocated Cargo button in the top of the modal. Clicking it will bring up another window with a list of unallocated cargos. Filter and search as needed, and select a cargo from the list.
After choosing a cargo, the create voyage modal will be automatically filled in with all the details from the cargo. Only the fields that are not coming from the cargo will remain editable.
When entering Quantity, Volume or Stowage Factor, the modal will automatically calculate the corresponding value. Updating Quantity or Stowage Factor will update Volume, and updating Volume will update the Stowage Factor. Selecting a Commodity will default the Stowage Factor to that of the commodity.
If the optional preference SF_INTAKE_CALCULATION is enabled on your company's system, the behaviour of the modal is changed slightly.
Stowage factor will change from being System Volume Unit / System Weight Unit, to Cubic Feet / System Weight Unit
Updating Volume will update Cargo Quantity
If a vessel is selected, updating Stowage Factor will calculate the maximum amount of cargo the vessel can carry, restricted by vessel deadweight and cubic capacity.


