Loading...
Loading...
Loading...
Loading...
Loading...
Loading...
Loading...
Contains invoices list, pending receivable list, pending payable list and pending hire payable list
Select the tab corresponding to the view you would like to see in the invoices module.
Invoices is showing a list of invoices of various statuses
Pending receivable is showing a list of pending document lines for receivable items
Pending payable is showing a list of pending document lines for payable items, except hire payable
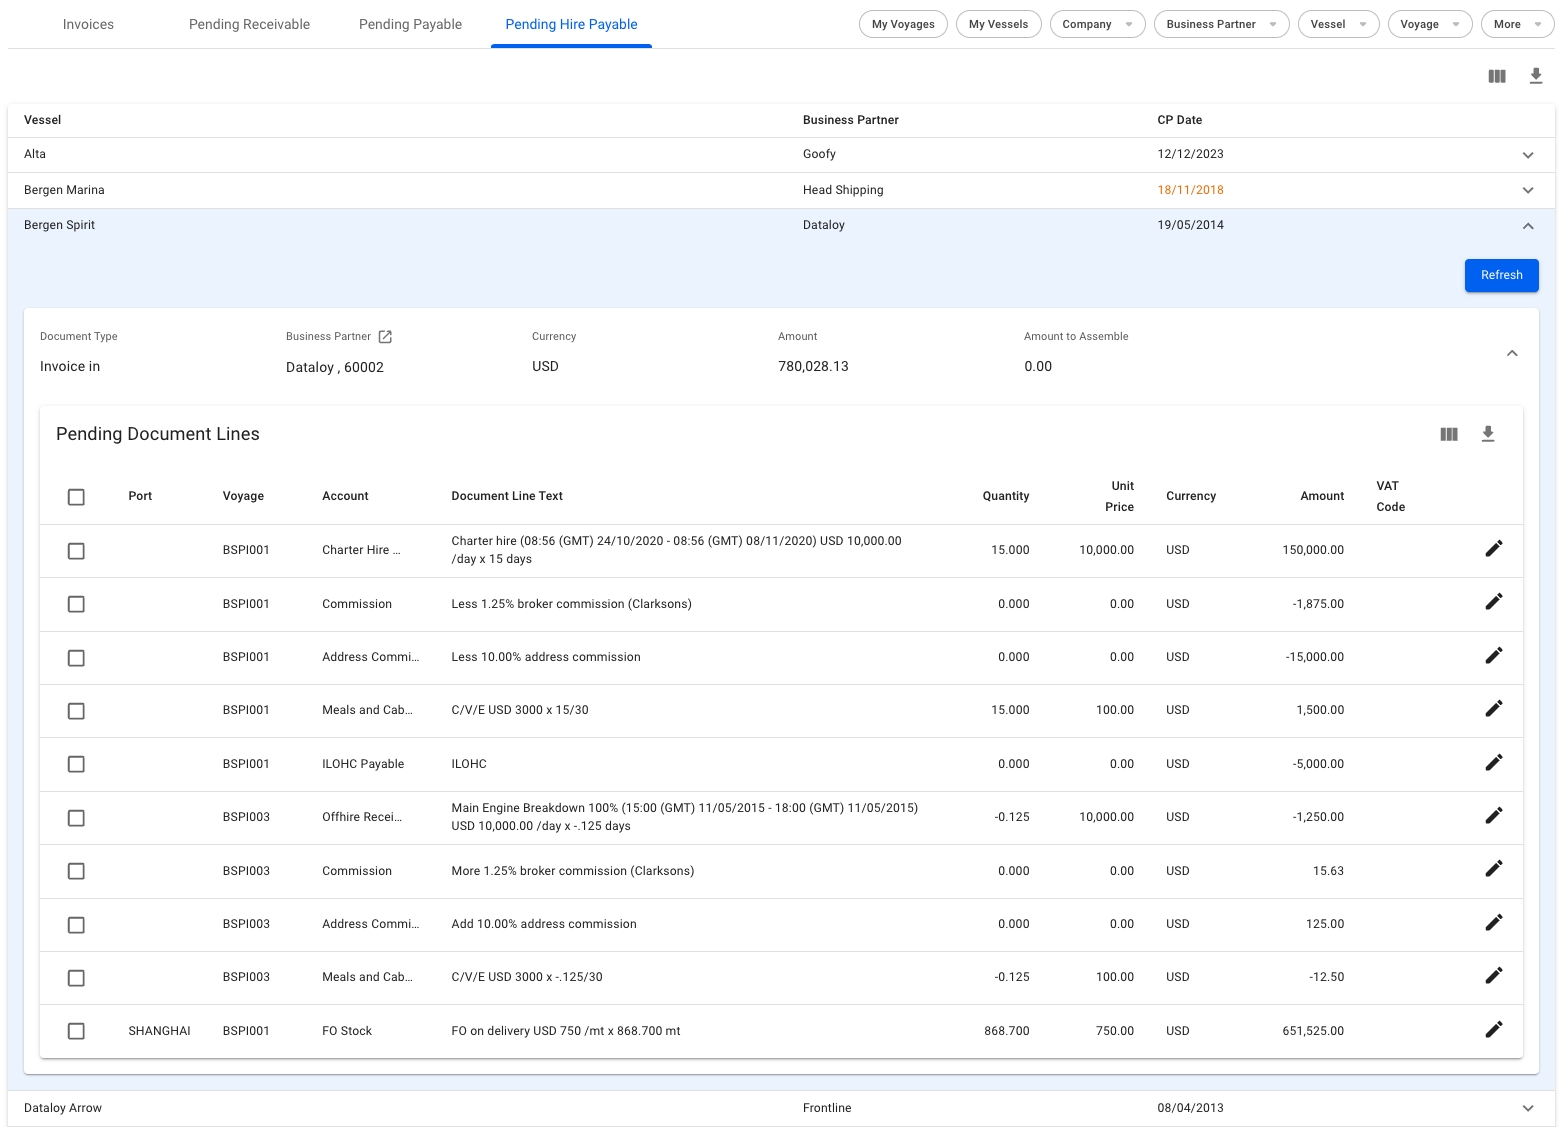
Pending hire payable is showing a list of pending document lines for hire payable items
List of all invoices
This list is showing all invoices with status Assembled, Ready For Posting, and Posted. Numerous filter-options are available, such as accounts receivable/payable, companies, voyages et cetera. These filters are persistent across all four tabs.
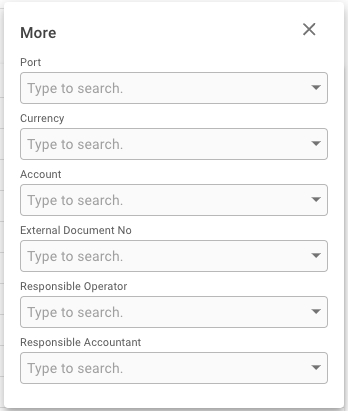
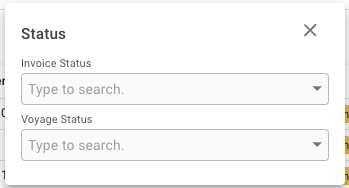
The Status filter allows you to filter on both Voyage and Invoice Status. By clicking on the More-filter, options for Port, Currency, Account, External Document No, Responsible Operator and Responsible Accountant can be selected.
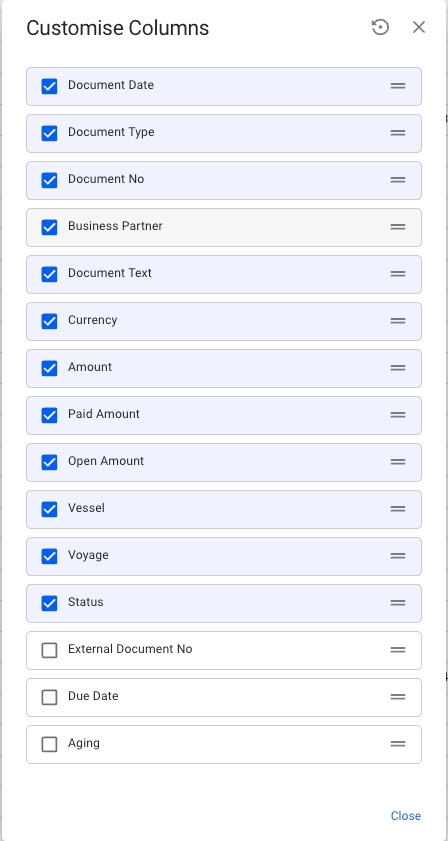
Due to the extensive amount of data being displayed, some columns are hidden by default to prevent visual clutter. If you wish to see the following columns, you can turn them on in the customise columns menu.
External Document No
Due Date
Aging
Editing document lines and assembling Receivable, Payable and Hire Payable invoices
These three tabs lists all unprocessed Voyage Charter and Time Charter invoice proposals, grouped by either voyage or vessel for Receivable and Payable invoices, and contract for Hire Payable invoices.
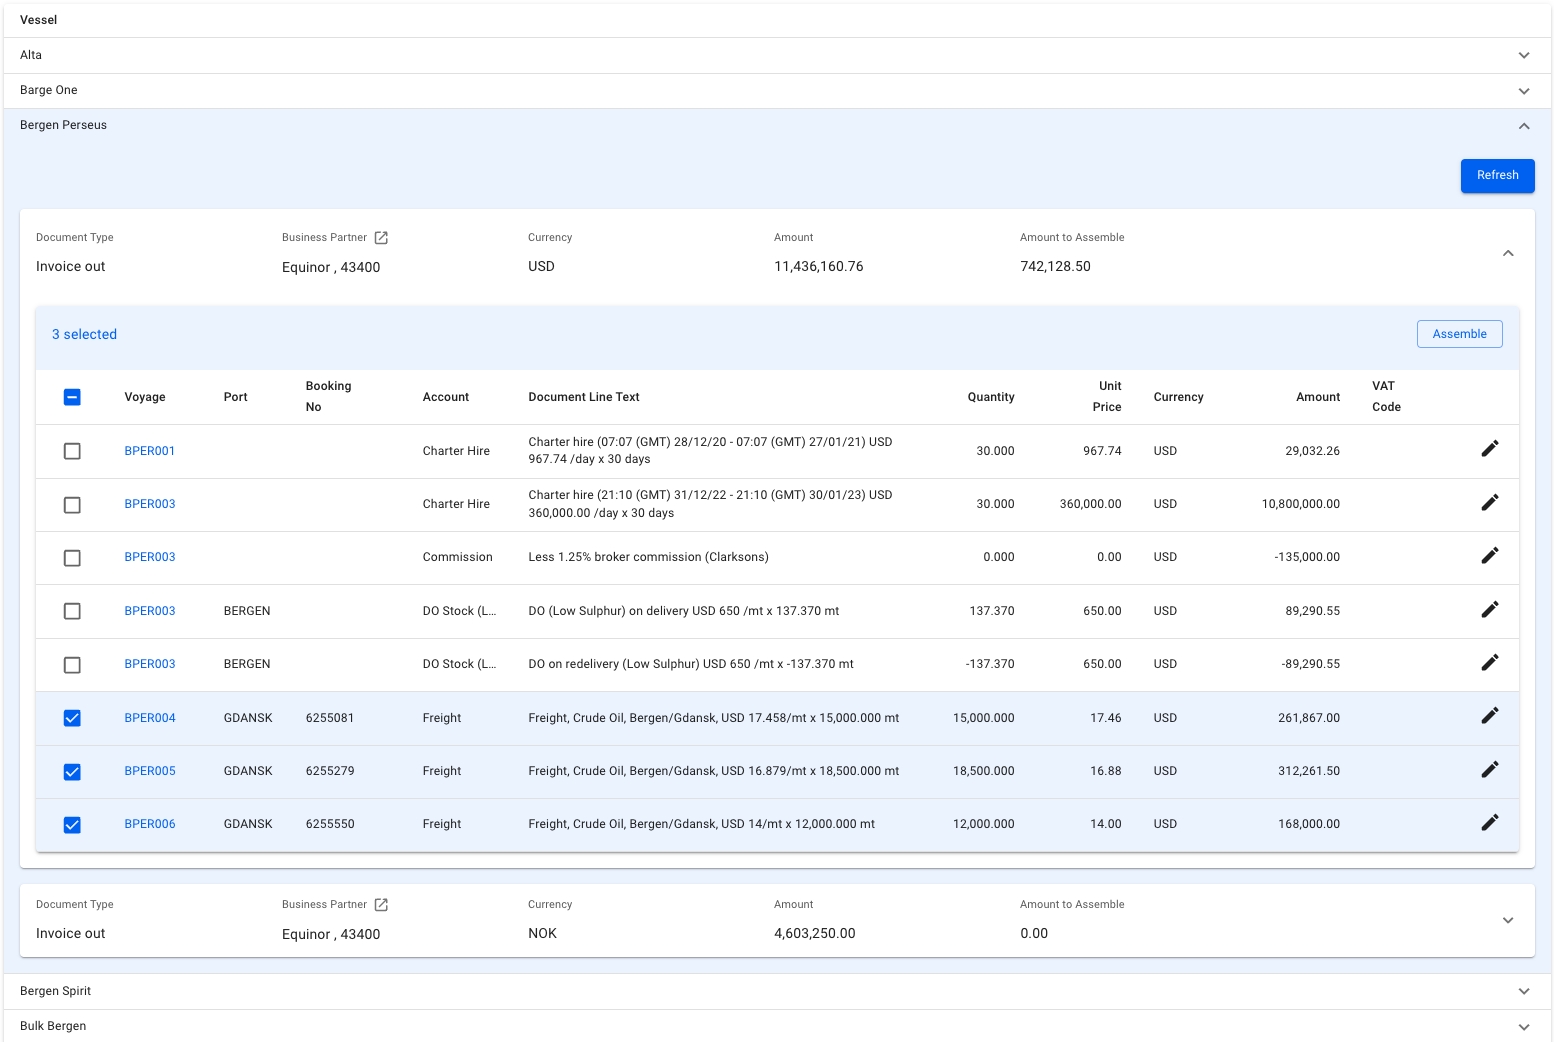
Clicking on a line will expand it, and display a grouping of unprocessed invoices. The invoices can be expanded to reveal invoice items that can be selected and assembled into a complete invoice.
The Refresh button will fetch fresh voyage data from the server for the invoice items in the list. This is useful if you have made changes to the voyage that are not reflected in the unprocessed invoice.
Invoices can only be generated and assembled for frozen voyages.
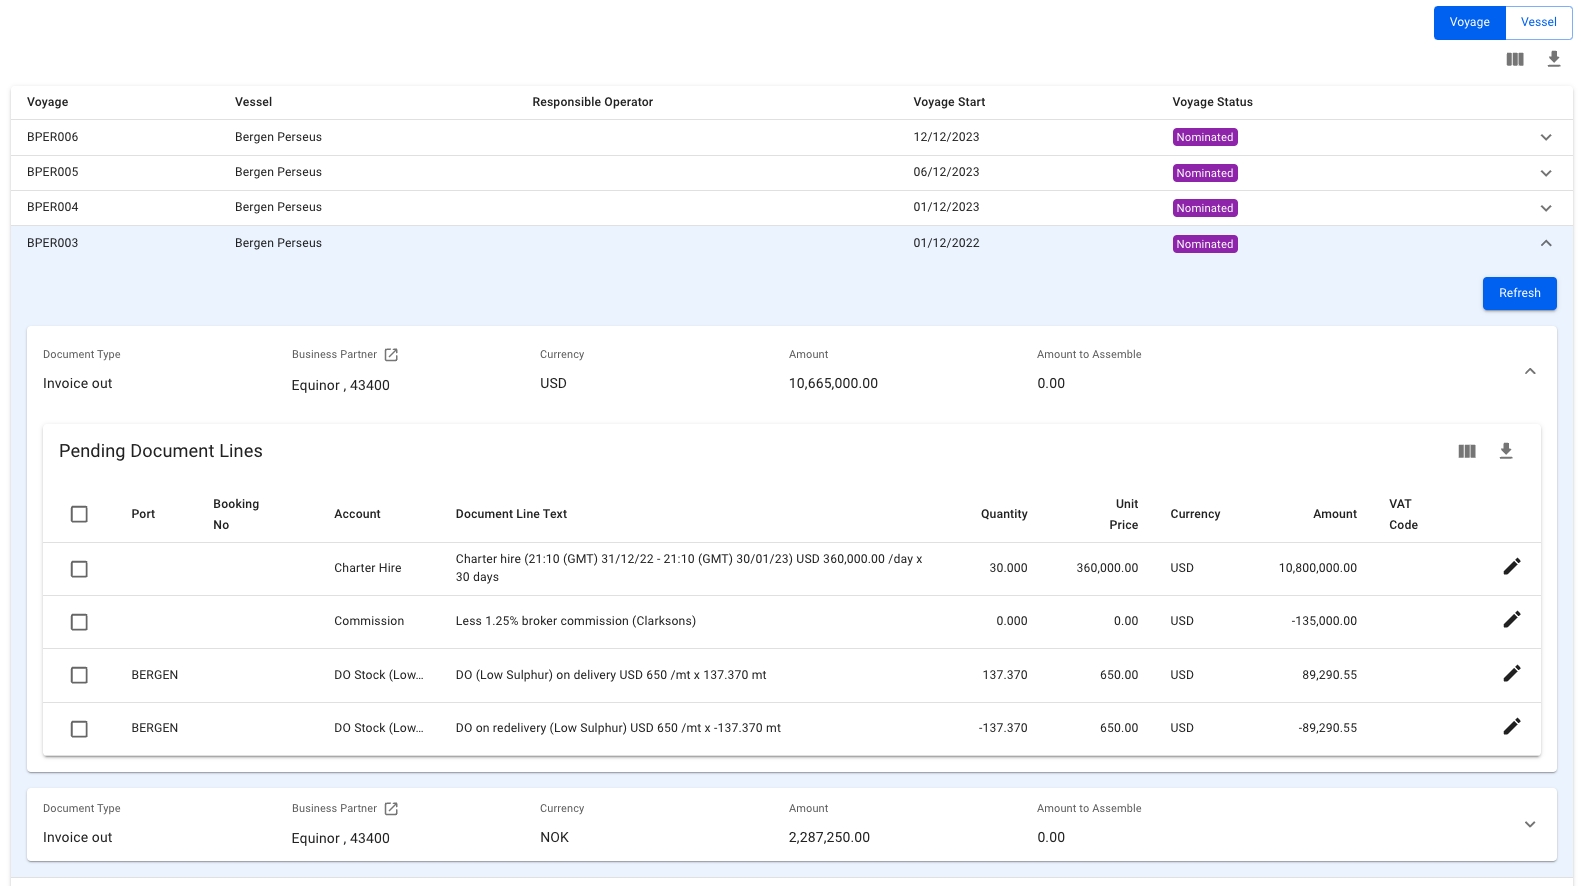
Displays a list of all pending receivable and payable invoice proposals for a Voyage Charter. By clicking the toggle-button underneath the quickfilters, you can change the view.
In this view, a list of voyages will be displayed, alongside the vessel, operator, start date and voyage status. Clicking on a line will open up a new grouping of Business Partners and Currency, from which document lines can be selected, edited and assembled into a document.
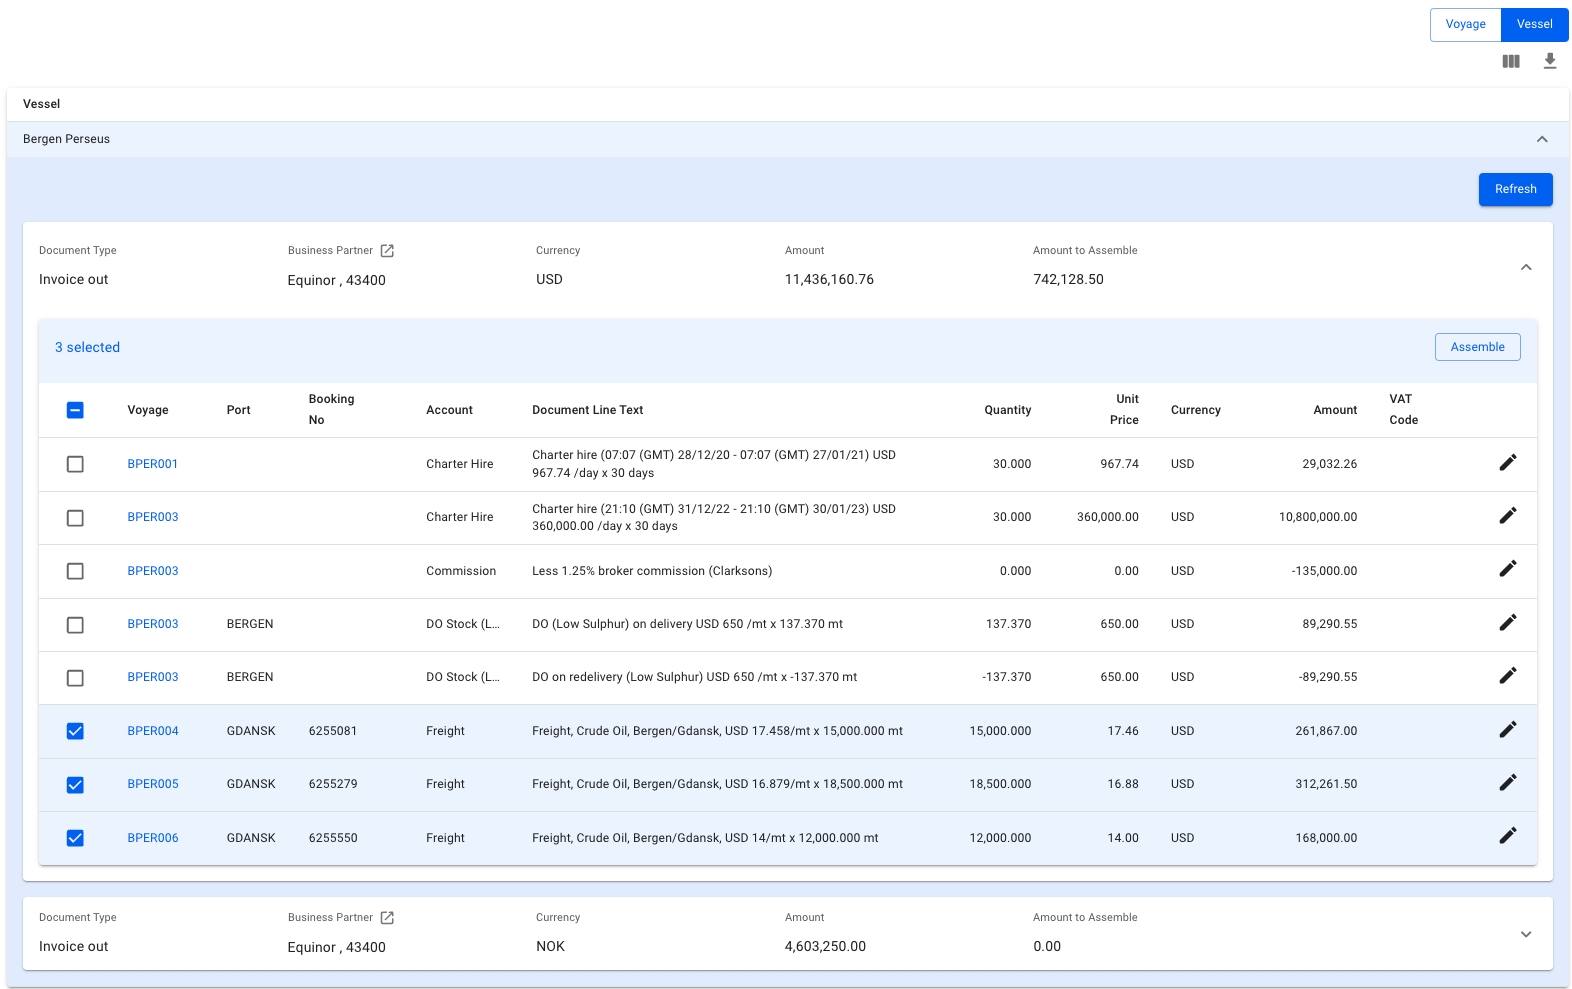
In this view, a list of vessels will be displayed. Clicking on a line will open up a new grouping of Business Partners and Currency. Difference being, we can now see and choose lines from several different voyages, and assemble them all into one invoice.
Lists all unprocessed Time Charter invoice proposals, grouped by vessel/contract, business partner and currency.
Edit and assemble invoice lines into an invoice
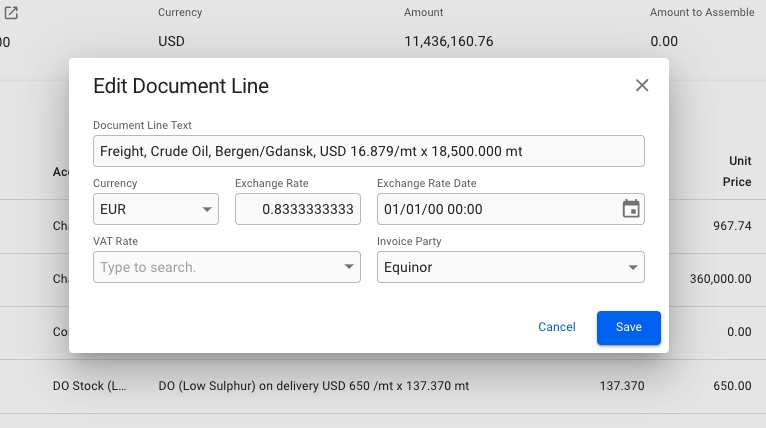
By clicking on a line item a small modal will be brought up, allowing you to edit the Document Line Text, Currency, VAT Rate and Invoice Party. Changing the currency will automatically fetch the latest exchange rate, and set it for the document line.
Clicking the Refresh-button on a Voyage or Vessel will first delete all existing Document Lines, then re-generate new lines with updated values. Any changes made using the Edit Document Line modal will thus be lost!
Select the document lines you want and click the Assemble-button.
Document Assemble permission is needed to have this option available!
It is not possible to assemble invoices for Voyages with status Closed.
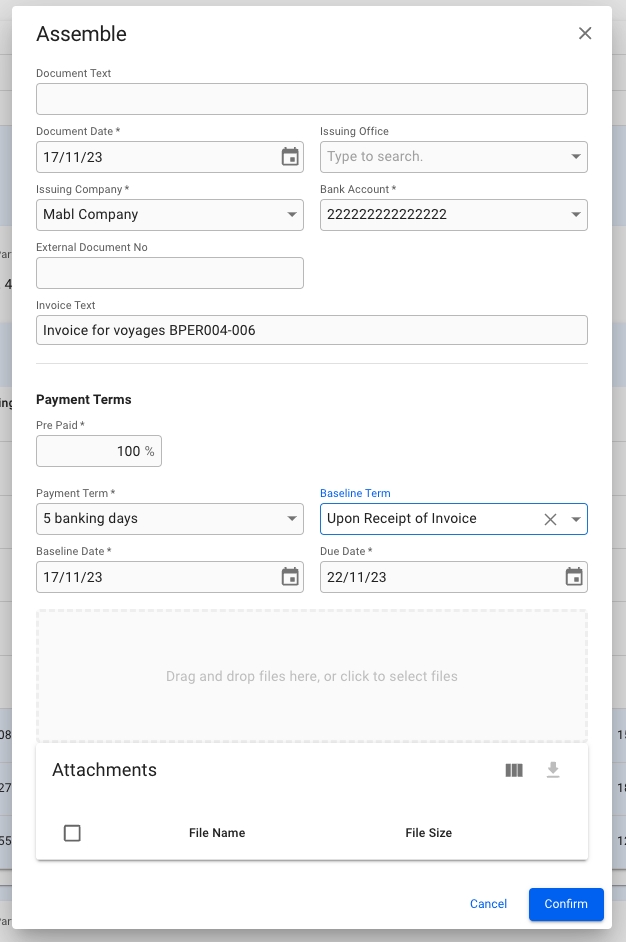
An assemble modal will open and some of the fields will be pre-filled. Make sure all mandatory fields (marked with *) are entered and click Confirm. The assembled invoice will open in a drawer.
When printing an assembled invoice the printout will be marked as a draft.
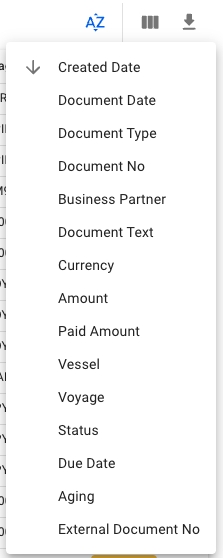
By clicking the -icon you will see the sorting options available. By default the list is sorted by created date in descending order.
To the right of the Sorting button there is a button that allows you to Customise Columns.
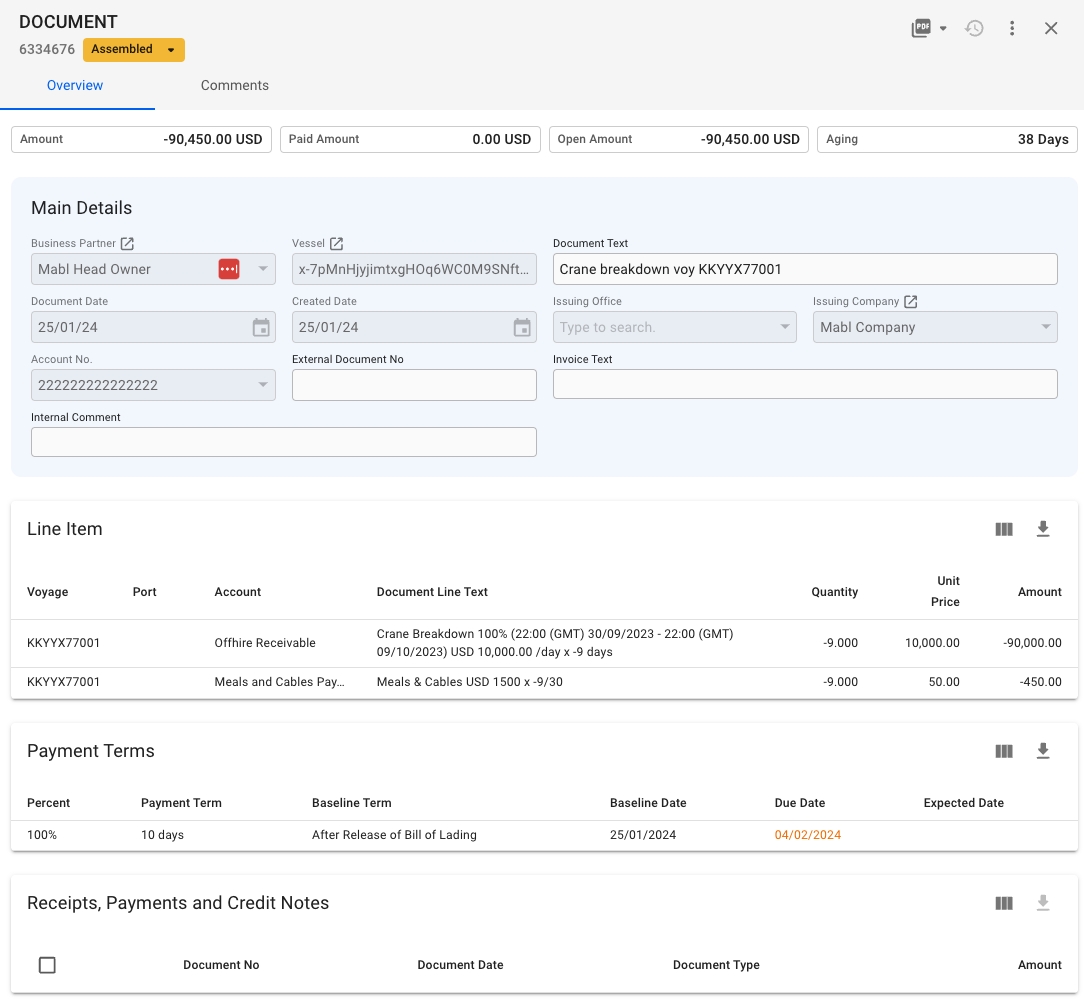
The Document drawer for assembled, posted or ready for posting drawers invoices.
The label chip next to the Document ID is showing the current status of the invoice:
If the status is Assembled, you can change the status to back to Pending (dissolve the invoice), Ready for Posting or Posted
If the status is Ready for Posting, you can transition to Posted status only
You cannot change the status of invoices if the voyage has status Closed
In the top of the drawer, you will see four boxes for Amount, Paid Amount, Open Amount and Aging, defined as the total amount of the line items on the invoice, the total amount of registered payment(s), the remaining balance, and the days until/past the due date of the invoice.
Other useful fields are added on the main details section for you to be able to view or edit them:
Business Partner
BU viewer permission, non-editable
Vessel
Vessel viewer permission, non-editable
Document Text
Editable when invoice has Assembled status
Document Date
Always non-editable
Created Date
Always non-editable
Issuing Office
Always non-editable
Issuing Company
Always non-editable
Account No.
Always non-editable
External Document No
Always editable
Invoice Text
Editable when invoice has Assembled status
Internal Comment
Always editable. Data entered here does not show up on the invoice printout.
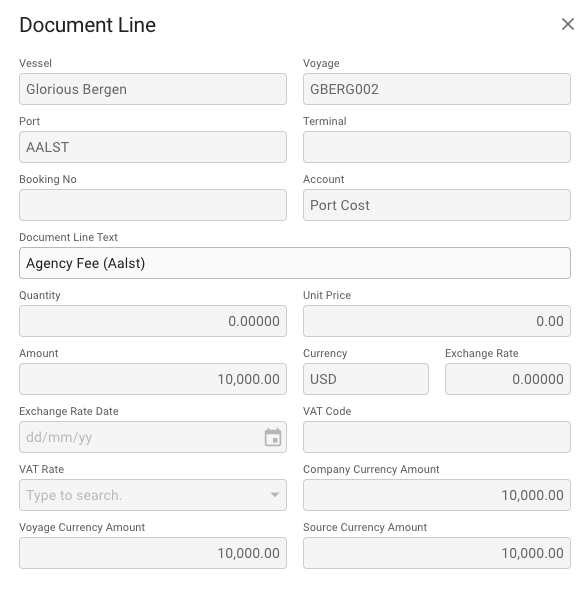
In this section, you will see a list of all the line items on the invoice. Clicking on a Document Line, will bring up the Document Line modal, which contains more details about the line, as well as allowing you to change the Document Line Text if, and only if, the invoice has status Assembled.
You can only record a payment if the invoice has status Ready for posting or Posted, and the document is of type Credit In/Out and Invoice In/Out.
If you need to delete a payment that is connected to an invoice, you can select it in the "Receipts, Payments and Credit Notes" table in the document drawer, and clicking the delete button.
Alternatively, you can go directly to the payment, and click the delete button in the top right corner.
To reverse an invoice, follow these steps:
Locate the invoice in the Invoices module and click it to open the invoice drawer
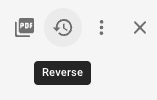
Click on the Reverse button on the top right of the drawer:
Enter the Reason for Reversal and then click "Save"
A reversal document will be created and automatically set to Ready for Posting status. If you have an integration with your finance system the reversal will be automatically booked.
Document Reverse permission is needed to have this option available
You cannot reverse an invoice of types:
Assembled
Pending
You cannot reverse invoices for voyages of status Closed
Using the Record Payment action in the more options menu , you can manually record payments towards an invoice and specify the amount. This will generate a new linked payment document, that will appear in the list at the bottom of the document drawer.
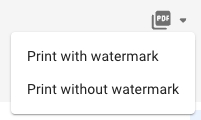
To print an invoice, open it in the document drawer, and click the button in the top of the drawer. If the invoice has status Assembled, you can choose between printing with or without DRAFT-watermark by clicking the little arrow down icon next to the button.
Aggregated line items
Some line items are automatically aggregated when printing an invoice:
Charter Hire lines
Lines on the document for the same rate and hire period are aggregated into a single line spanning the entire period.
The line will be generated using GMT or LT timezone, depending on the payment term set in the contract. If using local time, the timezone is that of the delivery port.
Commission lines
Lines on the document with same rate and business partner will be aggregated.
For time charter invoices, this aggregation can be turned on or off using the "Sum commission on hire invoices" setting.
VAT lines
Lines on the document for VAT that have the same VAT rate will be aggregated and added below the subtotal if using the new invoice template, or as separate line items in the old template.
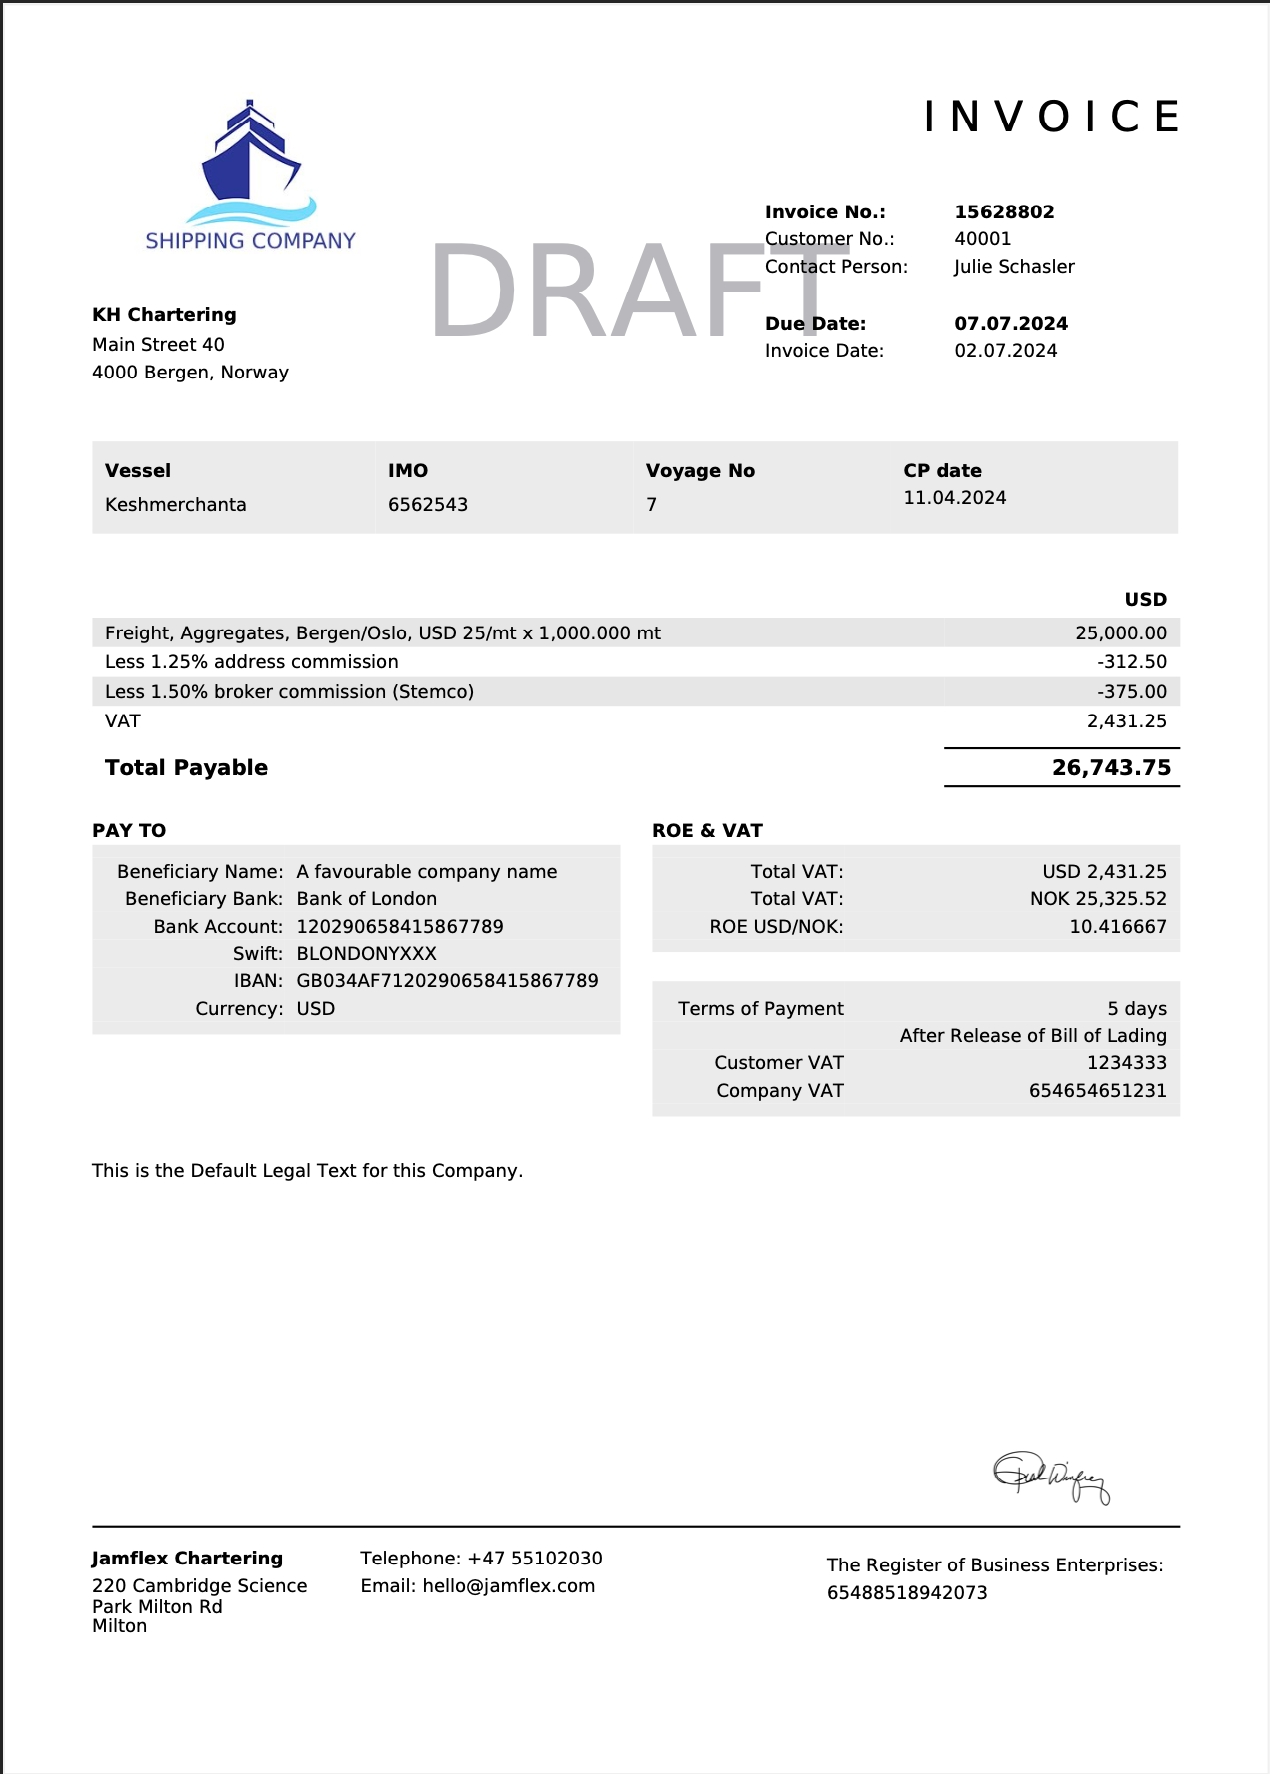
A brand new version of the invoice printout has been made available from version 7.7 and onwards. To switch between the new and old version, toggle the "Use new invoice template" setting under System Settings.
The new template brings along a beautiful new design language, as well as the ability to choose and select which data is being displayed in the printout.
The logo will automatically scale while retaining the aspect ratio, up to a maximum width of 150px. The taller the logo, the further the receiving party address lines will be pushed down. We recommend a width of 90px and height of 70px, though you may experiment with different dimensions to suit your needs.
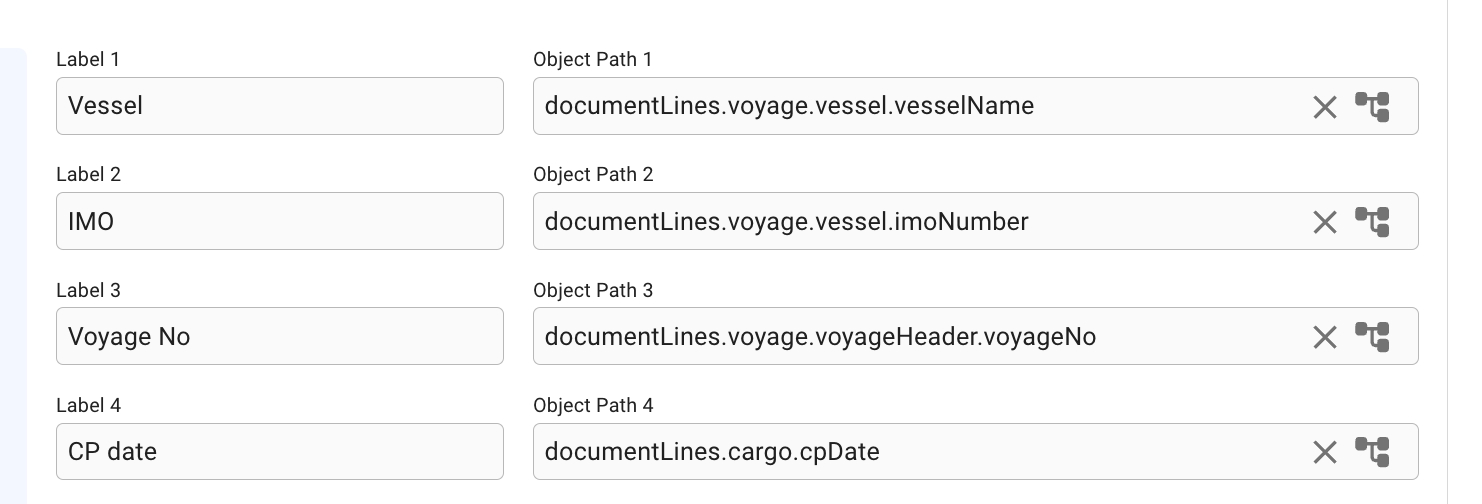
The new template allows for 2 sections where you can freely specify a label and accompanying value to be displayed. These values will always map one-to-one to the position they have been placed in.
If a value cannot be fetched from the specified object path, the label will be removed from the printout.
If the section has not been configured, or no values at all can be fetched, the entire section will be removed from the printout.
For instructions about setting this up, click here.
This section consist of a box that allows you to put up to 8 freely selectable values with an accompanying label.
This section consist of a small box that allows you to put up to 4 freely selectable values with an accompanying label. It is positioned to the right of the bank details, below the document lines, and possibly the RoE & VAT section, if it exists.
If your issuing company has a different currency than the currency of the document, the PDF printout will automatically contain a section with the Rate of Exchange and the VAT in both currencies.
When printing a document related to a cargo Fixture, an appendix will be added to the invoice, detailing the cargos of the fixture. The list will show the port rotation, commodity, actual BL date, the gross weight of the cargo in metric tonnes, and any external references.
The old invoice template had a few settings that are now deprecated in the new template. The following settings have no effect if you are using the new template:
Show Company Address in Header
Show External Document No
Show IMO on Invoice
Show Business Partner VAT Number
Show Issuing Company VAT Number
To maintain a consistent layout when editing invoices in Adobe Acrobat, installing the correct font is necessary. You can download the font for installation here dejavu-fonts-ttf-2.37.
Download the font files. These often come compressed in .zip folders. In one .zip folder, you might find several variations on the same font, such as “light” and “heavy.”
If the font files are zipped, unzip them by right-clicking the .zip folder and then clicking Extract.
Now you'll see the available TrueType and OpenType font files: The list of fonts in the unzipped file. Right-click the fonts you want, and click Install.
More info on Microsoft Support
On your Mac, download a font file from Apple or another source.
Note: macOS supports TrueType (.ttf), Variable TrueType (.ttf), TrueType Collection (.ttc), OpenType and OpenType-SVG (.otf), and OpenType Collection (.ttc) fonts. Legacy suitcase TrueType fonts and PostScript Type 1 LWFN fonts might work but aren’t recommended.
Do any of the following:
In the Font Book app , choose File > Add Fonts to Current User. In the window that appears, double-click the font file.
Drag the font file to the Font Book app icon in the Dock, then click Install in the dialogue that appears.
Drag the font file to the Font Book window.
Double-click the font file in the Finder, then click Install in the dialogue that appears.
When you install a font, Font Book automatically validates or checks the font you’re installing for errors. Font Book also checks for duplicate fonts.

