Loading...
Loading...
Loading...
Loading...
Loading...
Loading...
Loading...
Loading...
Loading...
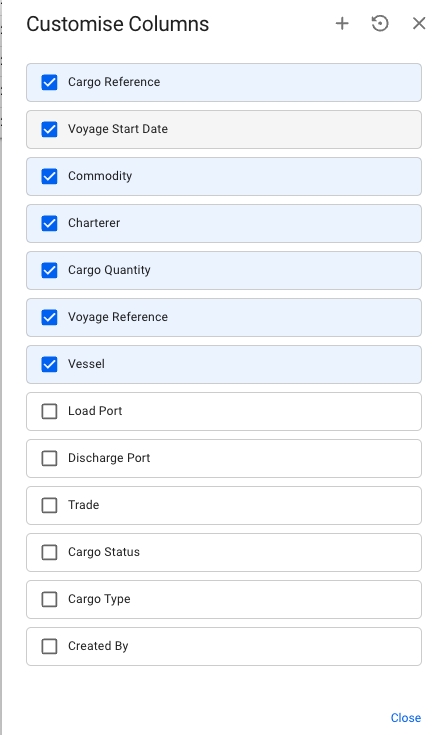
Navigate to these pages to read more about the various Cargo Drawer actions:
Allocate CargoDeleting CargoView Cargo HistoryRelet CargoesTransship and Preship CargoesTransfer CargoesConnecting to CoARemoving CoA connectionClick a cargo in the Cargoes module list.
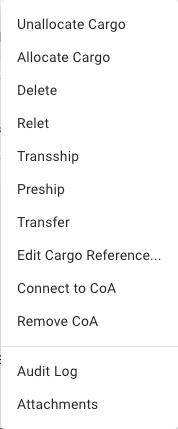
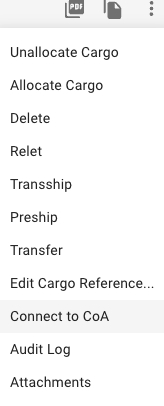
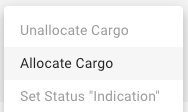
When the drawer opens, open the action menuin the top right.
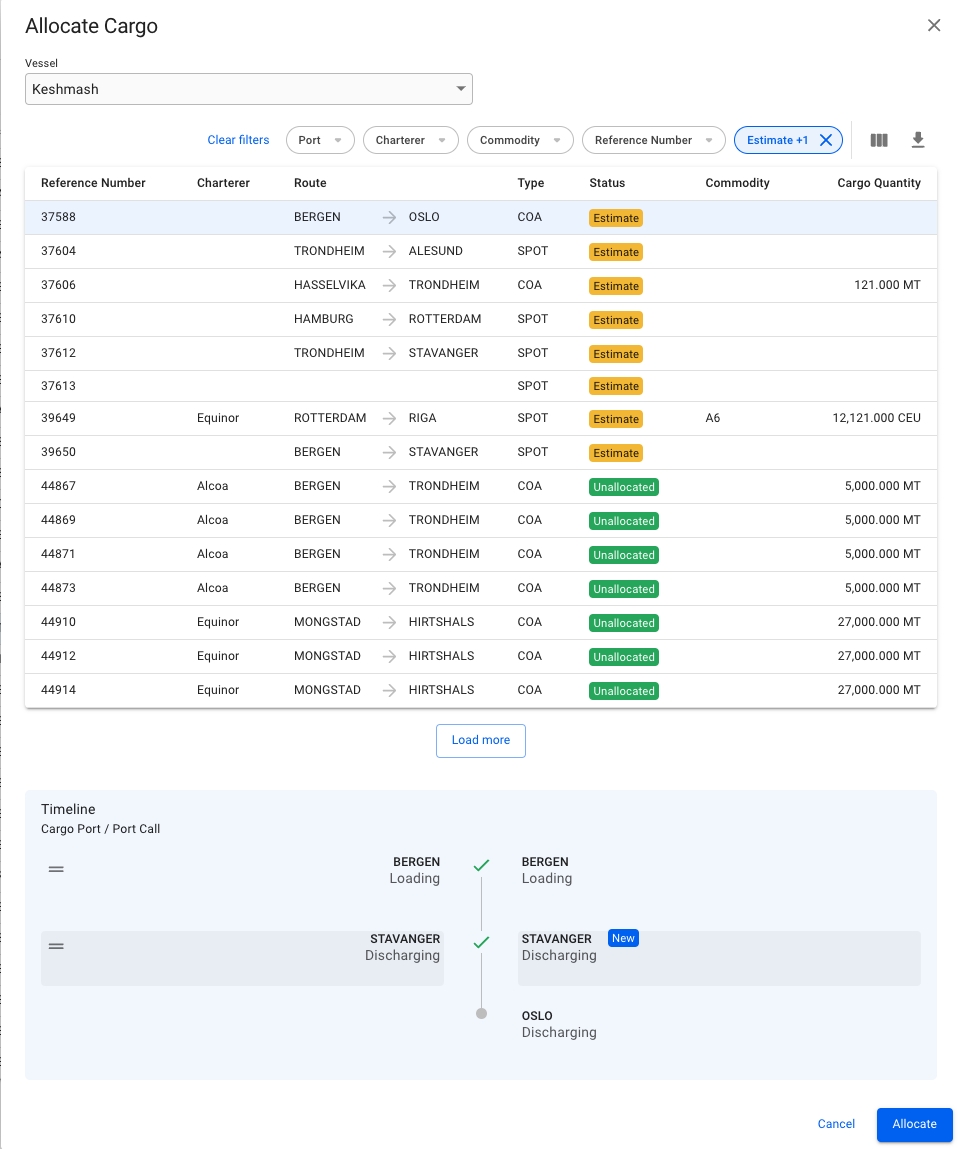
Click the Allocate Cargo button to open a dialogue for allocation.
When allocating, the cargo will also have its company and business unit changed to the voyage's company and business unit. You can edit the cargo's company and/or business unit after the allocating if you want it to be different from the voyage's.
Click Allocate to allocate the cargo and create any new necessary port calls on the voyage.
When a cargo has been connected to a Contract of Affreightment (CoA), a secondary action called 'Remove CoA' will be enabled which will allow you to revert the connection and disconnect the cargo from the CoA. If the Cargo does not have any CoAs connected, the Remove CoA button will be greyed out and disabled. The Secondary Action menu is opened by clicking the triple-dot icon in the upper right of the Cargo Drawer
Clicking the 'Remove CoA' button will instantly disconnect the CoA link from the Cargo.
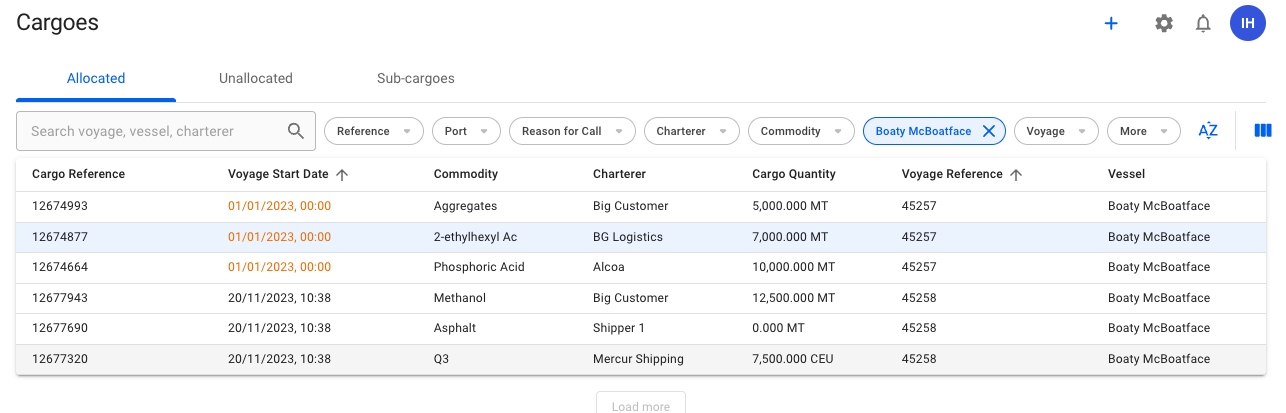
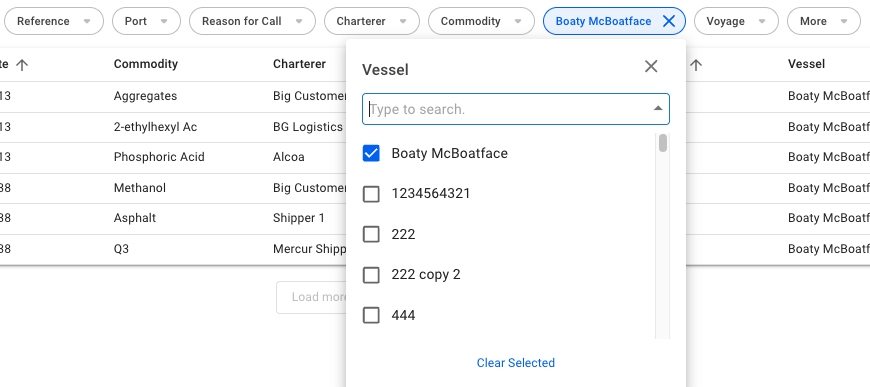
The Cargoes page is designed to be able to show the history of cargoes by setting filters and customising columns to your needs.
In the Cargoes list you can use the existing columns along with the optional column "Voyage Start Date" and use the filters of the list to view the history of cargoes.

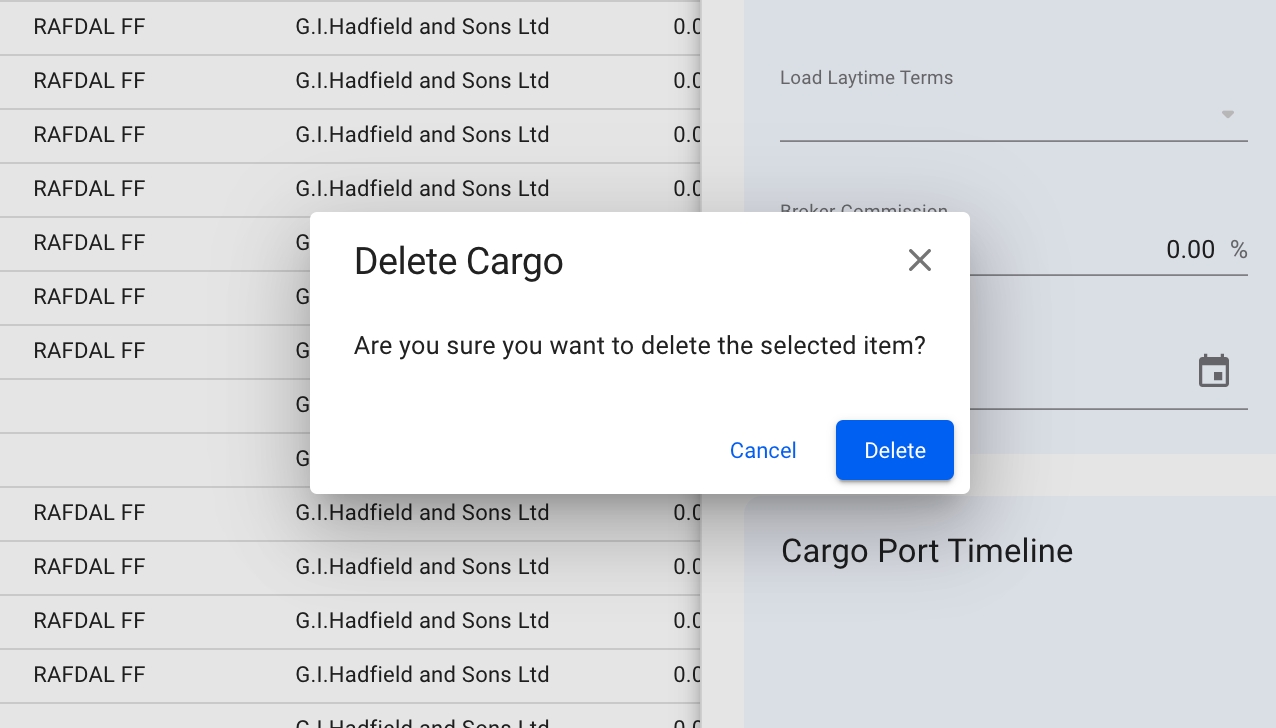
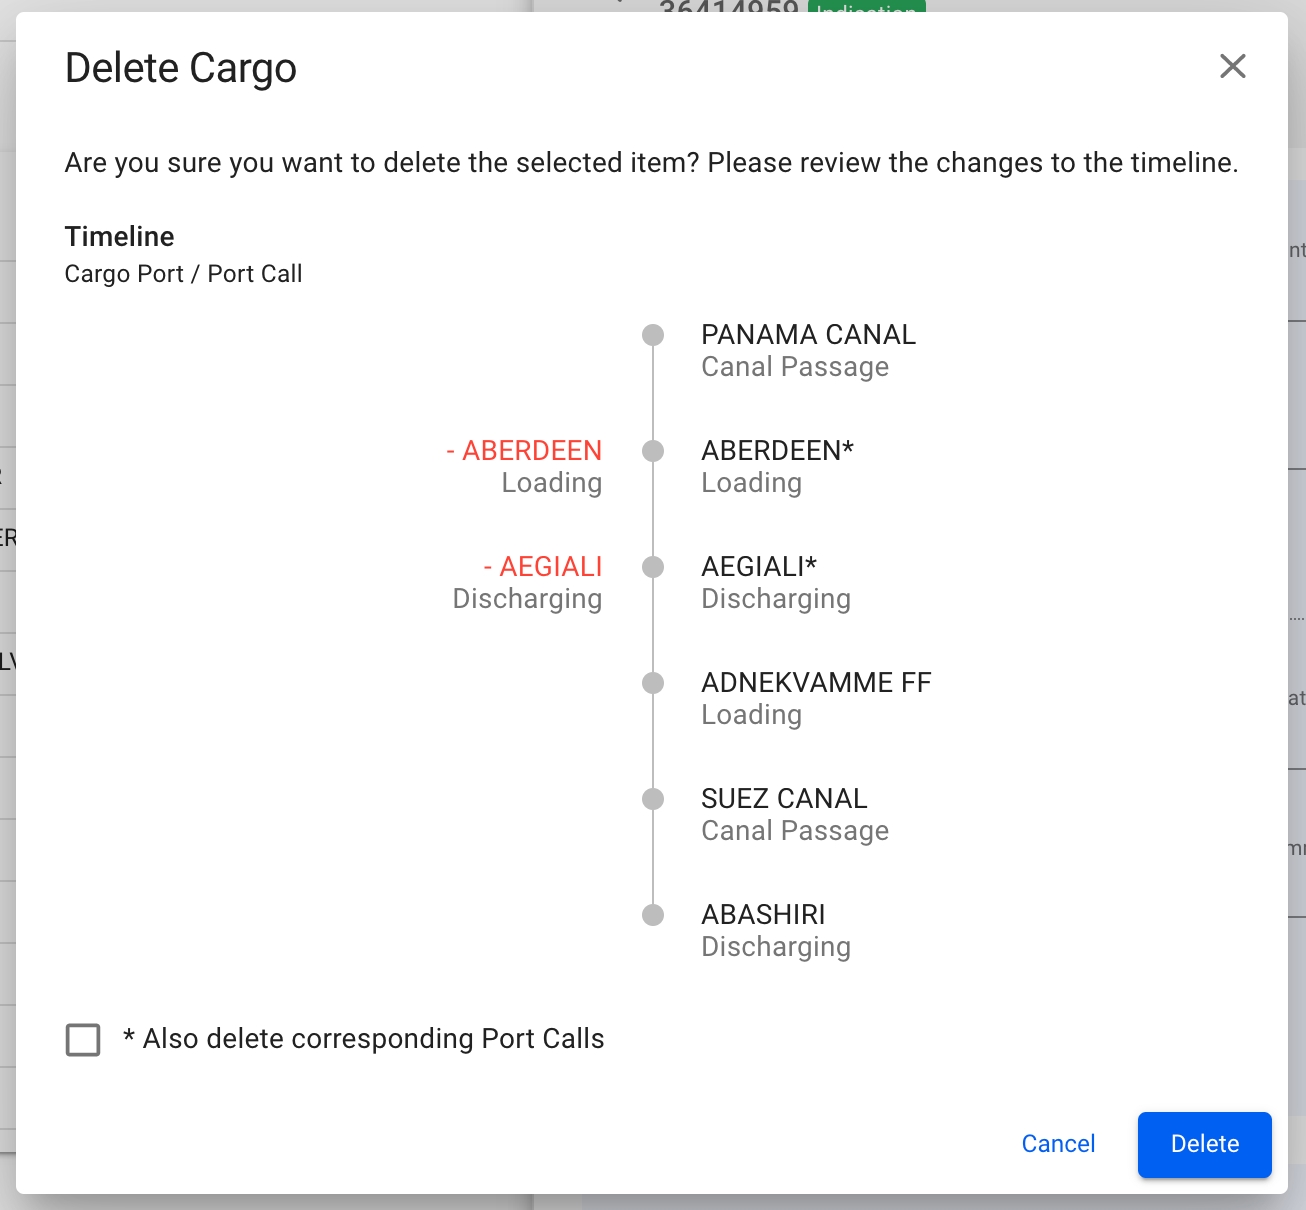
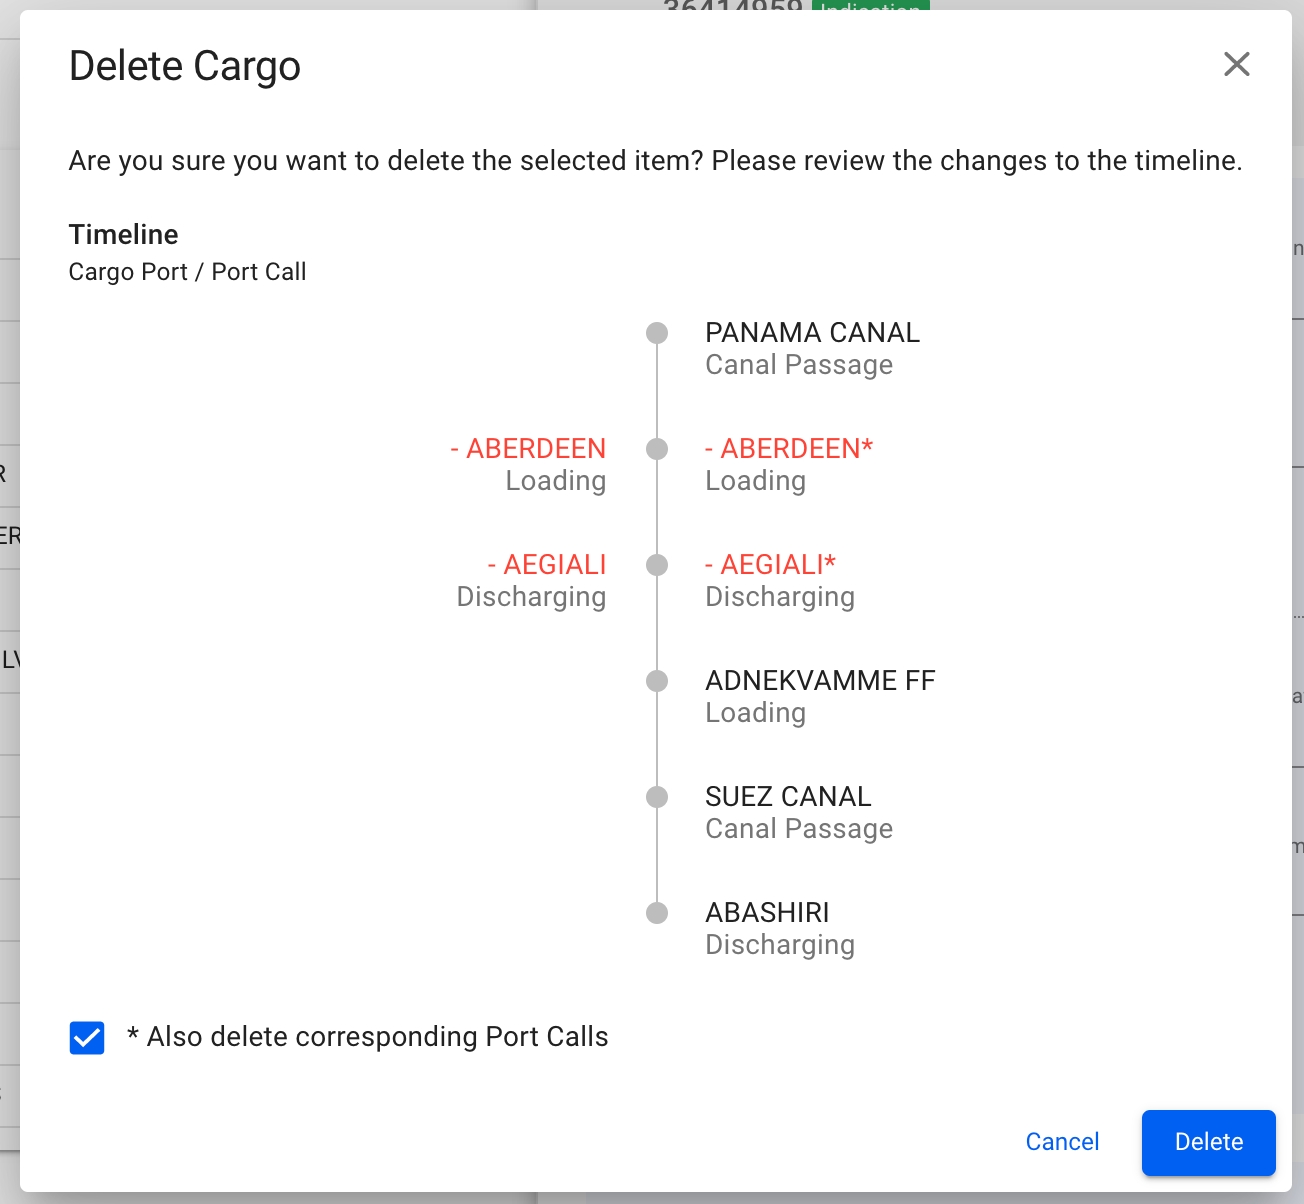
When deleting a cargo you will be presented different options based on the cargo you are deleting
Cargoes are loaded and discharged in cargo ports and these cargo ports are linked to the port calls you find in the voyages schedule.
One port call can be linked to:
no cargo port - for port calls to Bunkering, Canal Passages etc.
one cargo port - when loading/discharging one cargo
more than one cargo port - when loading/discharging more than one cargo
When deleting a cargo the link between the cargo ports and port calls will define what options you will see in the delete cargo window.
1️⃣ When deleting a cargo which has cargo ports linked to a port calls which are linked to some other cargos cargo ports you will get a simple confirmation message before cargo is deleted as per below
2️⃣ When deleting a cargo which has cargo ports linked to port calls which are not linked to any other cargoes cargo port you will get option to also delete the linked port calls. This makes it easier to keep your schedule clean and correct.
When ticking the checkbox the port calls marked in red will also be deleted from the schedule.
A cargo transfer is a type of transshipment where a cargo transported on two voyages. The cargo is transported on the first voyage to one port and then further transported on a second voyage to its final port.
You start with a cargo with a load and discharge port which represents the first part of the cargoes journey (on the first voyage). From a system perspective, the action "transfer" creates a new cargo for the second part of the journey (on the second voyage).
The original cargo will receive cargo type "Has Transfer", and the new cargo will receive cargo type "Transfer."
The following fields are synchronised:
cargo quantity and measurement unit
commodity
discharge rate + terms of has transfer cargo = load rate + terms of transfer cargo
Transfer cargoes are listed at the bottom of the cargo drawer under "Relets and Transshipments".
Open a cargo drawer.
At the top right in the cargo drawer, click Moreand select Transfer.
Fill in the form fields:
The discharge port of the original cargo will be the load port of the transfer cargo.
A transshipment is the shipment of cargo to an intermediate destination, then by a different vessel to another destination. It is a type of created from a cargo booking from a particular discharge port at the end of an original booking.
A preshipment is another type of relet created from a cargo booking. It is the shipment of cargo from a location to that cargo's load port in an existing cargo booking. This includes the transfer to the vessel transporting from the load port.
Transshipments and preshipments are listed at the bottom of the cargo drawer under "Relets and Transshipments".
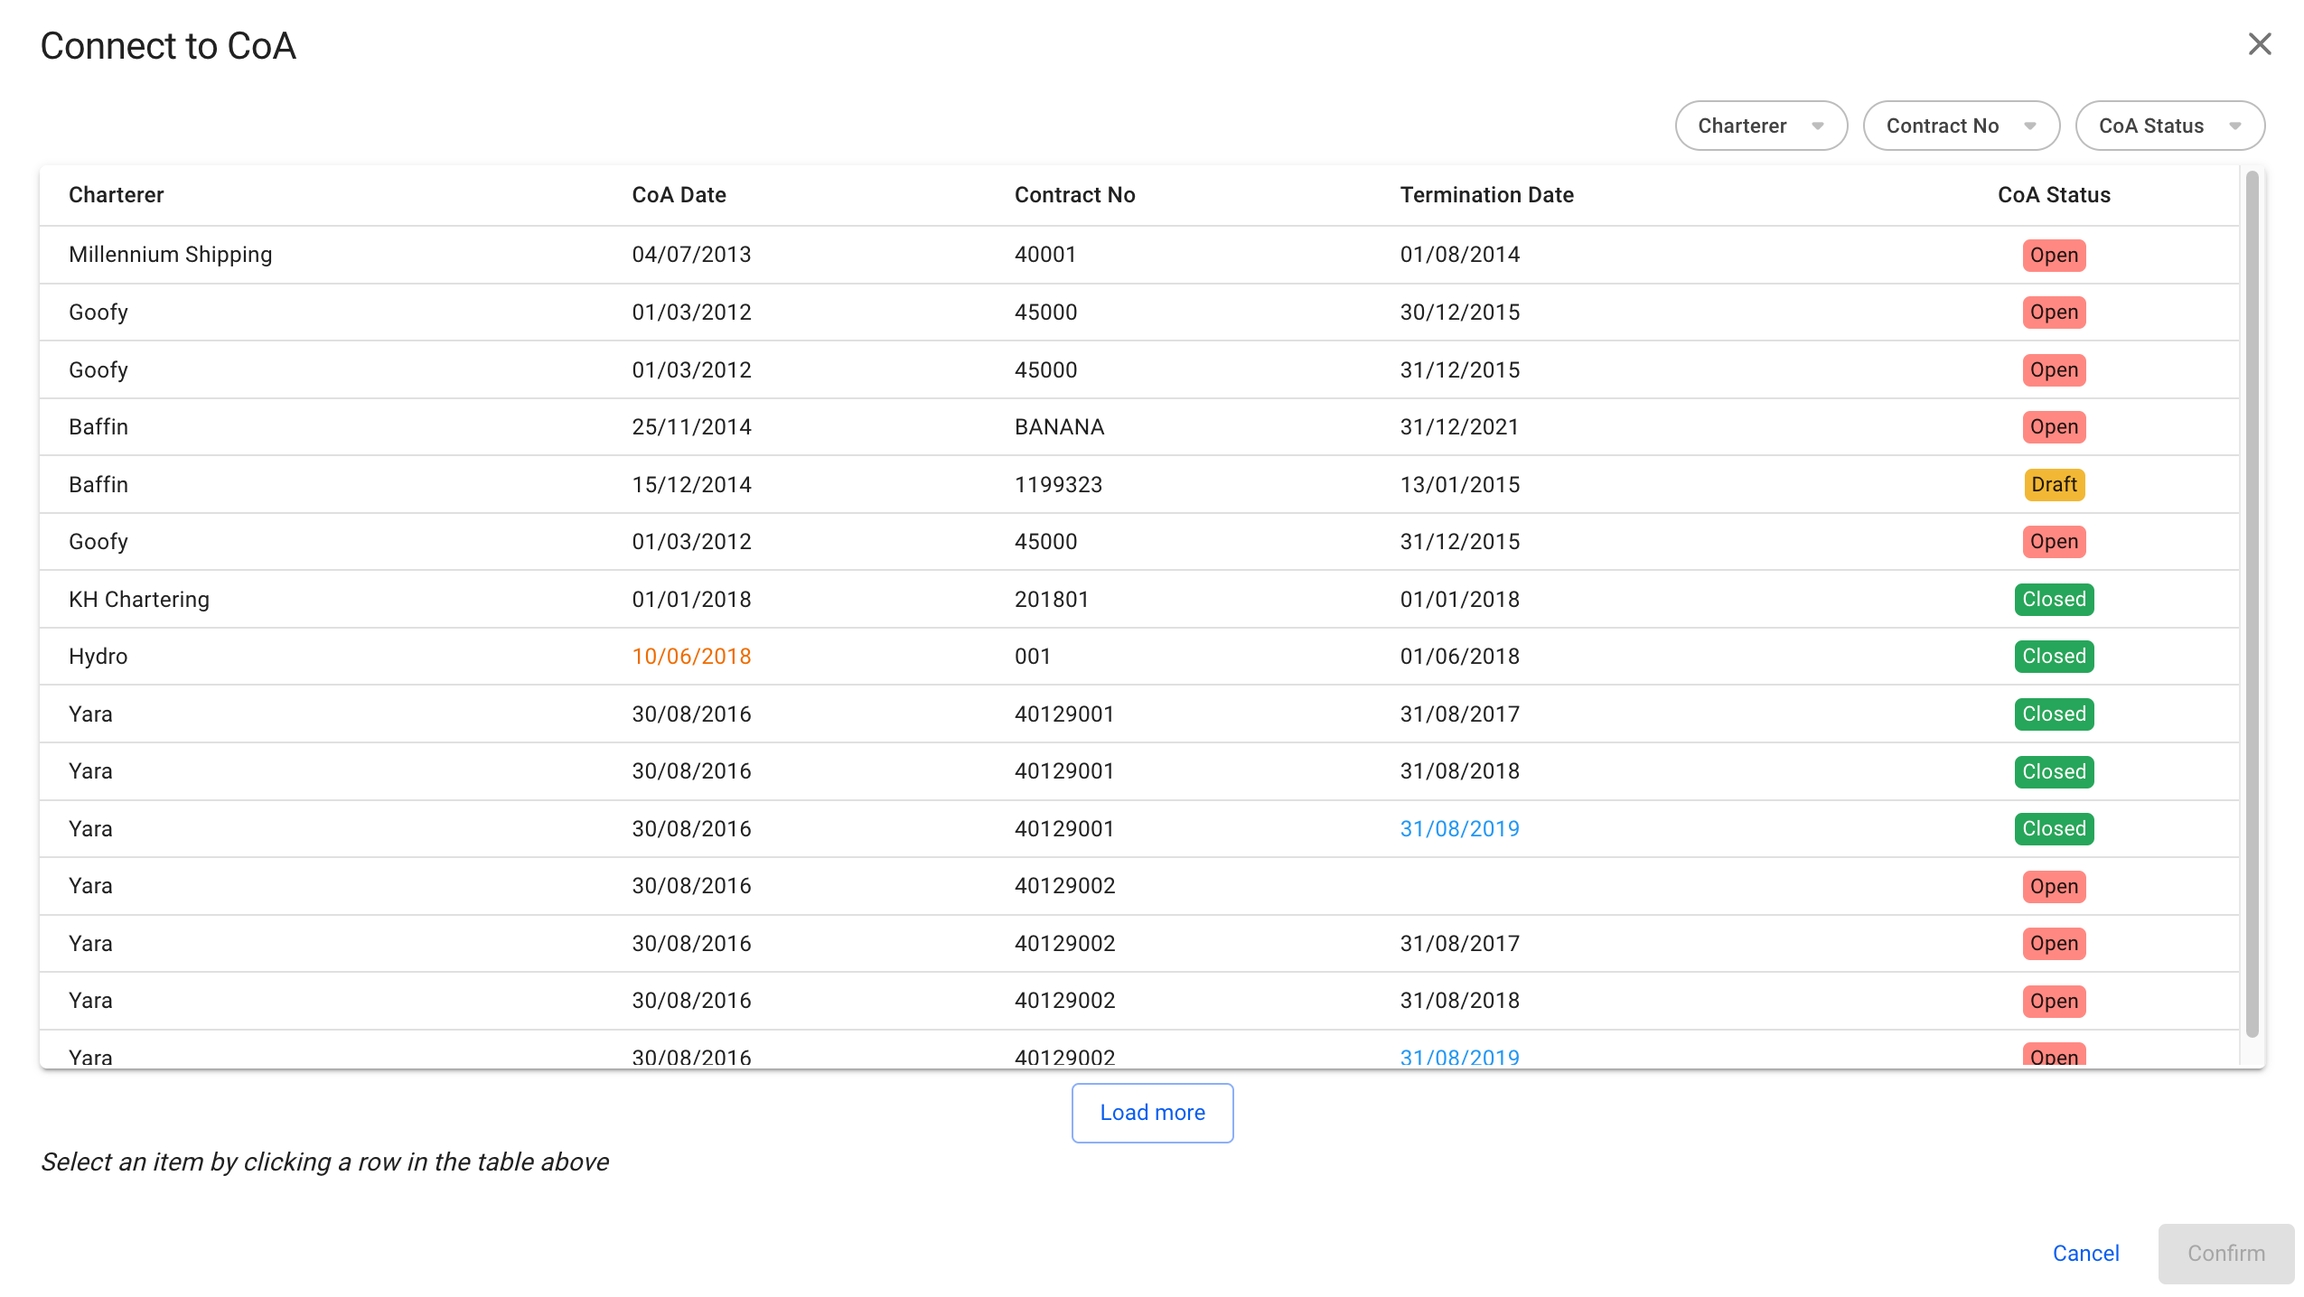
If you click the Connect to CoA button in the secondary actions menu on in a Cargo Drawer,
you will open the Connect to CoA modal:
In this modal you choose which CoA Line you want to connect the Cargo to and click Confirm to connect it. Doing so will update the Company and Business Unit of the Cargo to be the same as the Company and Business Unit of the CoA.
When you have connected the cargo to a CoA Line, you will see a chip at the top of the Cargo Drawer that says Contract of Affreightment as well as which CoA Line you've connected it to (40129002 in this example).
The CoA number chip (40129002) is a clickable chip that will open up the drawer of the CoA.
Final discharge port of the transfer.
Second vessel to transport the cargo.
Second voyage to transport the cargo.
Click Transfer.
Open the Cargoes module in the Core section.
Click a cargo in the list to open it in a drawer.
At the top right in the cargo drawer, click Moreand select Transship or Preship.
Fill in the fields listed below.
Click Confirm to relet the cargo.
Field
Description
Owner
Owner of the vessel to transship the cargo.
From Port
A discharge port in the cargo booking.
To Port
The final destination.
Field
Description
Owner
Owner of the vessel to preship the cargo.
From Port
The originating port.
To Port
A load port in the cargo booking.
Click a cargo in the list to open it in a drawer.
At the top right in the drawer, click Moreand select Relet.
Fill in the "Owner" field and click Confirm.
A copy holding most of the same data of the cargo to be relet will be created in the system .
Find the cargo that was relet.
Find the relet listed under "Relets and Transhipments" in the cargo drawer and click to open it.
At the top right in the drawer, click Moreand select Delete.
Editing the cargo quantity or the planned BL Date of a relet cargo or its connected cargo will trigger an identical change on the other cargo to keep them synchronised on these fields.