It is possible to access the cargo drawer by clicking on any allocated voyage in any of the boards/lists in FAS (or outside), and then opening the 'Cargo' tab. Also, in the Cargo Management Board, you can access the cargo drawer by clicking on a cargo commitments to the left, or directly on an allocated cargo on the right (on the allocated voyages).
Inside a chosen , you will be able to create new cargoes in based on allocated or unallocated voyages.
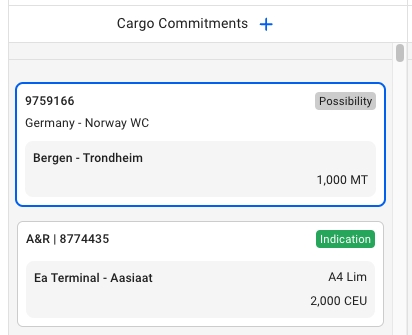
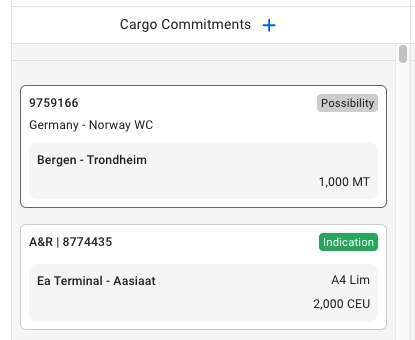
In the , next to the Cargo Commitment title, there is a icon. Here, you can find all the different types of cargoes to create, and their modals. Follow the same steps as to create a new cargo. The new cargo will be placed in this Cargo Commitments column based on the given Laydays. If not given, then they will be placed at the bottom of the list.
On any allocated voyage in FAS (or ), you can find the 'Cargo' tab at the top of the voyage drawer. Above the cargo list, there is a icon there. Also here, you can of cargoes, and display their modals. But- there is a new design here as well:
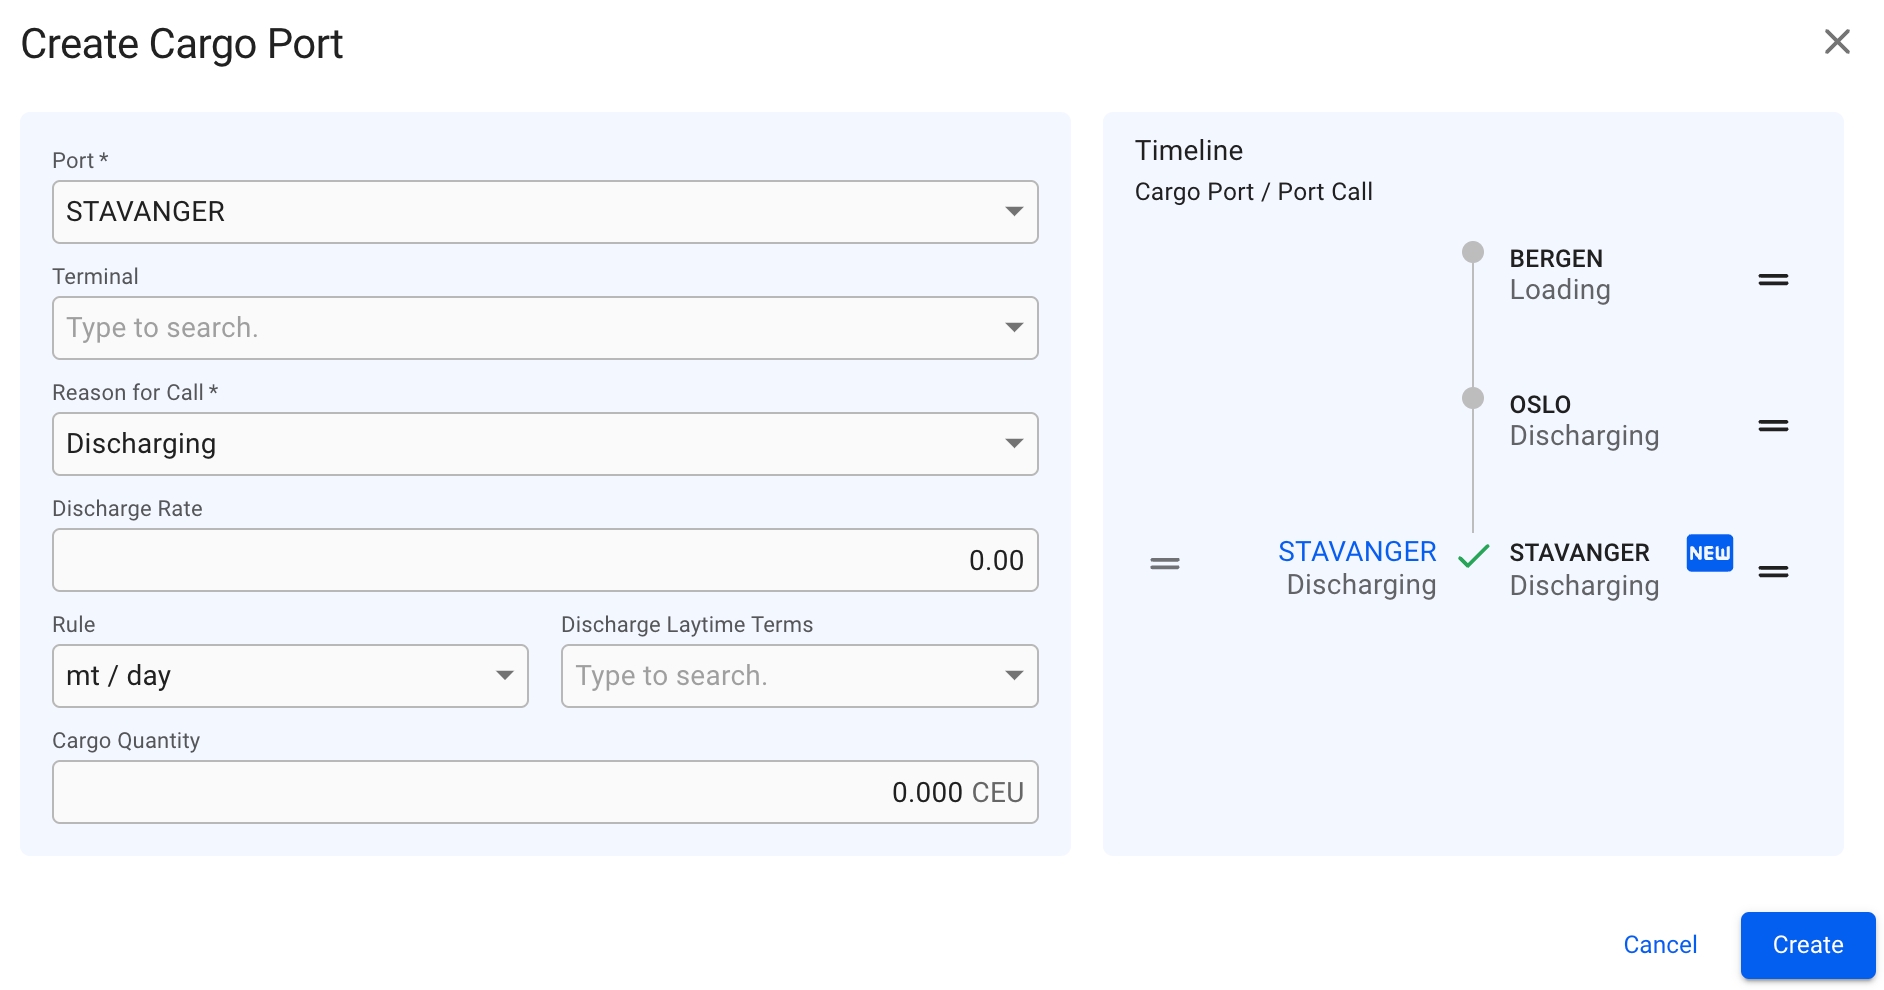
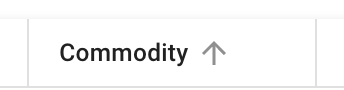
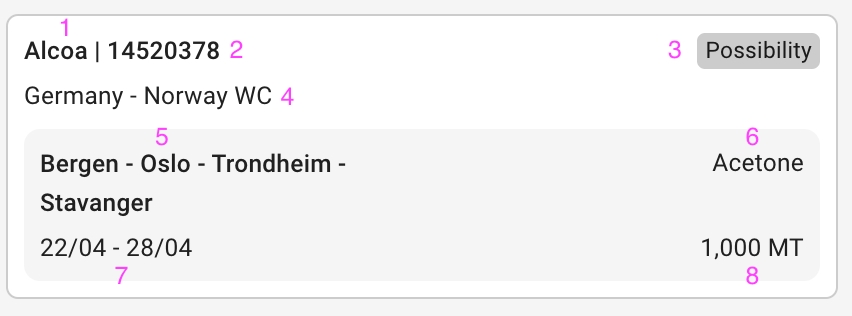
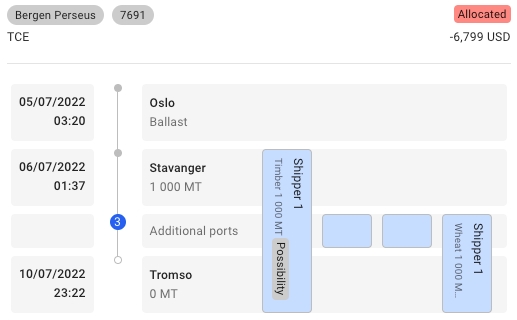
Please click on the picture to get better view of the details. The key details are the same as earlier described , but as you can see- there is some difference in the Timeline component this time. On a voyage, we have port calls. These will be matched with the new cargo ports of the cargo you want to create. The CP/PC row marked with 'NEW' contains the new cargo ports that are added from the fields on the left-most section, meaning port calls 'Trondheim' and 'Stavanger' didn't exist before, but are now added. At the same time, we know that 'Bergen' and 'Oslo' port calls existed from before, so if you want to add a cargo port 'Oslo', it will now be directly linked to the port call (and the 'NEW' icon is not displayed). Read more about the drag and drop features and the new Create Cargo Port modal down below.
On the allocated cargoes mentioned above, you will have drag and drop options on both sides of time timeline. On the left side, you will be able to drag a cargo port to match with a corresponding port call, but they both have to have the same reason for call. On the right side, you will be able to drag the whole CP/PC row to change the order in these ports on the voyage. The same features are implemented in the new Create Cargo Port modal:
Read about the new Create Cargo Port modal for unallocated cargoes .
In Open Positions Board: to allocate or unallocate a voyage, you can drag and drop the different voyage cards between the Voyage Commitments column (the unallocated voyages) and the different vessels displayed.
In Scheduler Board: to allocate or unallocate a voyage, you can drag and drop the different voyage bars between the COA and SPOT rows (the unallocated voyages) and the different rows of vessels displayed.
In the secondary actions menu (3 dots), it's possible:
To unallocate a cargo (unless it's already unallocated)
To allocate a cargo
To delete a cargo
To relet a cargo
You can filter unallocated cargoes based on Charterer, Cargo, Trade and Area.
You can filter the allocated voyages based on Voyage, Vessel, Area and More.
More containing Commodity, Charterer, Trade, Commodity Class and Cargo Type.
You can filter the cargoes based on Cargo Reference, Counterpart, Commodity, Vessel, Voyage Reference and Cargo Status. This are placed above the list.
You can sort the cargoes based on Created Date, Cargo Reference, Counterpart, Commodity and Cargo Status, by click on this icon: .
You can also header sort on the cargoes based on all the headers of the list, by click on the arrows: .
In Cargo Management board: to allocate or unallocate a cargo, you can drag and drop the different cargo cards between Cargo Commitments column (the unallocated cargoes) and the different allocated voyages displayed.
To tranship a cargo
To preship a cargo
To transfer a cargo
To edit Cargo Reference
To connect to CoA
To view the Audit Log
To access or upload voyage Attachments
You can use the settings button to adjust your view of the voyages.
The Cargo Management Board displays all allocated voyages and the cargos allocated to them. It also shows the unallocated cargos in Cargo Commitments column. For details on the Vessel Open Positions, voyage cards and board settings, see Open Positions Board.
The Cargo Management Board displays all cargos belonging to the selected scenario. In the left-most column, we display the unallocated cargos (Cargo Commitments column), which are cargos that have not yet been allocated to a voyage. The other columns display voyage cards with the cargoes allocated to them.
Each cargo contains the fields:
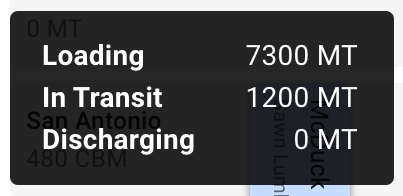
The right side of the Cargo Management Board contains all the allocated voyages and their cargos. On the right side of a voyage card, the cargo cards allocated (or dragged) to the voyage are displayed. Each cargo displays the Charterer, Gross Weight and Cargo Status, while illustrating graphically the Load Ports and Discharge Ports. These cargos can be moved by dragging and dropping between the voyages of the same Trade:
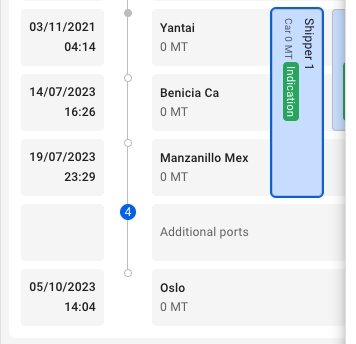
The Additional ports icon indicates how many more ports are "hidden" on the voyage. You can use the tool to adjust them accordingly.
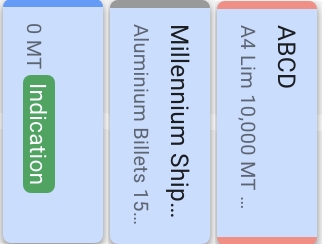
The Cargo Cards also has indication lines to help you interpret the Laydays and Arrival Windows for each cargo, graphically.
Laydays: indication line at the top of the cargo. Arrival Window: indication line at the bottom of the cargo.
Color indicator:
if early: blue
if late: red
if on time: normal / no color
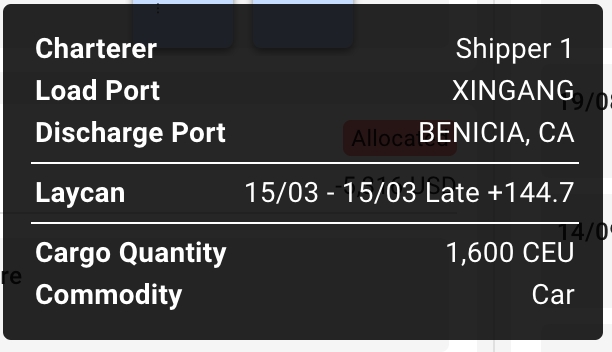
By hovering over a cargo card or on a port call row, a tooltip can be viewed. Fields in the tooltip that contain no data are hidden:
The following fields are available within the cargo card- and port call tooltips:
Each of the unallocated cargo cards now have a new light grey border, and when you hover, it will be marked with a darker one to clearly indicate which one you are hovering over.
When selecting one of these cards, a blue border and thicker border will display along with opening the Cargo drawer:
Along with displaying the cargo tooltips, we now get a darker shadow on the cargo when hovering over it:
When selecting one of the allocated cargoes, a blue border will display here as well, along with opening the Cargo drawer:
Commodity
Laydays Start to End Dates
Quantity and Measurement Unit
Commodity
Quantity Option Terms (%)
Quantity Option
Comment (Field Comment in the Cargo Drawer)
Charterer
Cargo Reference
Cargo Booking Status
Trade
Cargo Ports (both L and D)
Charterer
Quantity Loaded
Load and Discharge Ports
Quantity in Transit
Laycan From and To dates and Missed By Label
Quantity Discharged
Arrival Window From and To dates and Missed By Label
Quantity and Measurement Unit