Loading...
Loading...
Loading...
Loading...
Loading...
Loading...
Loading...
Loading...
Bunker prices can be changed from the Overview/Bunker tabs.
Click a row to edit bunker price
Edit the price for each bunker type in the modal

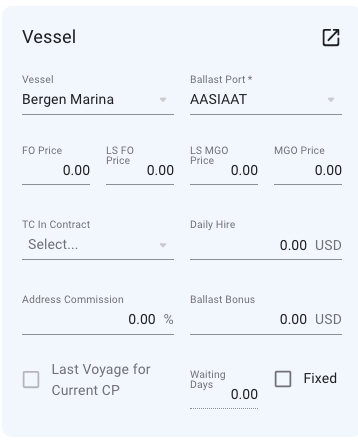
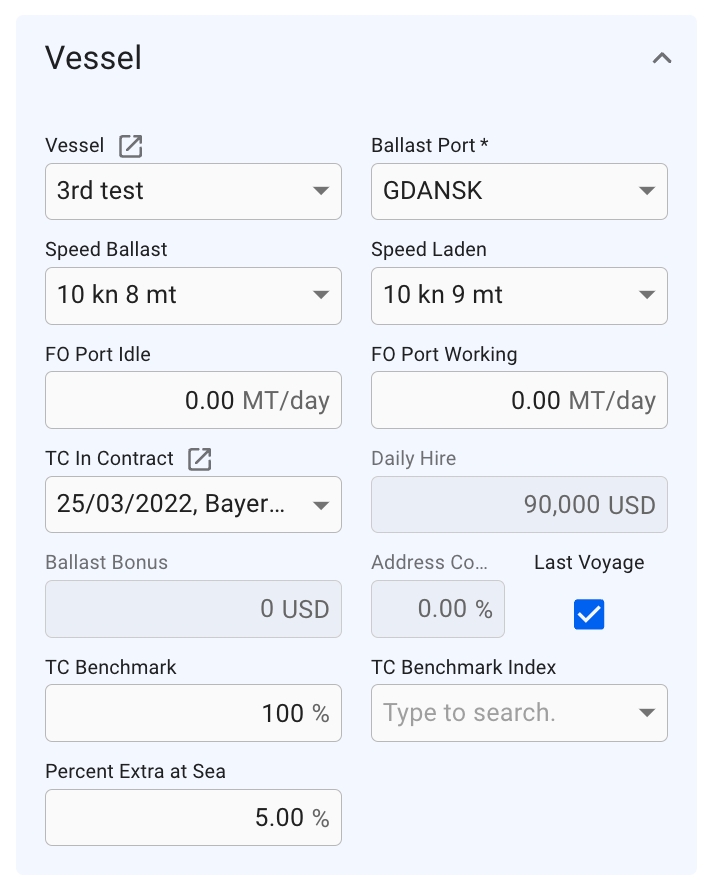
In the voyage drawer at the vessel section you will find a checkbox for setting "Last Voyage for Current CP". This checkbox is disabled when there is no TC In Contract registered.
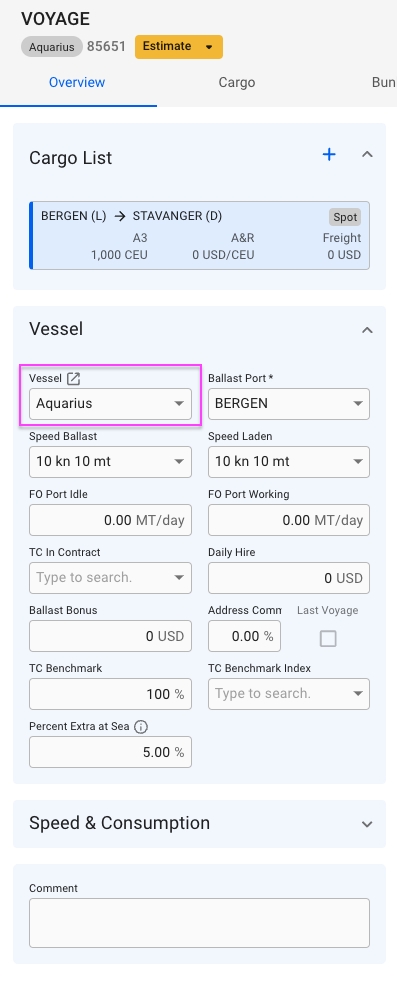
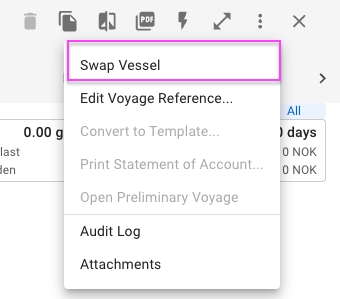
Swap Vessel is a functionality that allows you to change the vessel of the voyage, regardless the status of the voyage. There are two ways to change the vessel; through the Vessel field under Voyage Overview, or through the secondary action 'Swap Vessel'.
For voyages with status Estimate or Unallocated, you can only swap the vessel of the voyage through the Vessel field found under Voyage Overview section:
This works as a normal dropdown menu, that views all available vessels for you to click and swap to.
For voyages with status Allocated or above, you can only swap the vessel of the voyage through the secondary action called 'Swap Vessel':
Followed by clicking the action, this modal will pop up:
In this modal, a vessel must be selected to be able to swap. By default, the vessel you are currently on is selected. Meaning, you are always able to actually click on the Swap button (for now). After the swap, you are able to see the new vessel either as the above mentioned Vessel field under Voyage Overview, or at the top of the Voyage drawer, left-most (clickable) chip:
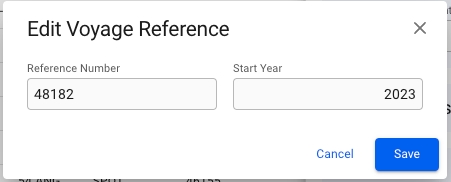
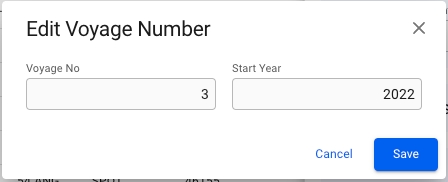
From the voyage drawer actions it is possible to change the Voyage Reference Number or Voyage Number, depending on the voyage status.
When voyage status is Estimate, Unallocated or Allocated, it is possible to change the Voyage Reference Number.
When voyage status is Nominated, Operational, Operationally Closed, Invoiced or Closed, it is possible to change the Voyage Number.
Clicking Edit Voyage Reference... or Edit Voyage Number... in the options meny opens a dialog box where the current values can be modified. In addition, the dialog box contains a field for changing the Voyage Start Year.



From the Voyage drawer it is possible to change the status of the voyage by using the status chip next to the reference no at the top of the drawer.
When changing status from estimate to Allocate, no modal will show. The same also happens from Estimate to Unallocated. You can check out the different requirements and validations below.
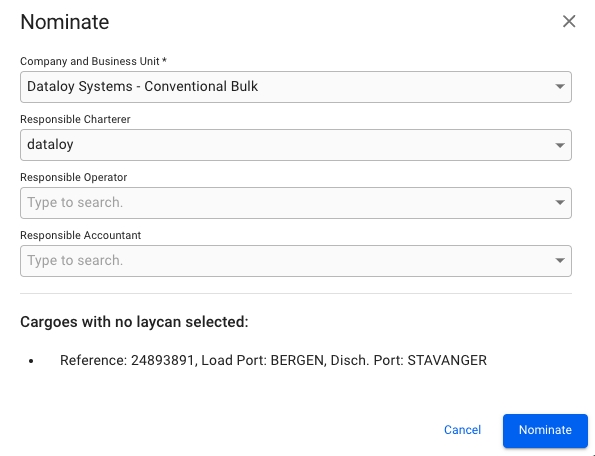
When changing status from Estimate to Nominated, the following modal will show:
If it's a TC voyage with missing Laycan on the TC, you will have to fill in the Laycan as well. Otherwise, you will get information at the bottom of the modal saying which cargoes does not have Laycans added, but you will be able to nominate.
As you can see, Company and Business Unit field is required. By default, what is selected on the voyage will display here, but you are free to change it. You can also add Responsible Charterer, Responsible Operator and Responsible Accountant, but these are not required.
The same also happens when changing from Allocated to Nominated.
You can check out the different requirements and validations below.
There are also other "forward" status transitions, like:
Nominated -> Operational
Operational -> Operationally Closed
Operationally Closed -> Invoiced
Operationally Closed -> Closed
When changing to these statuses, no modal will show.
When changing status from Allocated to Unallocated, the following modal will show:
You will be given the option to select a new Vessel and/or Ballast Port to change to, but not required for unallocating.
The same also happens when changing from Nominated to Estimate.
When changing to these statuses, no modal will show.
There are also other "backward" status transitions, like:
Operational -> Nominated
Operationally Closed -> Operational
Invoiced -> Operationally Closed
Closed -> Invoiced
Required Values Must Be Set:
For each cargo: charterer
For each cargo: commodity
-> This can be seen for most "forward" status transitions.
Vessel code must be changed from its default assigned value. Open Vessel "Internal Data" to set a new code.
-> This can be seen for most "forward" status transitions.
Warning
The ballast port on this voyage does not match the open position of this vessel. Do you want to <status> the voyage with the start date locked?
-> This can be seen for most "forward" status transitions.


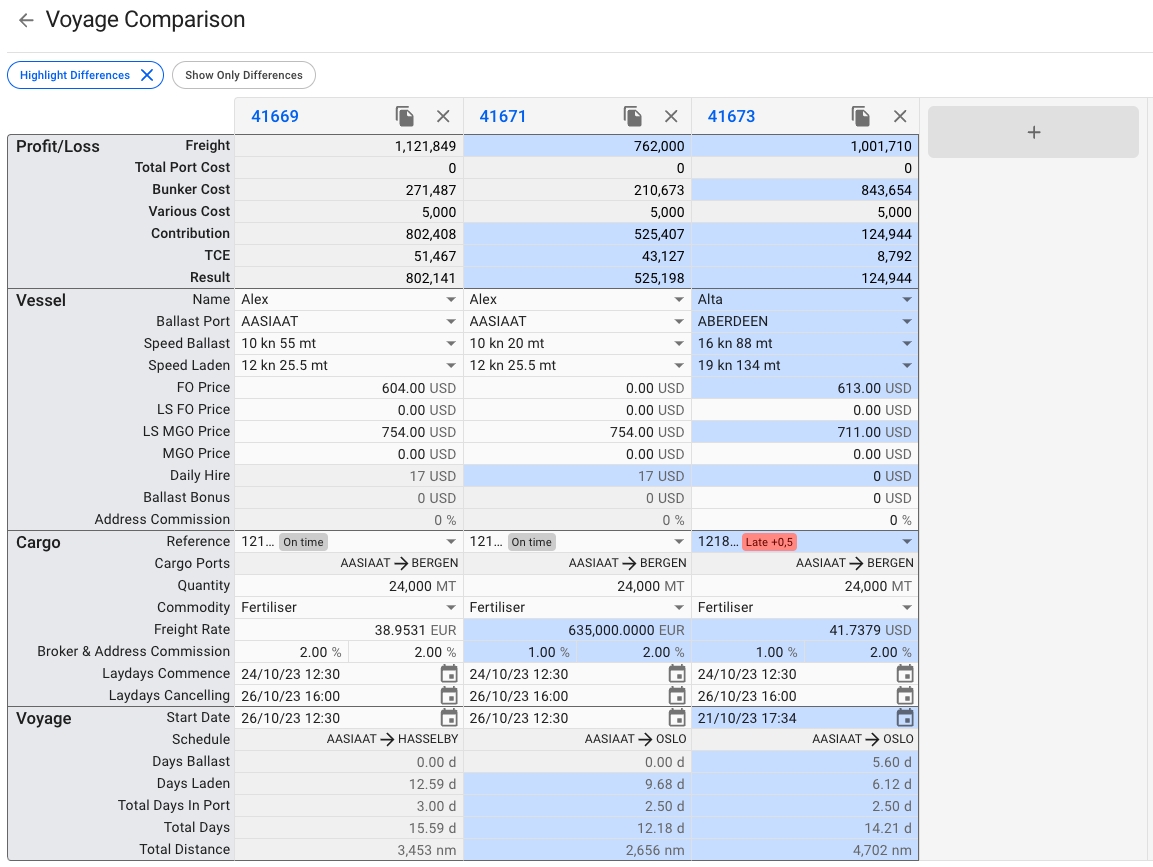
A functionality to compare voyages' values to each other to get the best overview.
The comparison button can be found as a primary action in the Voyage drawer:
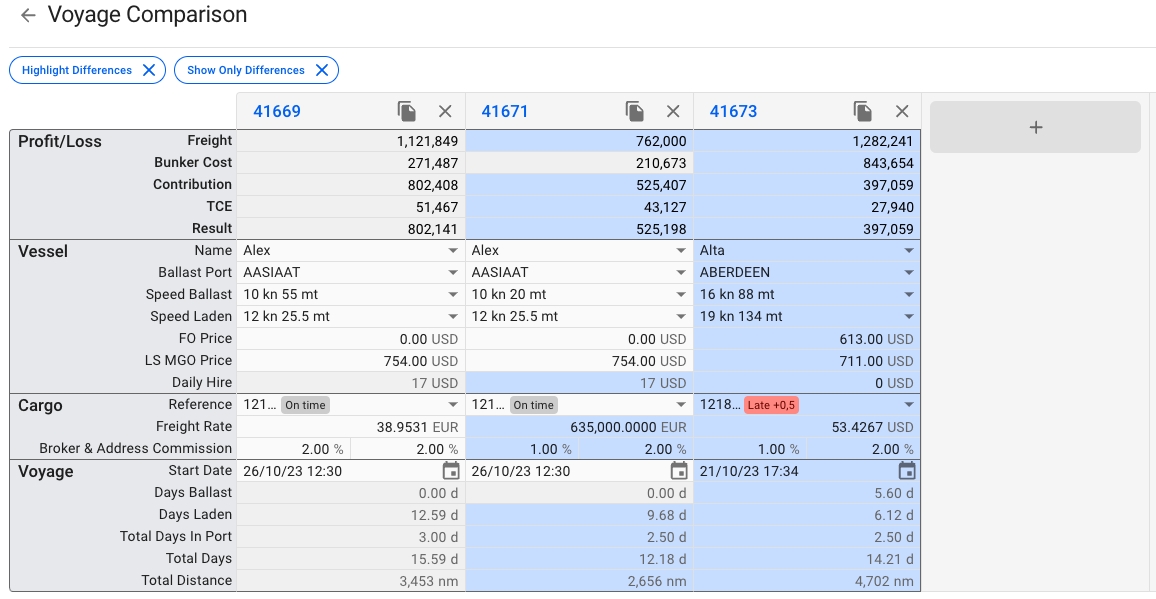
This will open a new page where you will be able to see a overview of the voyages to compare, copy the voyages you want to compare and/or open the Voyage drawer of the voyages:
For the initial release version of this tool, you'll be able to see and modify details on your vessel, cargo and voyage. Some fields may be greyed out, for the same reasons you might not be able to modify them in the voyage or cargo drawer normally.
In the top left you will find two buttons; Highlight Differences and Show Only Differences, which will enable or disable the respective features. By default, Highlight Differences is turned on.
The top header shows the voyage reference number, and a button to copy and remove the voyage from the comparison. Clicking on the voyage reference will open the voyage drawer. From here, you can make all the changes you are used to, and the comparison will update accordingly.
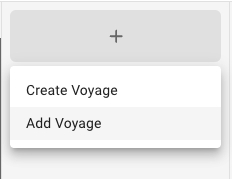
To the right of the rightmost voyage, you'll find a big grey button that when clicked, opens a dropdown menu. Here you can add an existing voyage to the comparison, or create a brand new one.
The Vessel section of the comparison allows you to choose and edit many values that can change your result. Want to see how another vessel would perform on a given voyage? How much difference will different speed orders or bunker prices make? Make a change, and see how it affects your result and TCE.
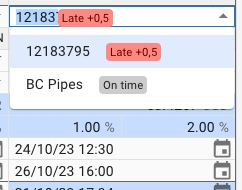
The Cargo section displays information about one cargo at a time. In the event your voyage has multiple cargos, click on the Reference dropdown to see and select another cargo.
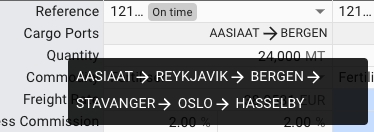
The Cargo Ports row shows you the first load and discharge port for the cargo. If you have a longer schedule, hover over the row to see the entire schedule as a tooltip.
Changing any of the fields here behaves as if they were changed from the Cargo drawer. For instance, setting a high freight rate will automatically update the rule to Lumpsum, and the calculations are being carried out as such.
In the Voyage section, you are only able to set the start date of the voyage. Like the Cargo Ports row in the Cargo section, the Schedule row only shows two ports. Hovering your mouse over the row will bring up a tooltip showing the entire voyage schedule.
A voyage can be converted to voyage template if certain requirements are met, these are listed below:
Can be converted to template:
Estimate Voyages
Unallocated Voyages
Cannot be converted to template:
Template Voyages
Allocated Voyages
Nominated Voyages
Operational Voyages
Operationally Closed Voyages
Closed Voyages
Invoiced Voyages
The voyage's type (TC, SPOT, COA) does not matter in regards to whether you're allowed to convert or not.
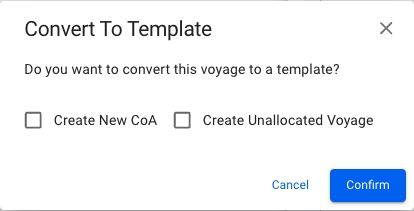
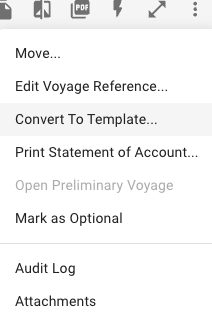
In order to convert a voyage to a template voyage one must open a voyage's drawer and click the secondary action menu in the top-right and select the "Convert to Template...' action.
After selecting the action you will get a confirmation popup modal which allows you to select to 'Create New CoA' and 'Create Unallocated Voyage' when converting to template. When clicking the 'Confirm' button, you will be brought to the template voyage's drawer.
Both optional buttons will be available.
None of the optional buttons will be available.
Both optional buttons will be available and the 'Create New CoA' button will be selected by default. If un-selecting this button, the template voyage will continue to use the old CoA instead of creating a new.
