Loading...
Loading...
Loading...
Loading...
Loading...
Loading...
Loading...
Loading...
Loading...
Loading...
Loading...
Loading...
Loading...
Loading...
Loading...
Loading...
Loading...
Loading...
Loading...
Depending on your access permissions the list of users might not be visible.
The "User Administration" module can be located from the menu under System.
There are several options available for you to narrow down what you include in the list view.
As of version Release 5.3 it is possible to introduce crew onboard to the VMS and create an efficient, "one time entry" work process in the system.
The functionality with establishing a master role involves giving them access to only their relevant port calls. In order to establish this filter for the user we need to link their credentials to their particular vessel.
Pre requisite for below is that vessel has been created, has been created with security role "Vessel" (only this security role) and .
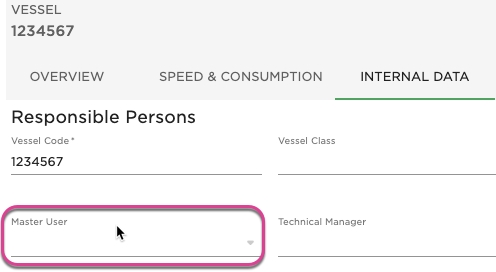
Step 1: Access vessel master data screen and insert vessel user in the "Master User" field as indicated below. This action will link the vessel to the user so that Crew only see their relevant port calls in the VMS
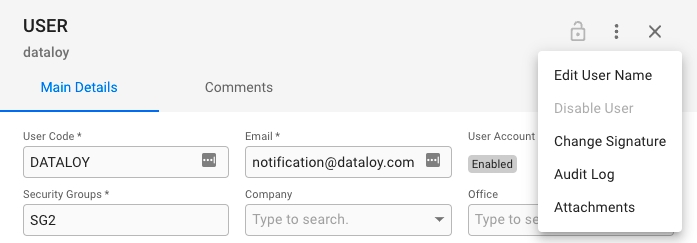
When you have located a user, click it and the details will show in a panel (so called "drawer") on the right hand side. Details can be maintained directly in the fields.
By clicking the secondary actions icon additional actions may be possible.
Edit User Name
Open the Users module in the Setup section.
Click Create New Userin the top right corner.
Fill in all required fields listed below in the Create New User window.
Click Create.
Field
Description
User Code
A short identifier used for logging in
User Name
The user's name that is displayed in the system
Password
Password used for logging in
Email address for notifications
Security Groups
Restricts access to modules and the API
Vessel Users
The security role "Vessel" is designed to grant access for users onboard vessels. See Create a Vessel Master user.
Permissions in the Java VMS
In order to perform actions in the Java VMS a user must also belong to a Security Group.
Groups, roles and their permissions are maintained in the Manage Permissions module in the Java VMS.
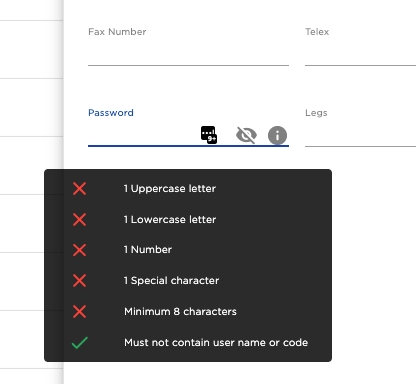
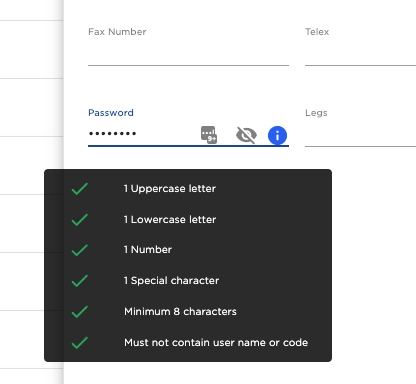
Find the user to change password. Locate the password input field and fill in the new password.
When all the verifications are met, press enter or click outside of the input field to submit, the password will be changed if no notifications are displaying otherwise.
Dataloy offers two types of MFA for our customers.
MFA by integrating with the customer's Active Directory (AD) server.
Depending on your access permissions the list of Security Roles might not be visible.
Open the Roles module in the Setup section
There are several options available for you to narrow down what you include in the list view.
When you have located a Security Role, click it and the details will show in a drawer on the right hand side. Details can be maintained directly in the fields/tree.
By clicking the primary action icon it is possible to make a copy of the selected security role, a modal will open where you enter the name of the copy.
By clicking the secondary actions icon (icon = 3 dots) additional actions may be possible.
Edit Security Role Name
Delete Security Role
Filters can be used to locate permissions in the tree.
For customers with OAuth 2.0 authentication, in Dataloy VMS, MFA can be set up with Auth0's Guardian app. This is an intuitive MFA solution that is easy to set up and use.
If you are uncertain if your VMS is set up with OAuth 2.0 authentication, please let us know, and we can check it for you. Send an email to support@dataloy.com
Dataloy will enable MFA on the installation/environment level forcing all users to log in using MFA in the environment it is configured for.
Once activated and configured, the users will be sent a "push-notification" that must be approved in the app. Simply click the "Allow" button, and you are securely logged in.
Setting up the Guardian app for the first time:
Log in using the system's "web" login screen.
(The URL for this will be provided in case you use the Java version of the VMS)
Follow the instructions on the screen to install and configure the app.
You will scan the QR code shown on the screen with the app, so camera permissions on the phone must be permitted.
When finishing the set-up, a "push-notification" will be sent to your phone.
Click "Allow" to securely complete the configuration.
Log in to the application:
The Java-based version of the VMS:
Log out of the web-based version, as the configuration is now complete.
Start the system and log into the application as you normally do.
Click "Allow" when asked on your phone, and you are securely logged in to the Java-based VMS.
The web-based version of the VMS:
You are already logged in and can continue your work.
Open the Roles module in the Setup section
Click Create Security Rolein the top right corner.
Fill in the security role name, and select the wanted permissions from the tree.
Click Create.
Filters can be used to locate permissions in the tree.
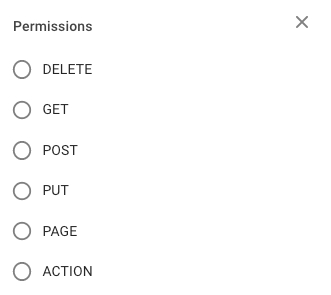
Within the modal you can find quick filters to easier navigate the tree.
DELETE - Permission to delete an object GET - Permission to retrieve an object POST - Permission to create an object PUT - Permission to update an object PAGE - Permission to access a page ACTION - Permission to execute actions
Find the user to disable.
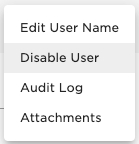
Open the actions menuand click Disable User. This will prevent the user account from logging in.
The user can be found again by filtering on inactive users in the list.
1) Open the Security Groups module in the Setup section.
2) Click Create Security Group in the top right corner.
3) Fill in the security group name, and select the wanted roles from the tree.
4) Click Create.
Within the modal, you can find a quick filter to easier navigate the tree.
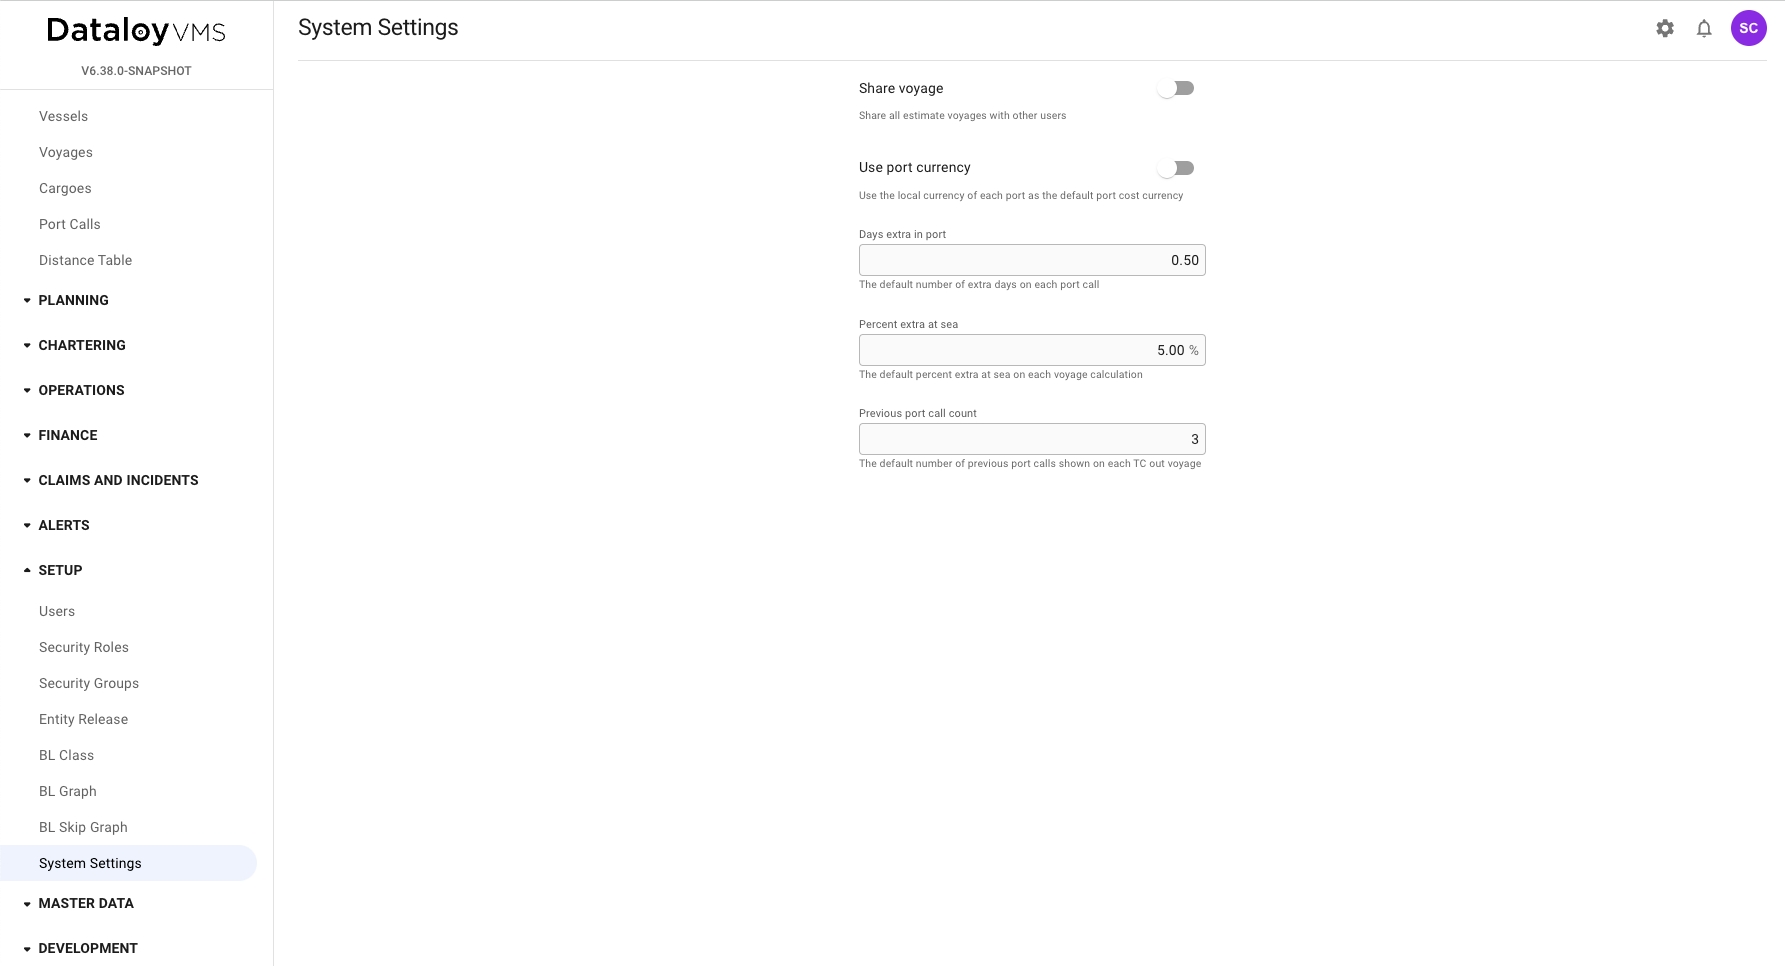
The system settings module is available to all administrators under Setup -> System Settings or the gear icon in the top right corner of the screen. The settings on this page enables administrators to customise default behaviours in VMS, e.g. Days extra in port controls the number of extra days automatically added to new port calls. Note that system settings is applied globally to the environment, which means any change alters the functionality for all users.
When you have located a Security Group, click it and the details will appear in a drawer on the right hand side. Details can be maintained directly in the tree.
By clicking the icon , it is possible to create a copy of the selected security group, a modal will open where you enter the name of the copy.
By clicking the secondary actions icon , the following actions will be possible,
Edit Security Group Name
Delete Security Group
Filters can be used to locate security roles in the tree.
Depending on your access permissions the list of Security Groups might not be visible.
Open the Security Groups module in the Setup section.
There are several options available to narrow down what you include in the list view.
